5 Nail Art Pens for Cute Easter Nails
Spring is officially in the air, and you know what that means—it’s time to break out the pastels, the fluffy textures, and all the adorable inspiration for your Easter manicure. Whether you are planning a sophisticated brunch, a fun egg hunt in the backyard, or just want to get into the seasonal spirit, your nails are the perfect accessory to showcase your personality.
While intricate nail art can sometimes feel intimidating, there is a secret weapon that makes creating professional-looking designs at home an absolute breeze: nail art pens. These dual-ended tools—featuring a brush on one side and a precision tip on the other—are game changers. They give you the control of a fine-liner pen but the versatility of nail polish. No more messy dipping into pots of liquid polish with a stripping brush!
In this listicle, we’re diving into five adorable, trendy nail art designs that are perfectly suited for nail art pens. These looks range from subtle and chic to bright and playful, ensuring there is something for everyone. So, grab your favorite pastel polishes, let your creativity bloom, and let’s get into these cute Easter nails!
1. The “Cottontail” Micro-French Tips
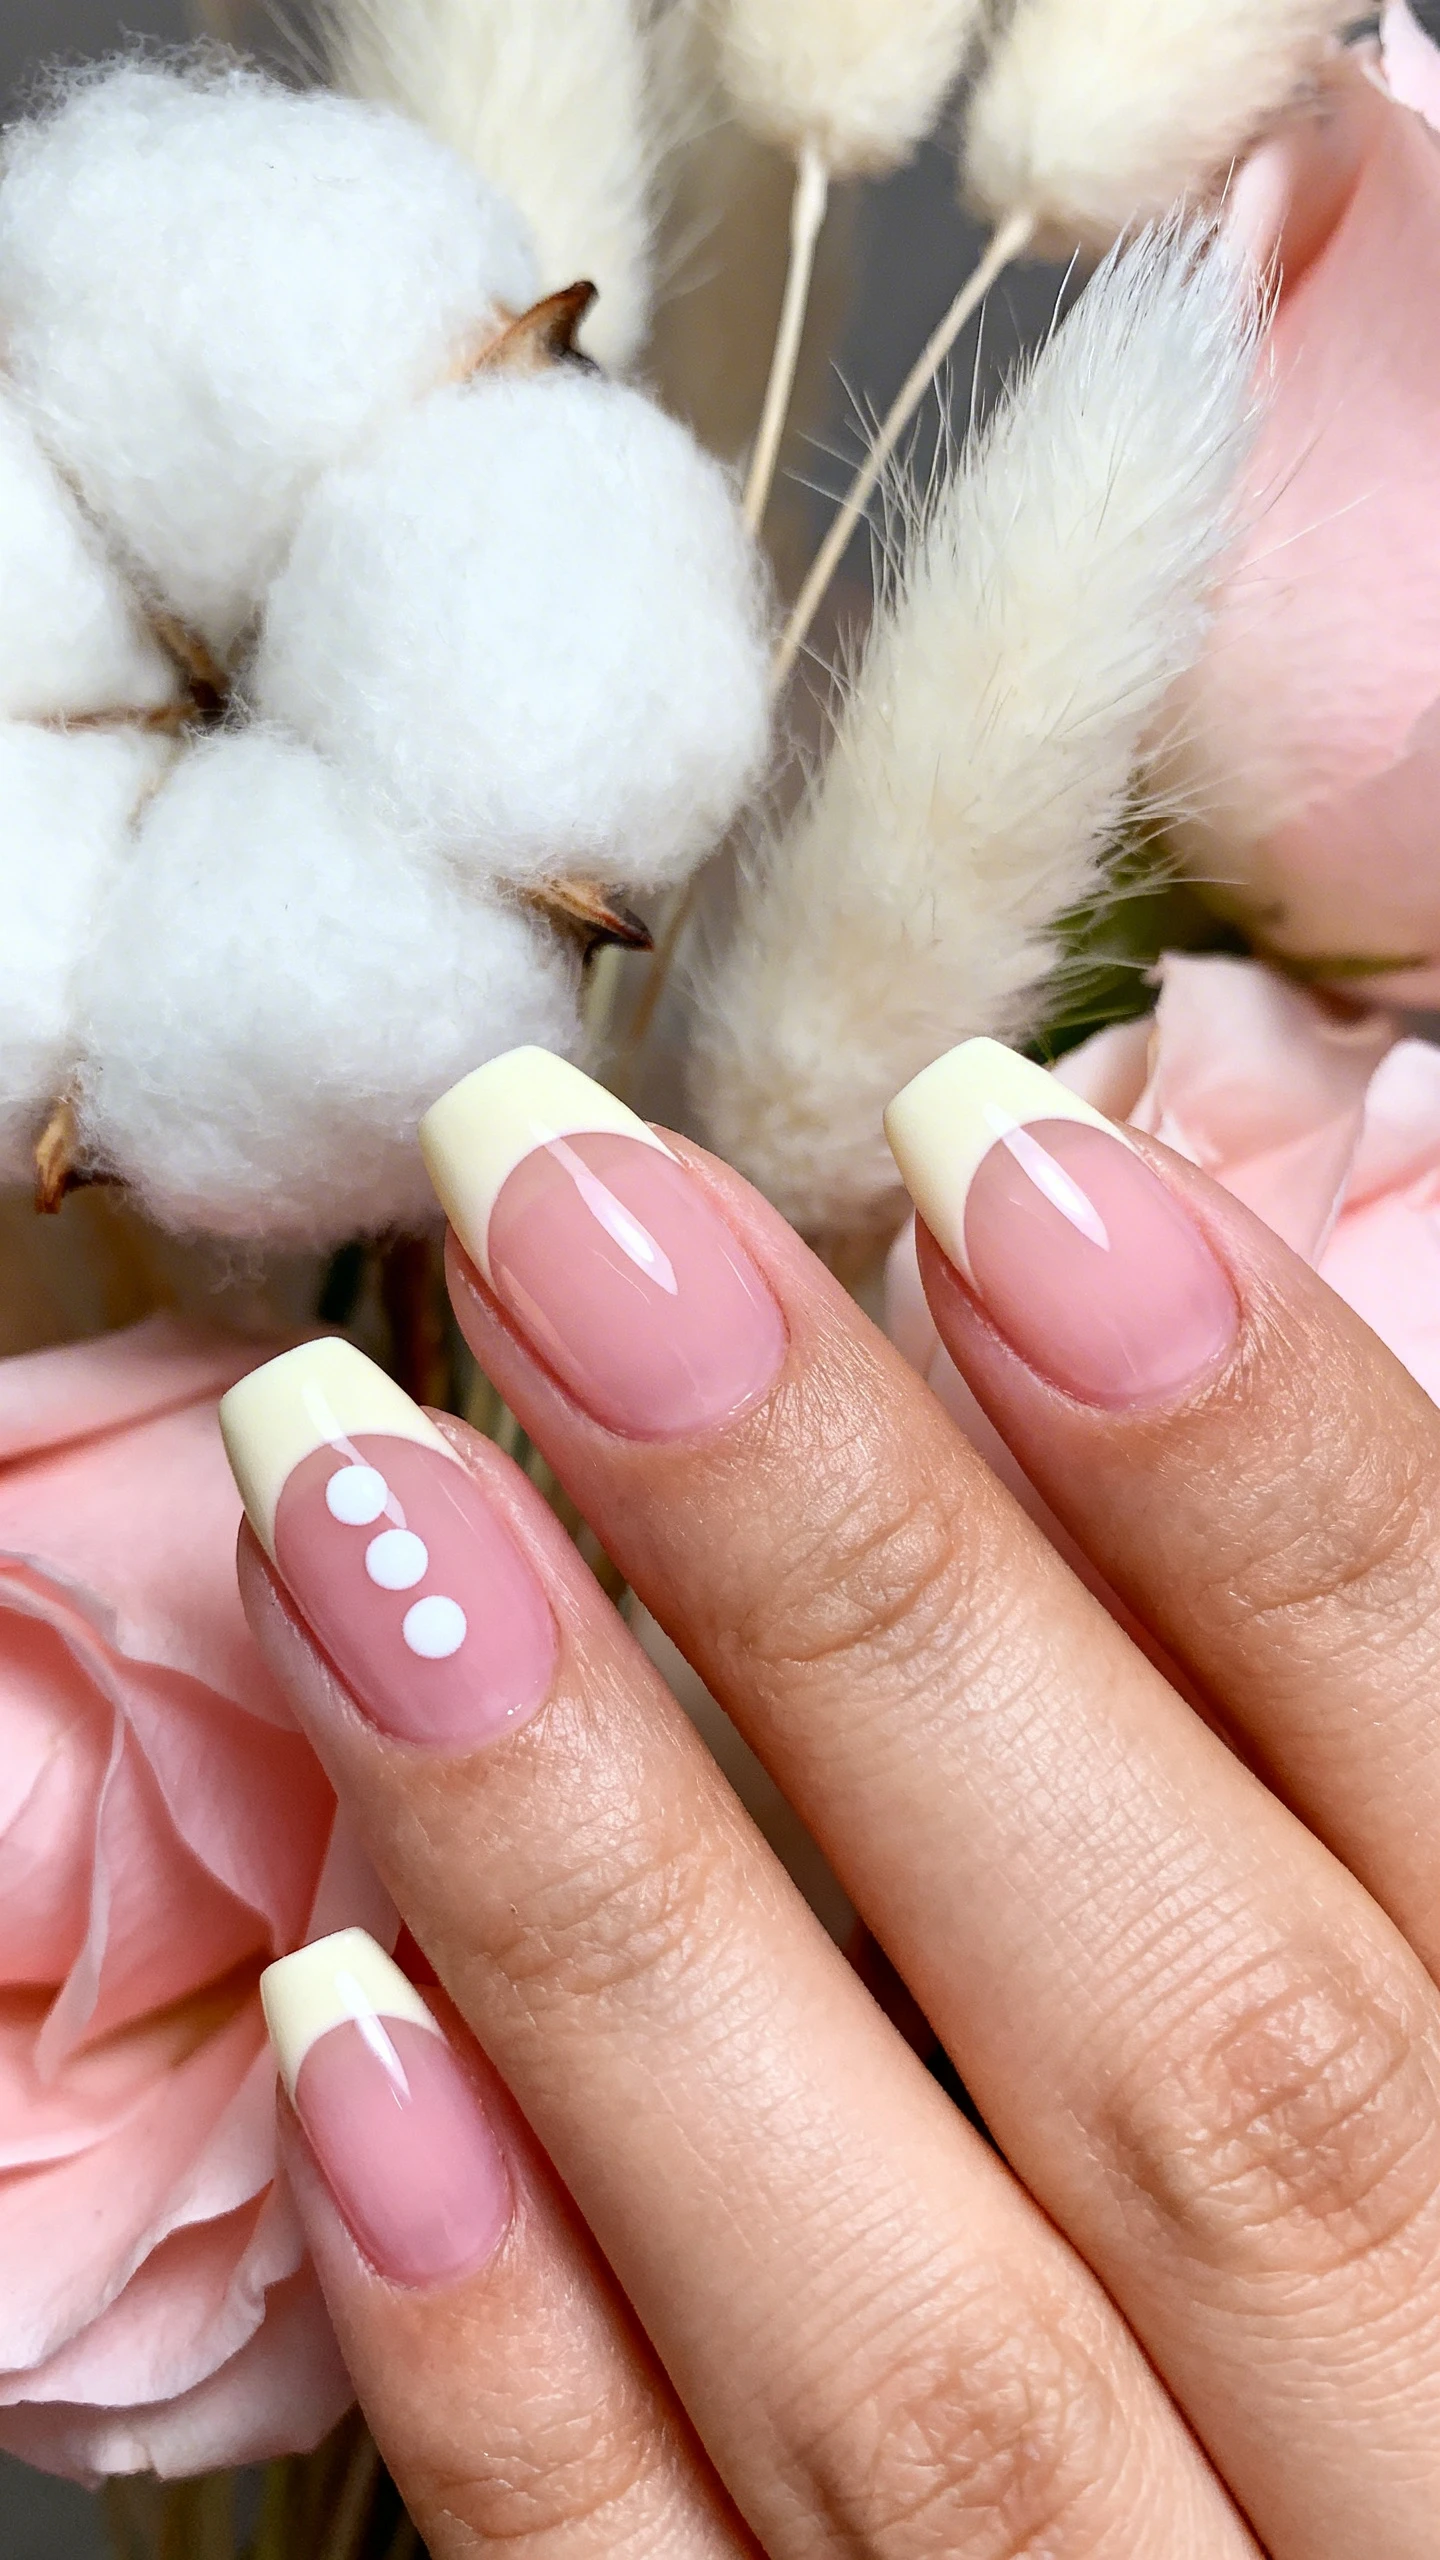
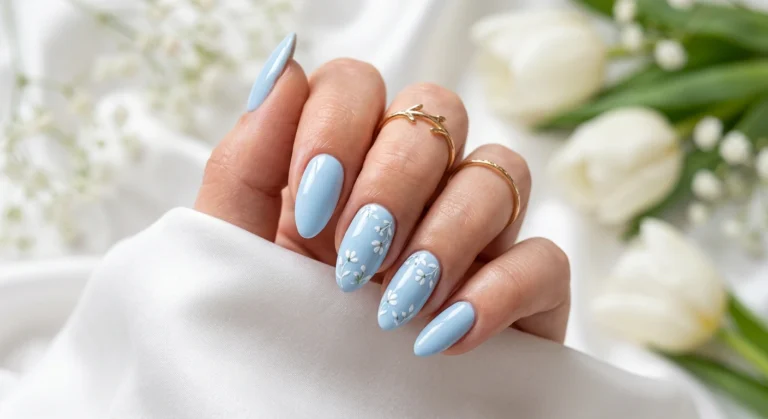
If you love the aesthetic of a clean, classic manicure but want to add a whisper of whimsy, the “Cottontail” Micro-French is your go-to look. This design takes the traditional French tip and shrinks it down to a micro-thin line, creating a silhouette that is incredibly modern and elongating on the nail bed. It’s subtle enough for the office but cute enough for Easter Sunday dinner.
The real magic of this design lies in the tiny details you add with your nail art pen. Instead of a stark white tip, we are using a soft, creamy white, and then using the fine tip of the pen to draw tiny little bunny tails or whiskers right at the base of the cuticle or peeking out from the tip. It’s a “blink and you’ll miss it” detail that looks stunningly high-end. Because you are using a pen, you can get those microscopic hair-thin lines that would be impossible with a standard brush.
Why We Love It
This design is the ultimate low-maintenance luxury. The micro-tip makes your nails look longer and more elegant, while the bunny accents add that necessary festive touch without feeling childish. It’s incredibly versatile, pairing perfectly with lacy dresses or casual denim jackets. Plus, if you get a small chip in the base color, the intricate line work draws the eye away!
Nail Details:
* Base Color: A soft, sheer baby pink or clear jelly polish for a natural, glossy look.
* Tip Color: A creamy, off-white opaque polish.
* Patterns: Micro-thin French tips painted just at the very edge of the nail. On the ring finger, use a white nail art pen to draw three small whisker dots on one side and a tiny bunny tail (a small fluffy circle) near the cuticle.
* Finish: High-shine top coat to make the white pop against the pink.
2. Cottage-Core “Carrot Patch” Plaid
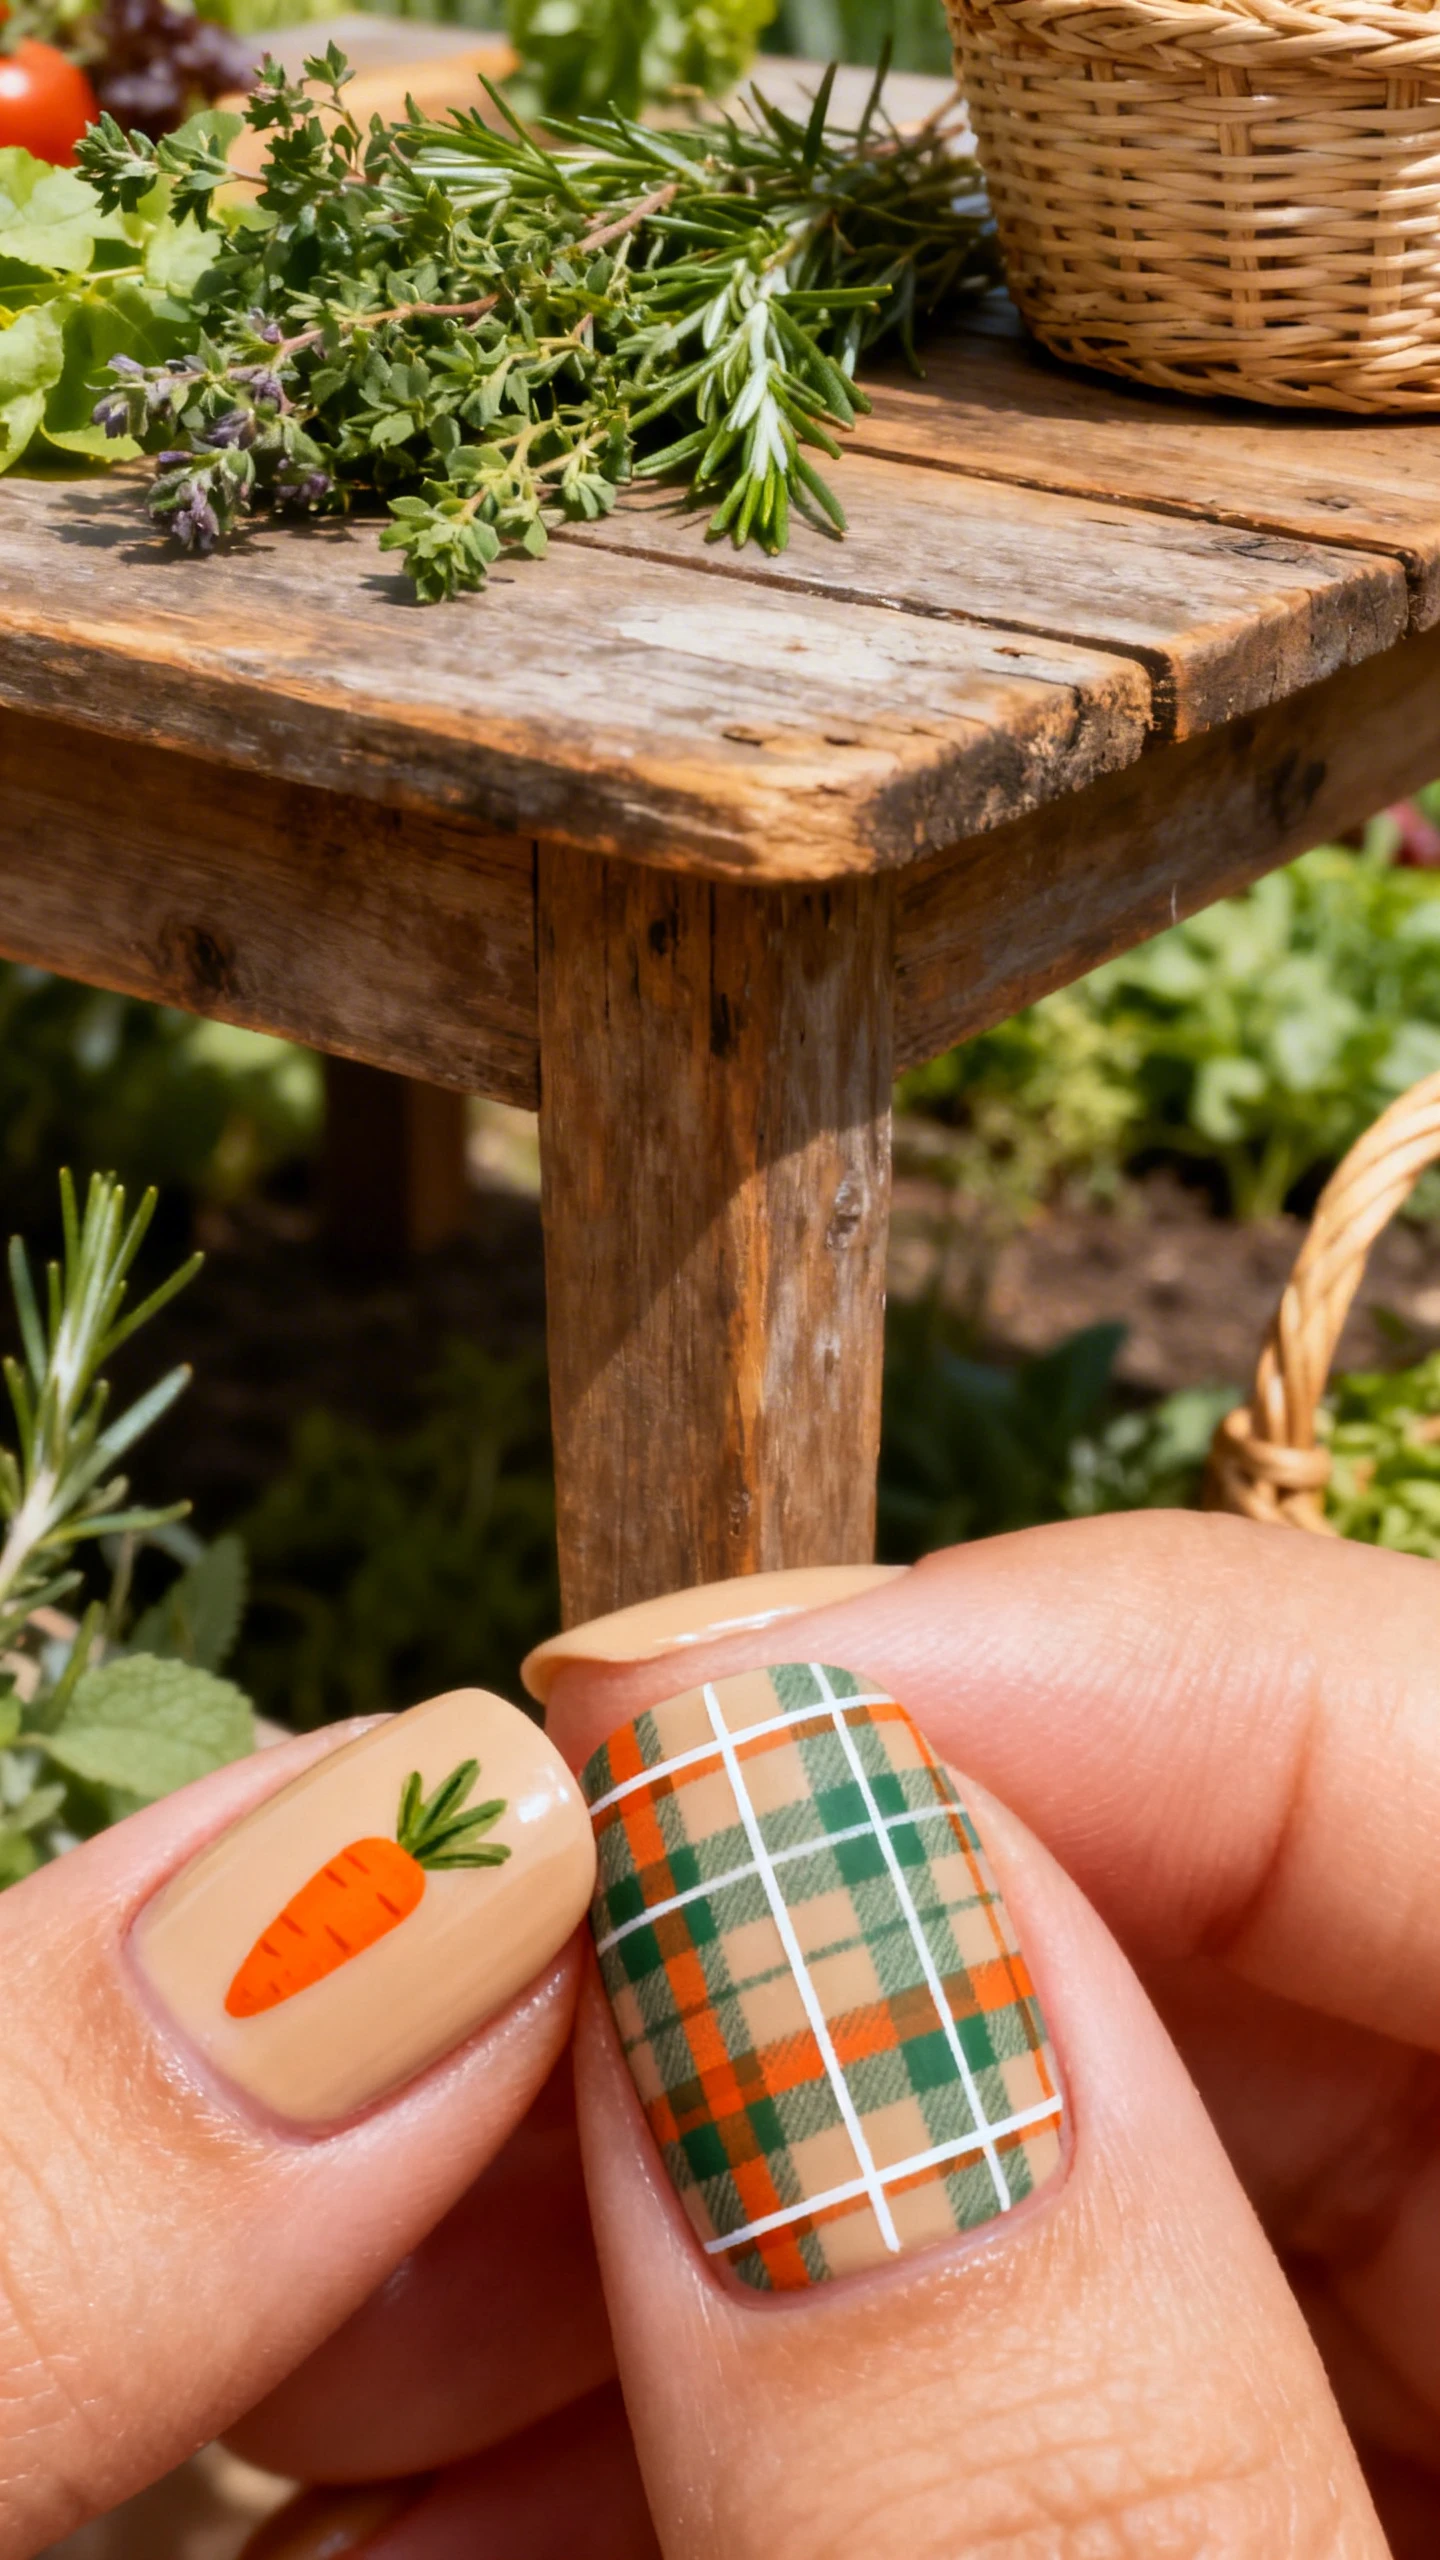
Nothing says Easter quite like the cottage-core aesthetic, and plaid nails are having a major moment this spring. This design combines the cozy vibes of a picnic blanket with the festive colors of the season. The “Carrot Patch” Plaid is all about layering colors to create a woven texture that looks complex but is actually surprisingly simple to execute with the right nail art pens.
The key to mastering plaid with pens is the precision tip. You don’t want the lines to bleed together; you want crisp, geometric intersections. We are using a palette of sage green, dusty orange, and a warm sand tone. The orange represents the carrots, while the green creates the “patch” vibe. It’s a design that feels earthy and grounded, perfect if you aren’t into the super-sugary sweet pastels usually associated with the holiday.
Pro Tip for Crisp Lines
When working with geometric patterns, allow your base layers to dry completely before using the nail art pen. If the base is even slightly tacky, the pen tip will drag the color, leaving jagged edges. For the plaid effect, paint your vertical lines first, let them dry, then paint your horizontal lines over the top. The pen allows you to press gently for a super fine line or press harder for a bolder stroke.
Nail Details:
* Base Color: A warm, sandy beige or soft cream polish.
* Pattern Colors: Sage green, burnt orange, and white.
* Patterns: A classic tartan plaid pattern covering the entire nail. Use the green and orange for the main checks and white for thin accent lines. On the accent thumb, paint a tiny orange carrot shape using the pen and add a green leaf top.
* Finish: A matte top coat works beautifully with plaid to give it a fabric-like texture.
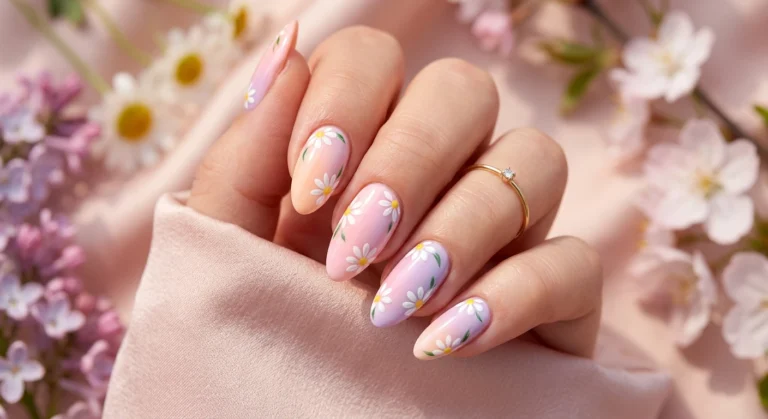
3. Ditsy Daisy Meadow Gradient
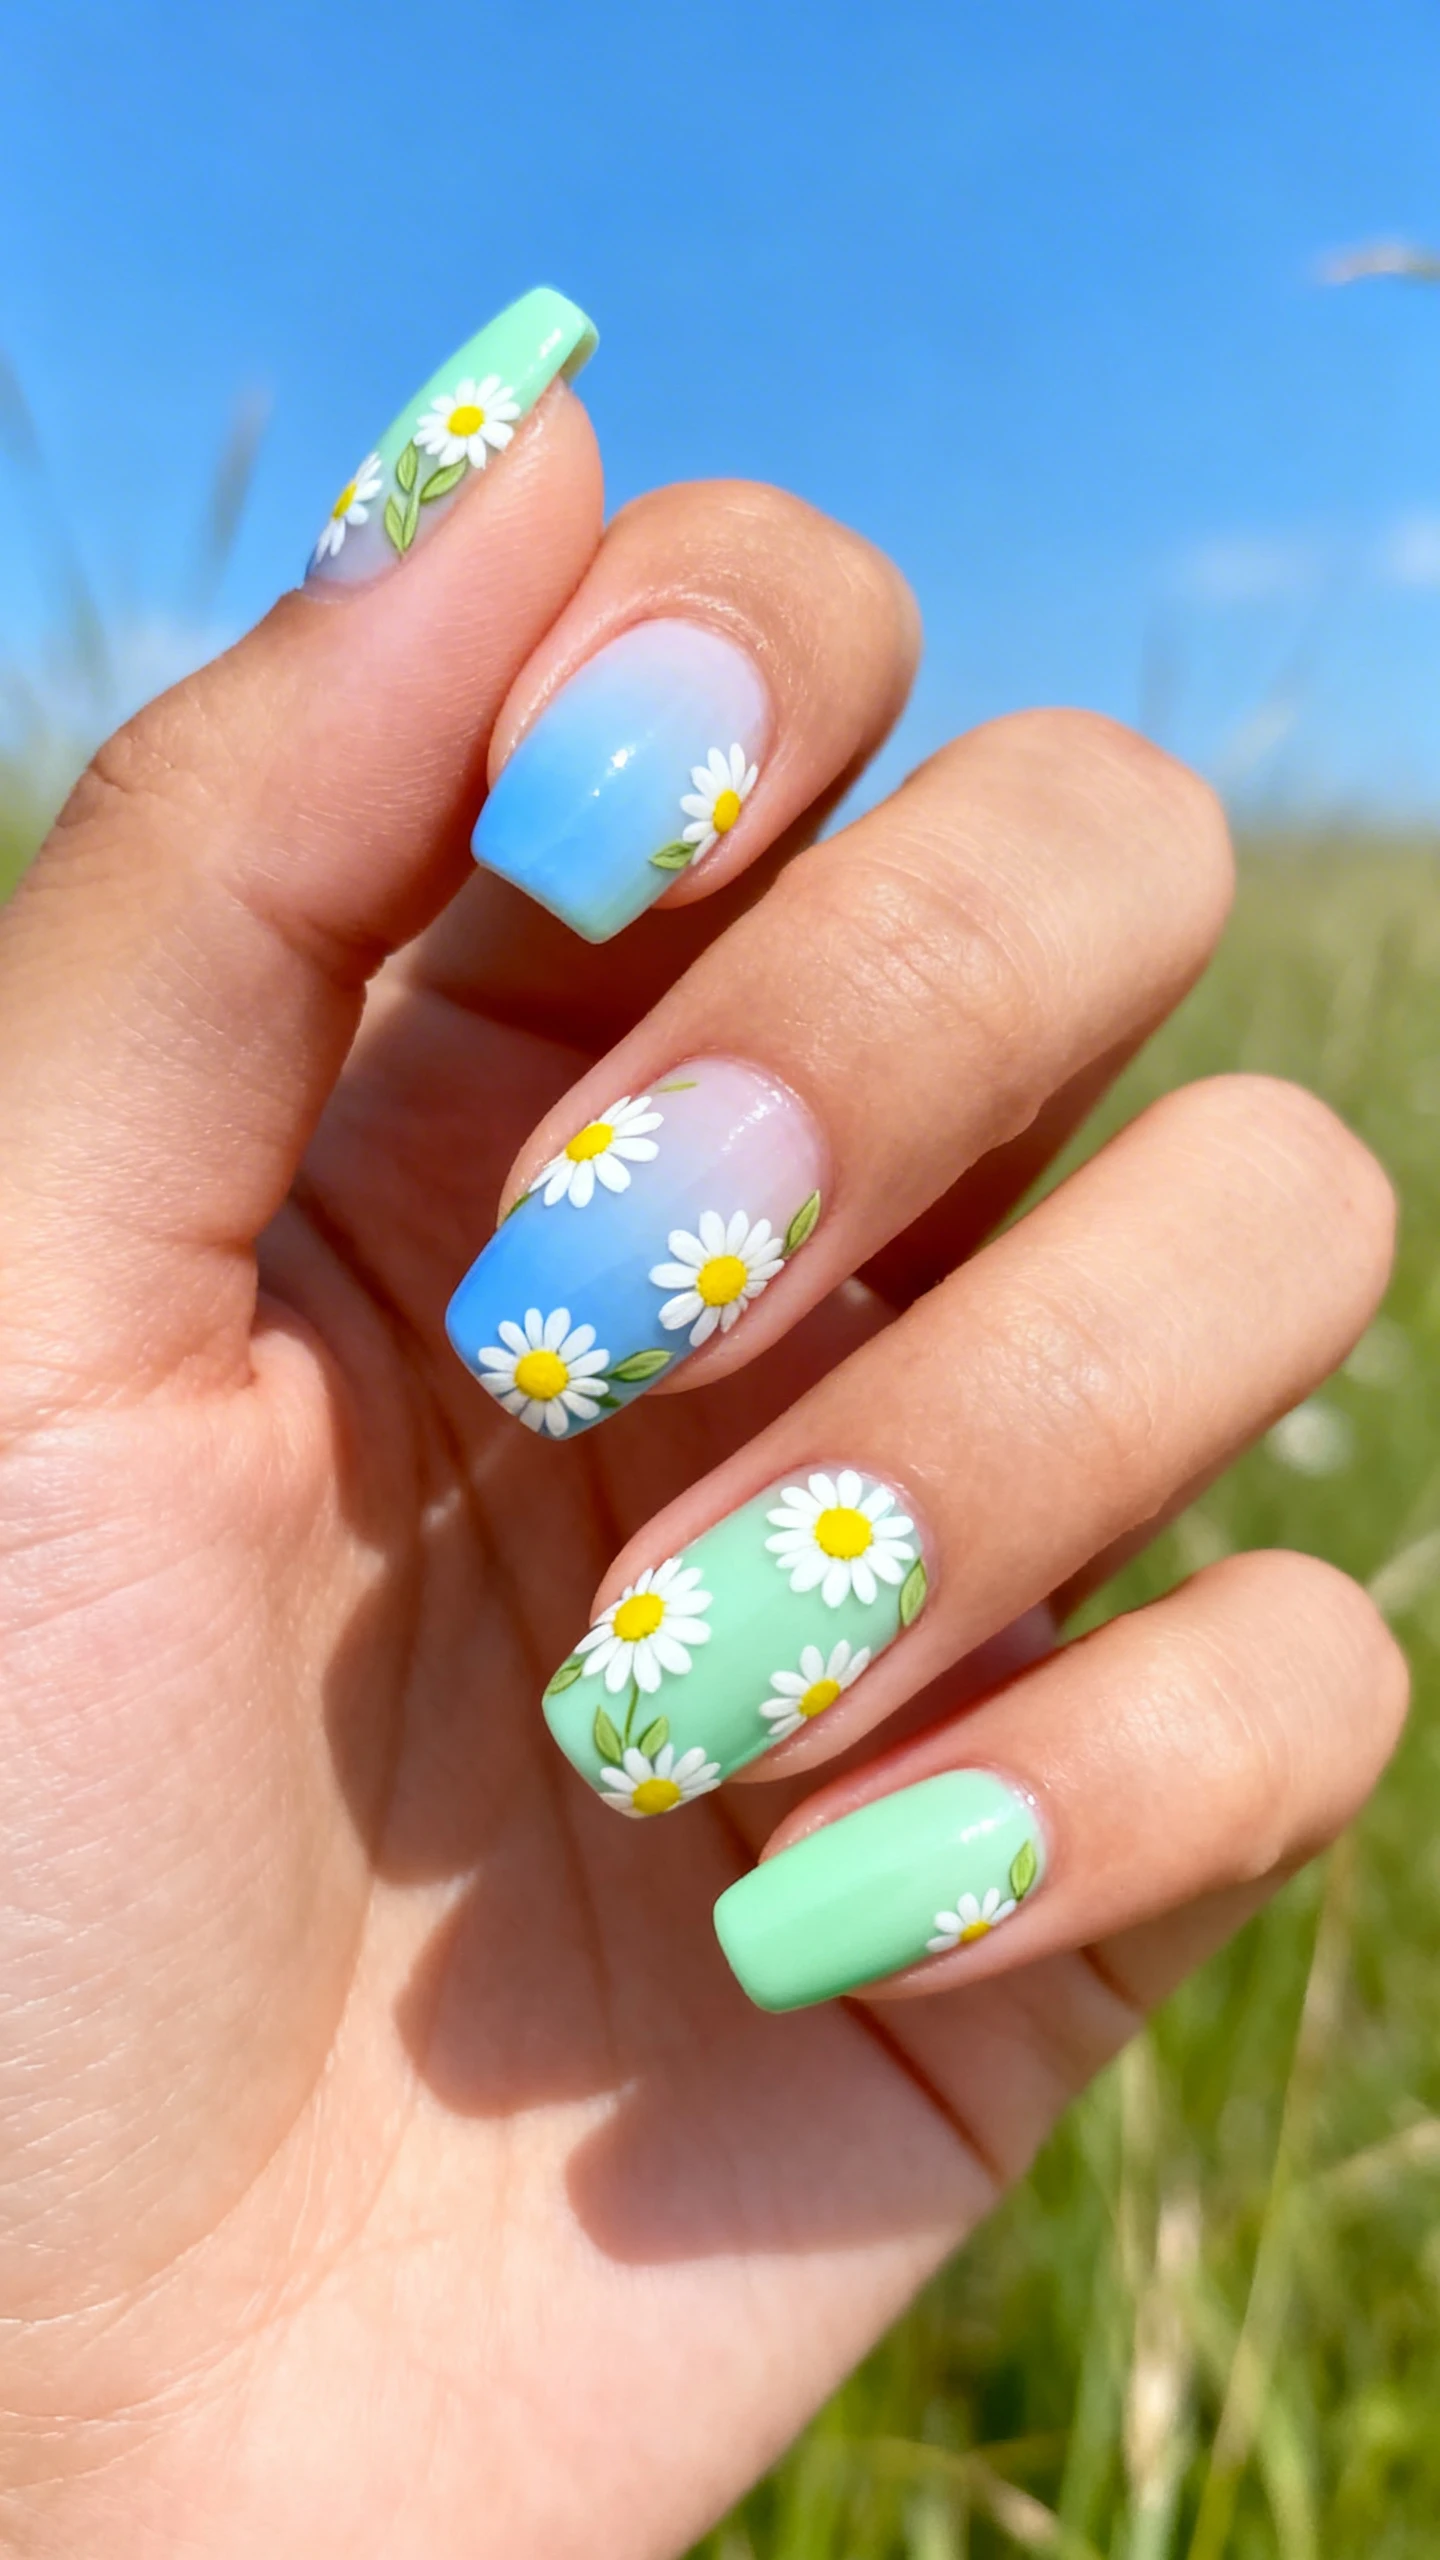
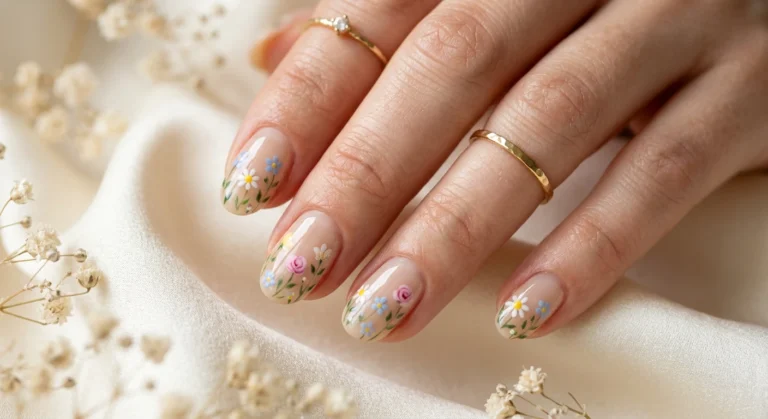
Florals for spring? Groundbreaking, we know—but there is a reason this trend never fades. This design takes the ditsy floral print usually seen on vintage tea dresses and translates it onto your nails. The “Meadow Gradient” aspect involves blending two soft pastel colors to create a sky or grassy background, over which you’ll scatter tiny, effortless daisies.
Nail art pens are absolutely essential here because drawing petals freehand can be tricky. With a pen, you can pivot your wrist easily to create the perfect “C” shapes that form the flower petals. We are going for a scattered look, rather than a uniform bouquet, which makes this style very forgiving. If a flower isn’t perfectly centered, it just adds to the wildflower meadow charm! This look is incredibly fresh and youthful, capturing the essence of a sunny April morning.
Creating the Perfect Petal
To get the ditsy floral look, use a pastel yellow nail art pen to make a simple dot in the center of your flower. Then, take a white pen and draw five small teardrop shapes or oval strokes around the center dot. Don’t worry about making them all the same size—variation in nature is beautiful! You can fill in the rest of the nail with tiny green sprigs or dots to mimic grass or pollen floating in the air.
Nail Details:
* Base Color: A gradient blend from a soft sky blue at the cuticle to a mint green at the tip.
* Pattern Colors: White for petals, bright yellow for centers, and light green for leaves.
* Patterns: Randomly scattered daisy clusters. Some flowers should be near the cuticle, some near the tip, and one large flower right in the center of the accent nail.
* Finish: A quick-dry glossy top coat to make the colors look vibrant and fresh.
4. Abstract “Speckled Egg” Splatter Art
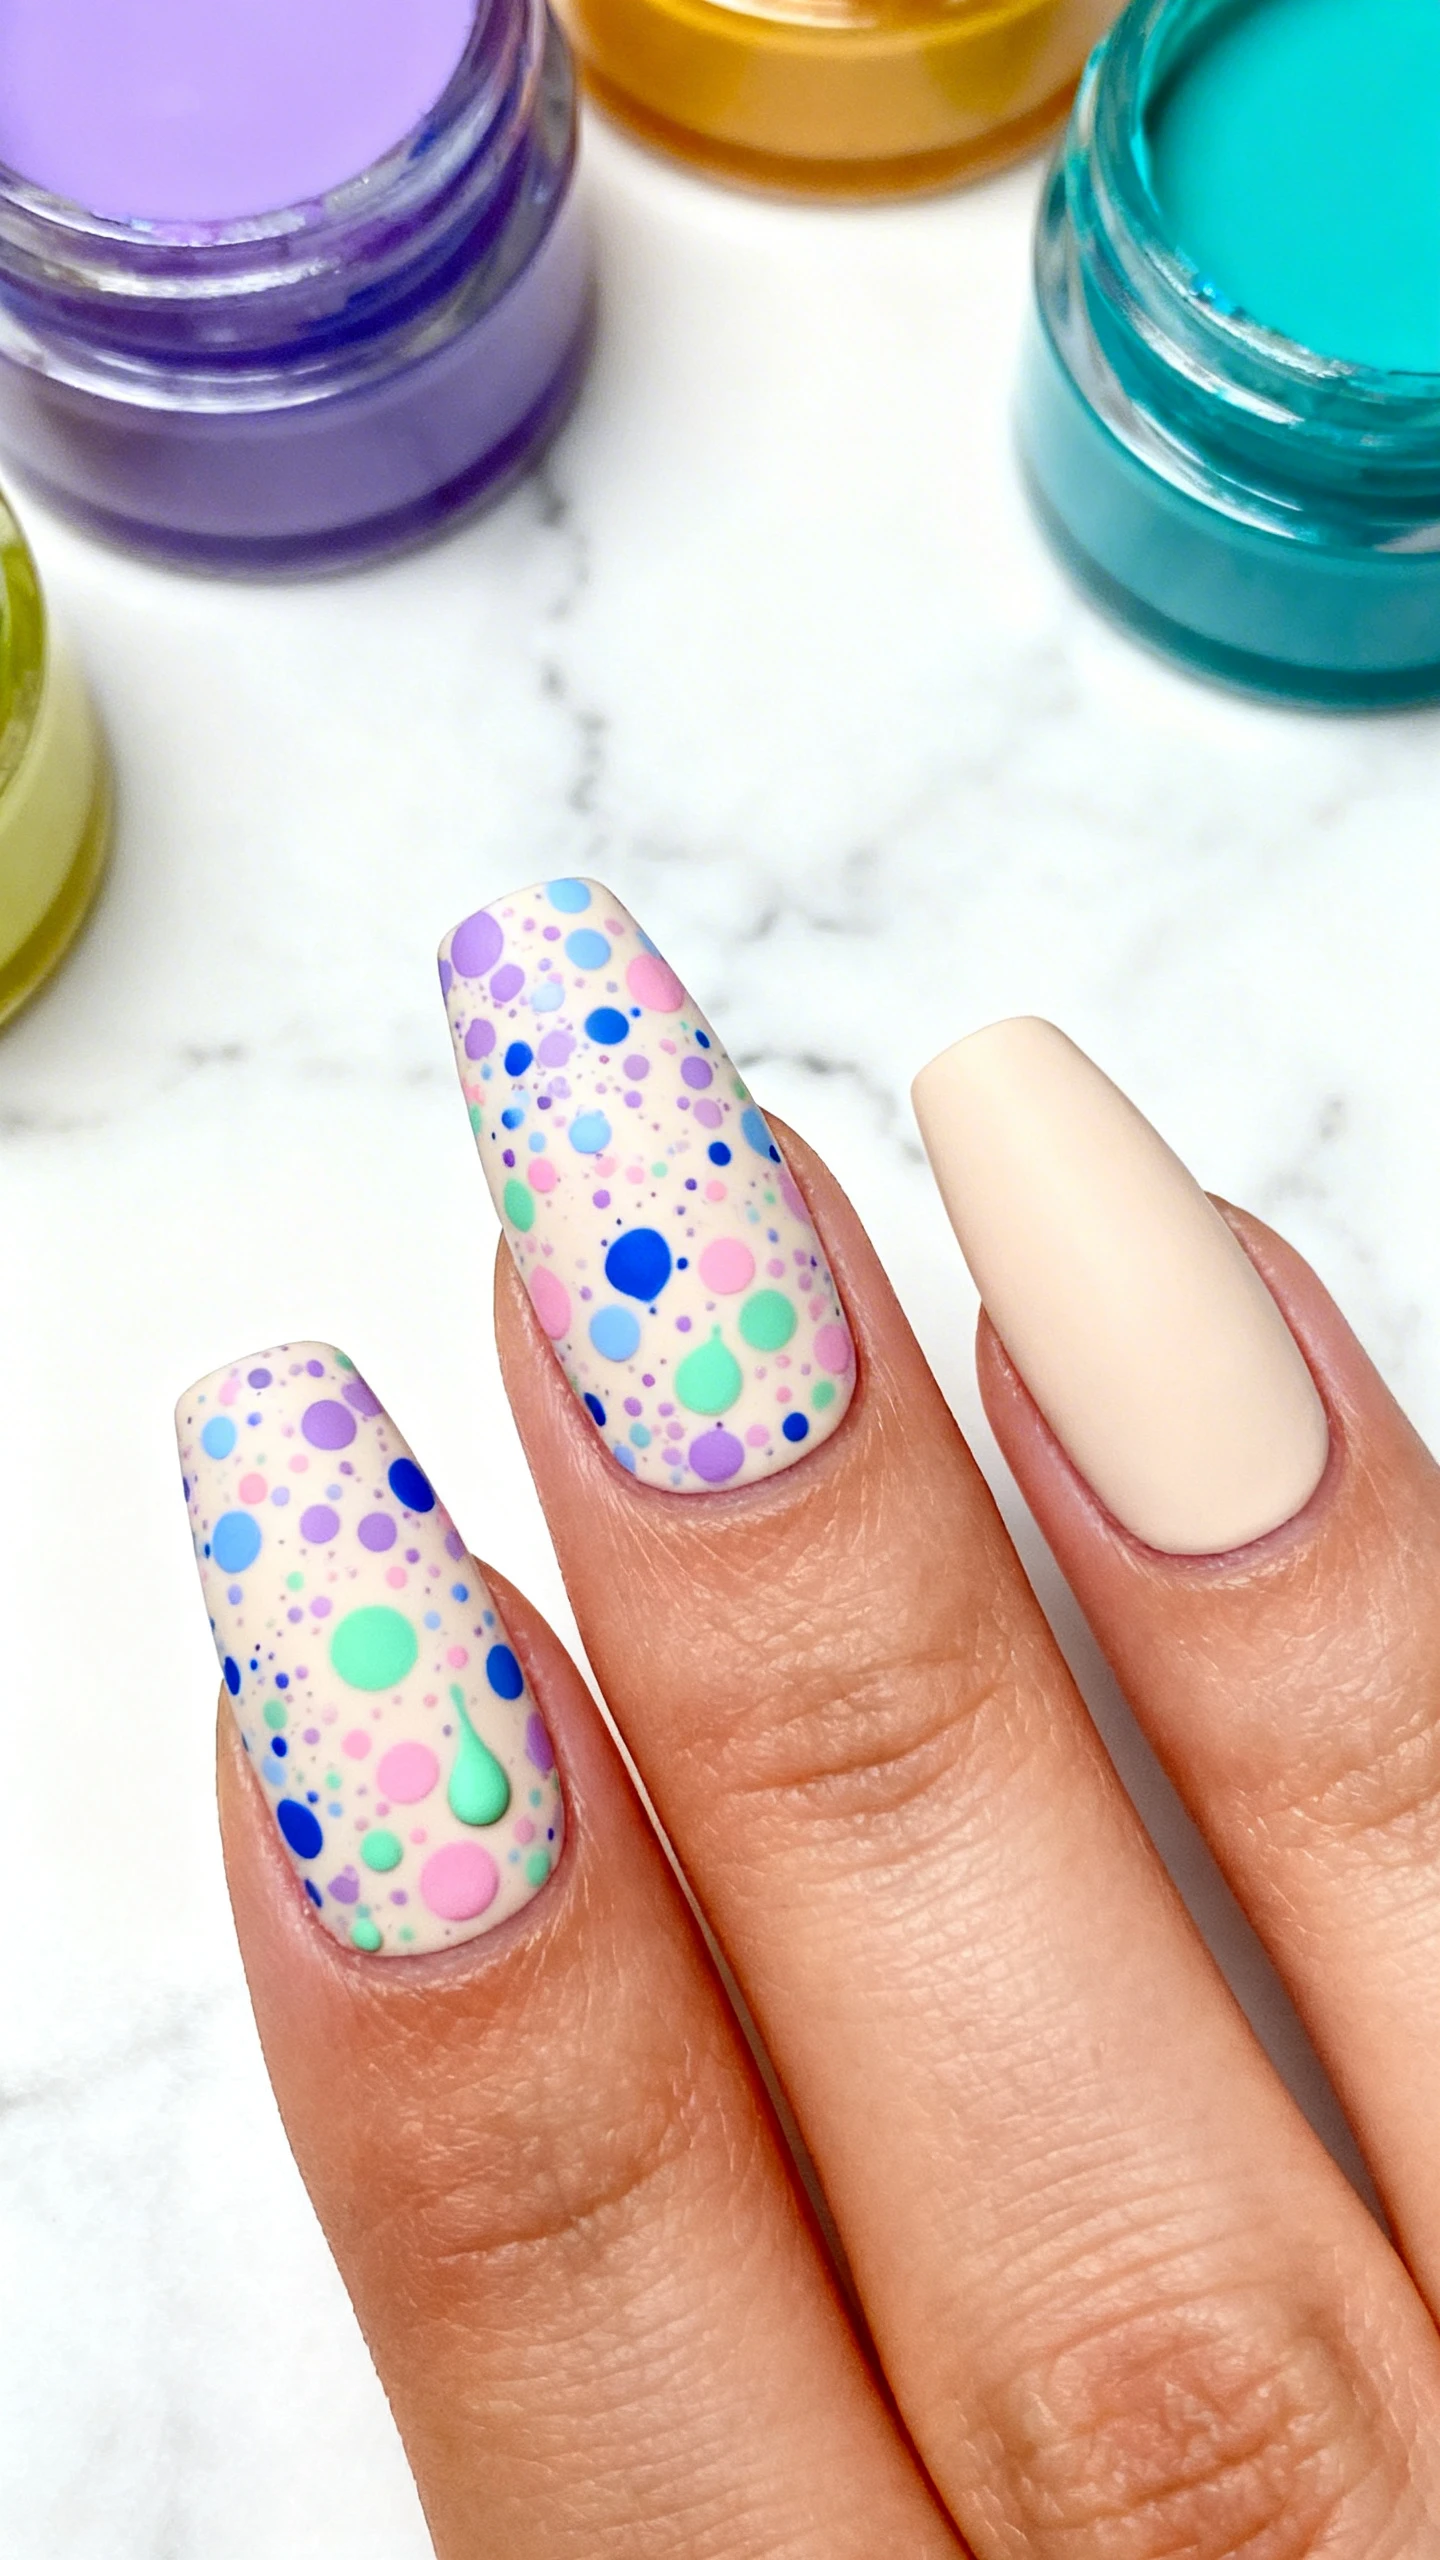
For those who prefer an artistic, edgy take on Easter traditions, the “Speckled Egg” design is a winner. This look mimics the beautiful, unpredictable patterns of a robin’s egg or a hand-painted chocolate egg. It’s abstract, expressive, and arguably the most fun design to create because it encourages you to be a little messy (in a controlled way!).
This technique relies heavily on the brush side of your nail art pen or the ability to thin out the polish significantly. The goal is to create a fine, misty spray of color over a solid base. Because nail art pens often come with a striper brush cap, you can use that to flick the polish onto the nail for a splatter effect. It’s a great way to use multiple pastel colors without overwhelming the eye. The result is a confetti-like celebration that looks like a party on your fingertips.
Mastering the Splatter
The secret to a good splatter manicure is protection. Before you start, use liquid latex or tape around your cuticles and skin—this process gets messy! Load your brush with a small amount of polish, then gently tap the handle of the pen against your finger to flick the bristles, sending tiny droplets onto the nail. Layer different colors—pink, blue, lavender, and lemon—one by one, letting them dry in between to build depth.
Nail Details:
* Base Color: A smooth, neutral beige or soft tan to act as the “eggshell.”
* Pattern Colors: Lavender, baby blue, soft pink, and mint green.
* Patterns: A dense, multidirectional splatter pattern covering the nail. The splatters should vary in size, with some tiny dots and some slightly larger flecks. On the ring finger, do a reverse splatter: a colored base with beige splatters on top.
* Finish: A glossy top coat to seal in the splatter and add a glass-like shine.
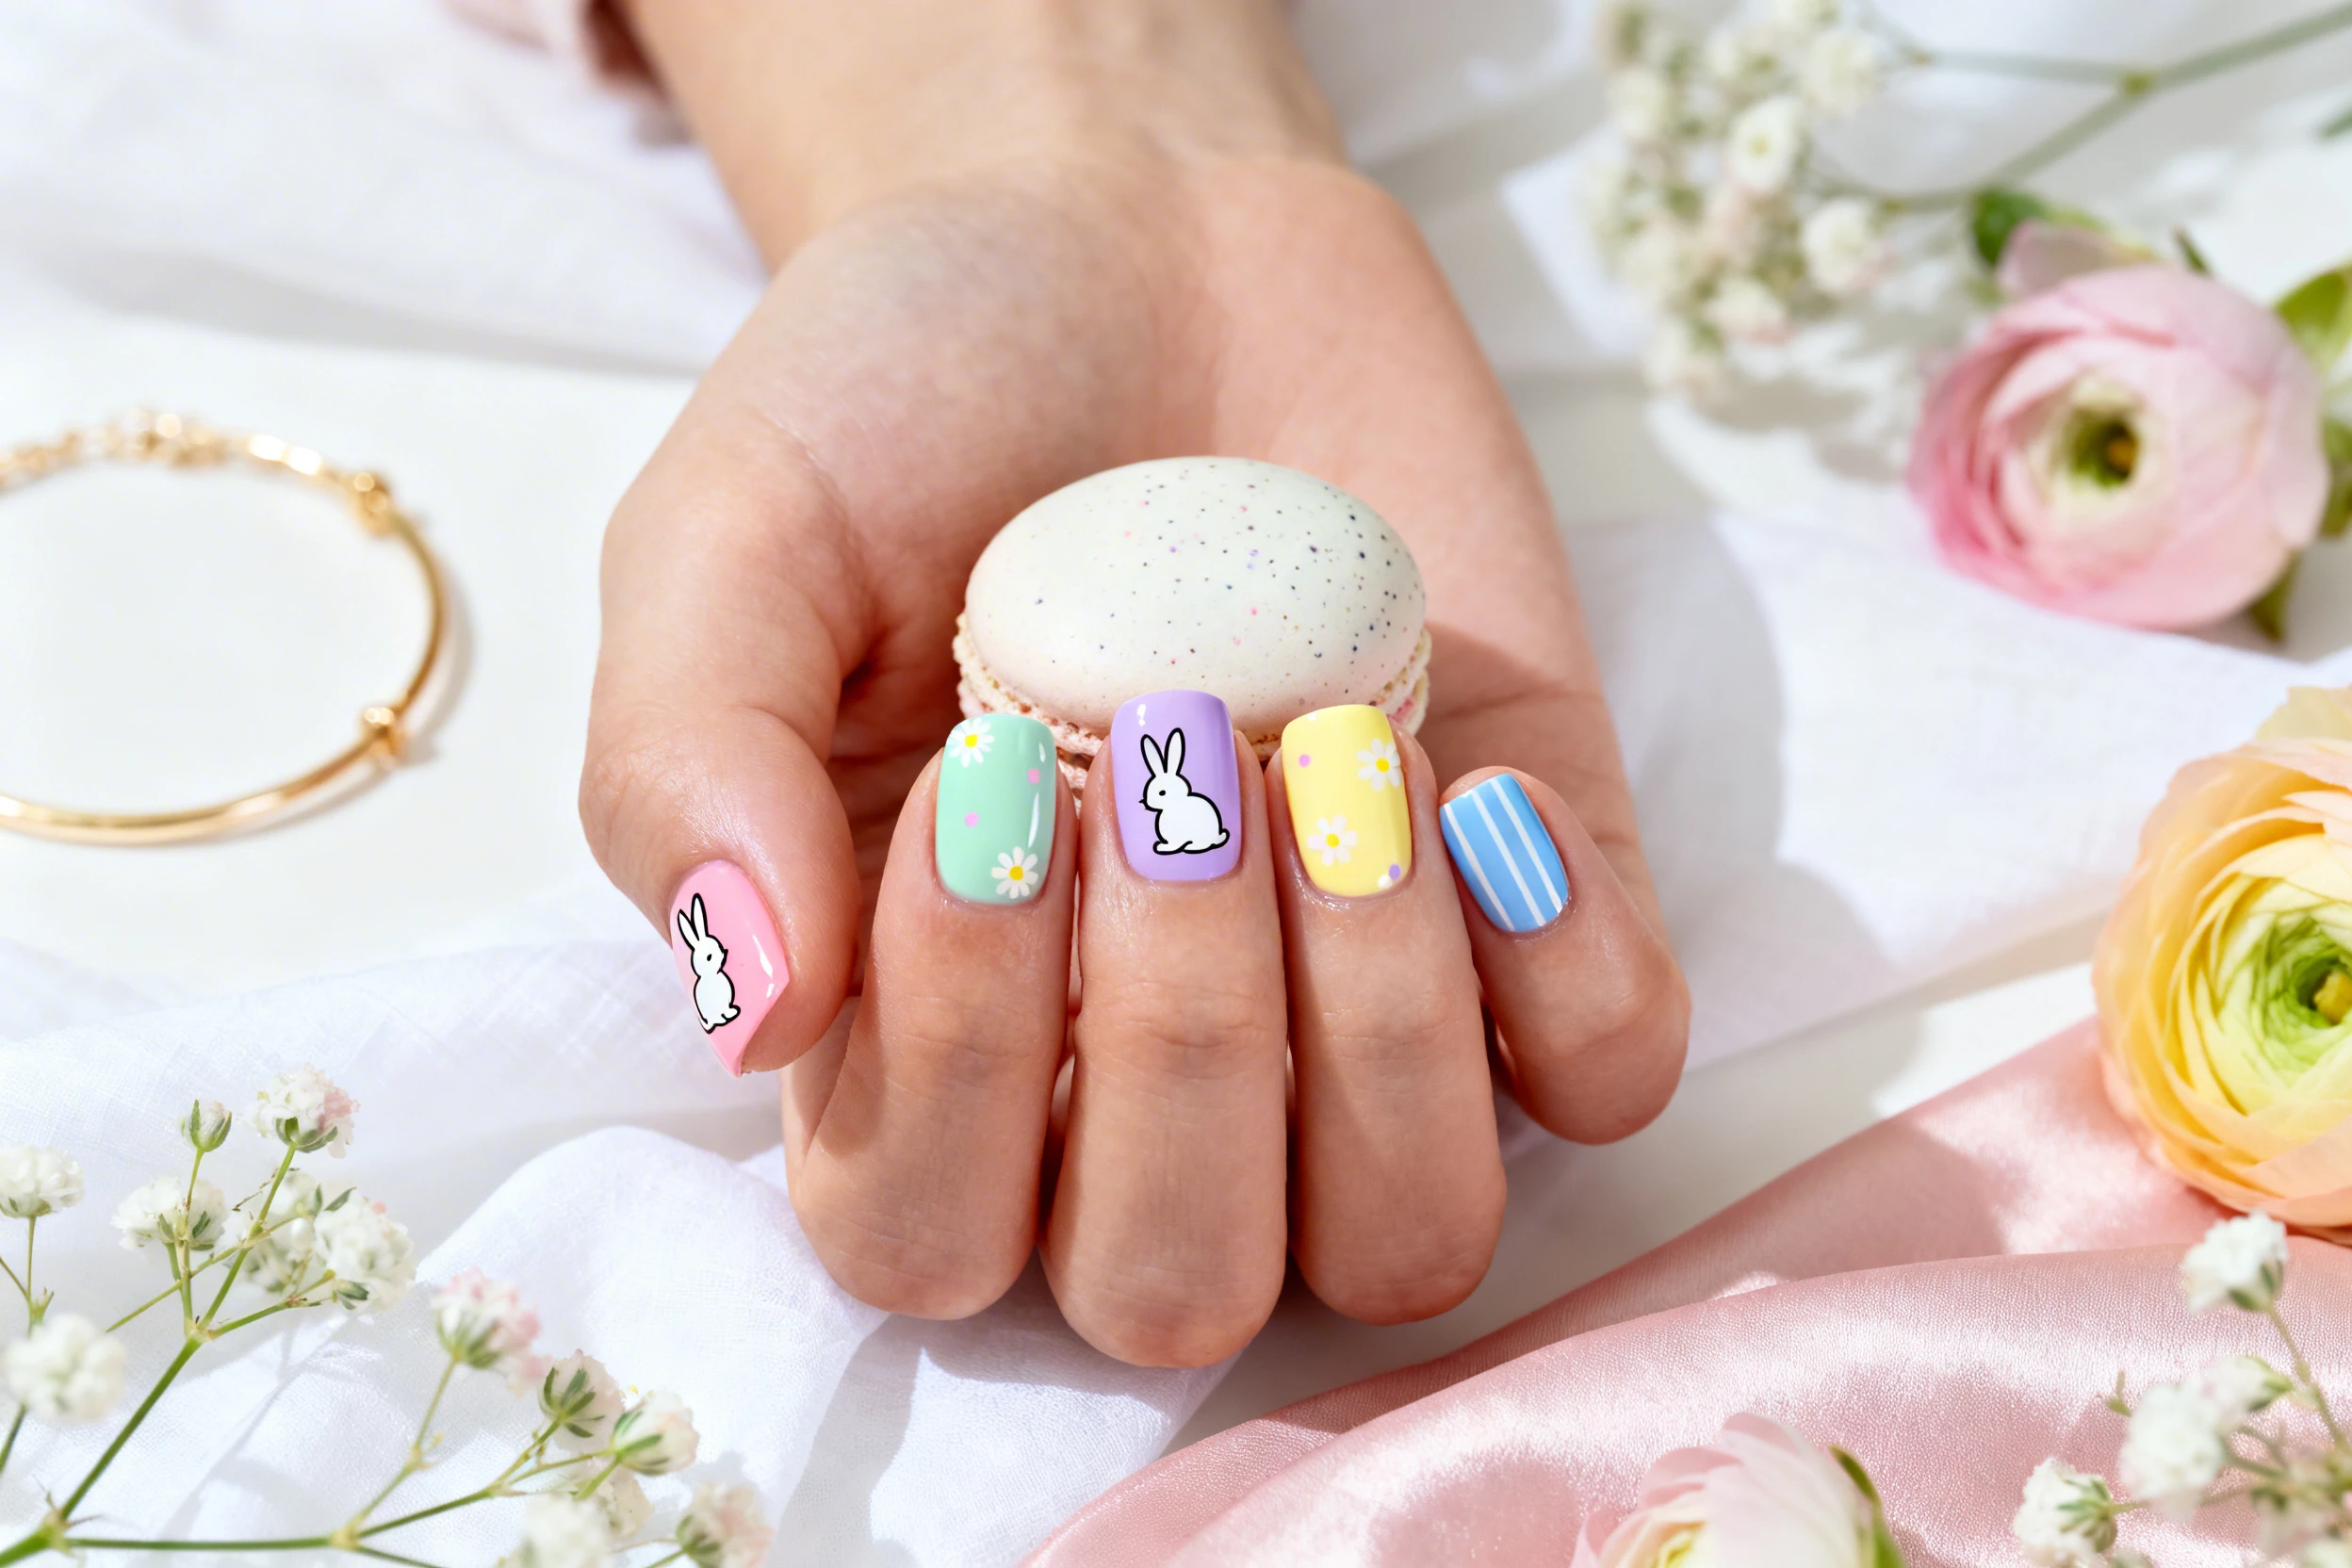
5. The “Chick & Stripe” Playful Mix
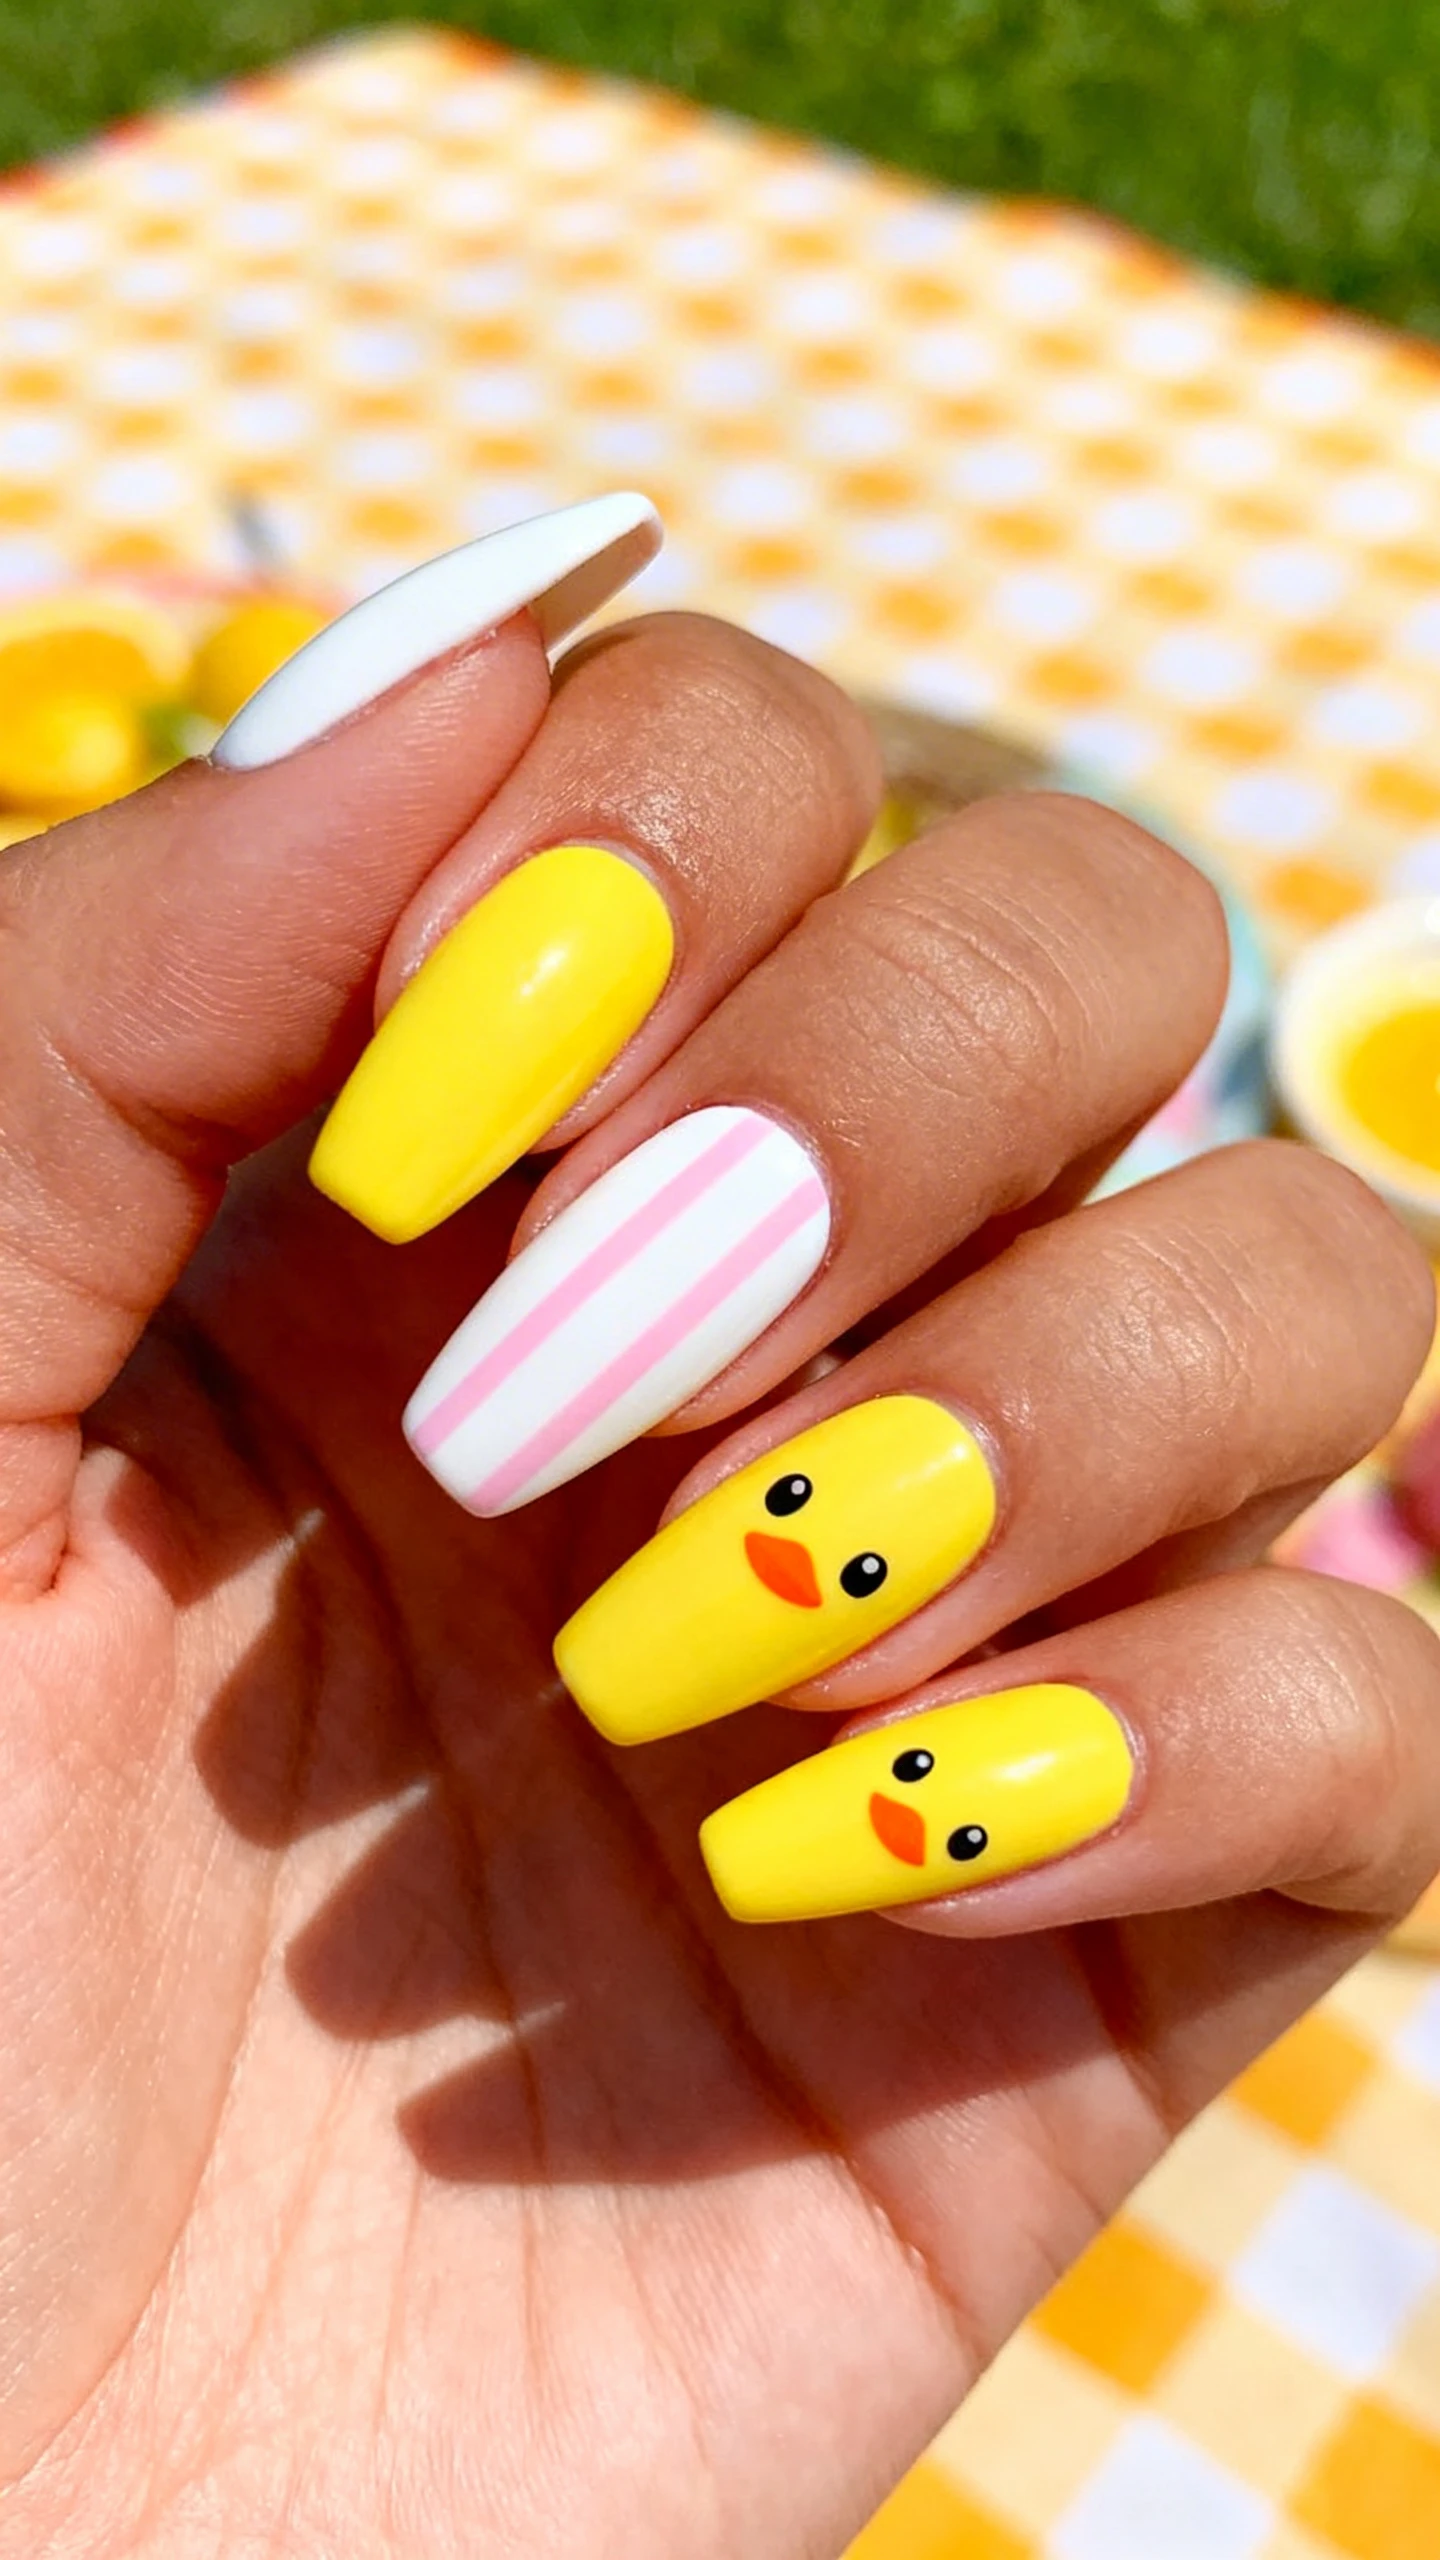
We couldn’t have an Easter list without a nod to the classic baby chick! This design combines bold, graphic striping with an adorable, kawaii-style character accent. It’s playful, bright, and guaranteed to bring a smile to everyone’s face. The contrast between the rigid lines of the stripes and the round, cute curves of the chick creates a visually interesting balance that is very pleasing to the eye.
Using a nail art pen for the stripes ensures they are straight and perfectly spaced, which is the hardest part of this design. You can use the pen’s barrel as a guide if you need to! For the chick, the fine tip is crucial for outlining the black eyes and the tiny orange beak. This design is perfect for an Easter egg hunt because the yellow and white combo is high-visibility and matches the spring blooms perfectly.
Outlining for Impact
When drawing character art, always start with the base shapes and let them dry completely before adding outlines. Paint a yellow oval for the chick’s body first. Once that is dry, use a black nail art pen to draw a crisp outline around the perimeter—this makes the character “pop” like a sticker. Then, add the details: a small orange triangle for the beak and two small dots for eyes. You can even add tiny little wings with a stroke of the pen!
Nail Details:
* Base Color: Alternating nails. One nail is bright sunshine yellow, the next is crisp white.
* Pattern Colors: Black for outlines, orange for beaks/feet, and a contrasting pastel (like purple or pink) for the stripes.
* Patterns: On the white nails, paint vertical pastel stripes. On the yellow nails, draw a cute baby chick face in the center. The chick should have a large black outline, small round eyes, and a tiny orange beak.
* Finish: A high-gloss top coat is essential here to make the yellow look juicy and the black look sharp.
Conclusion
There you have it—five adorable ways to elevate your Easter style using the magic of nail art pens! Whether you prefer the subtle elegance of the Cottontail Micro-French or the playful energy of the Chick & Stripe mix, these designs prove that you don’t need a trip to the salon to get festive. With a steady hand and a good set of pens, you can create miniature works of art that capture the joy of the season. So, pick your palette, put on some spring music, and enjoy the process of making your nails the cutest accessory in your basket. Happy painting!