5 Aura Nail Sponges for Soft and Dreamy Spring Easter Nails
Let’s be real: Easter manicures don’t have to be loud, glittery, or full of over-the-top cartoon characters. This spring, the hottest trend for holiday nails is the soft, blurry aura gradient—crafted perfectly with affordable, easy-to-use aura nail sponges. No more shaky freehand lines, no more streaky solid pastels: these sponges—either dedicated nail aura sponges or cheap dense makeup sponges cut to size—let you blend muted, dreamy colors into a finish that looks like it was lifted from a wildflower meadow or a hand-dyed Easter egg. Whether you’re a total manicure newbie or a seasoned at-home tech, these five aura sponge designs will check every box for soft, festive spring nails. Let’s dive in!
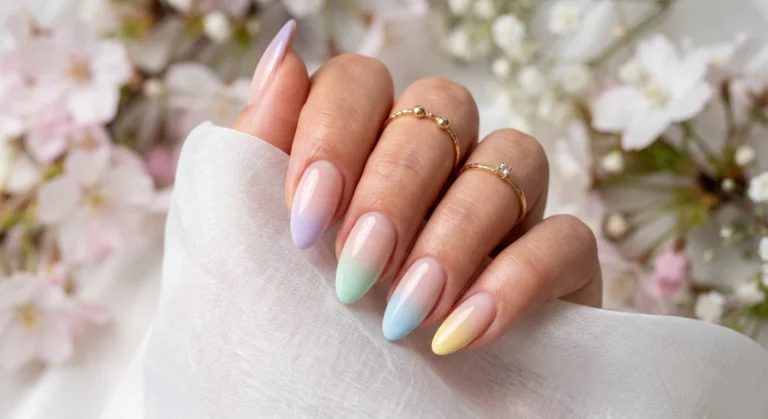
1. Pastel Eggshell Aura Gradient Nails
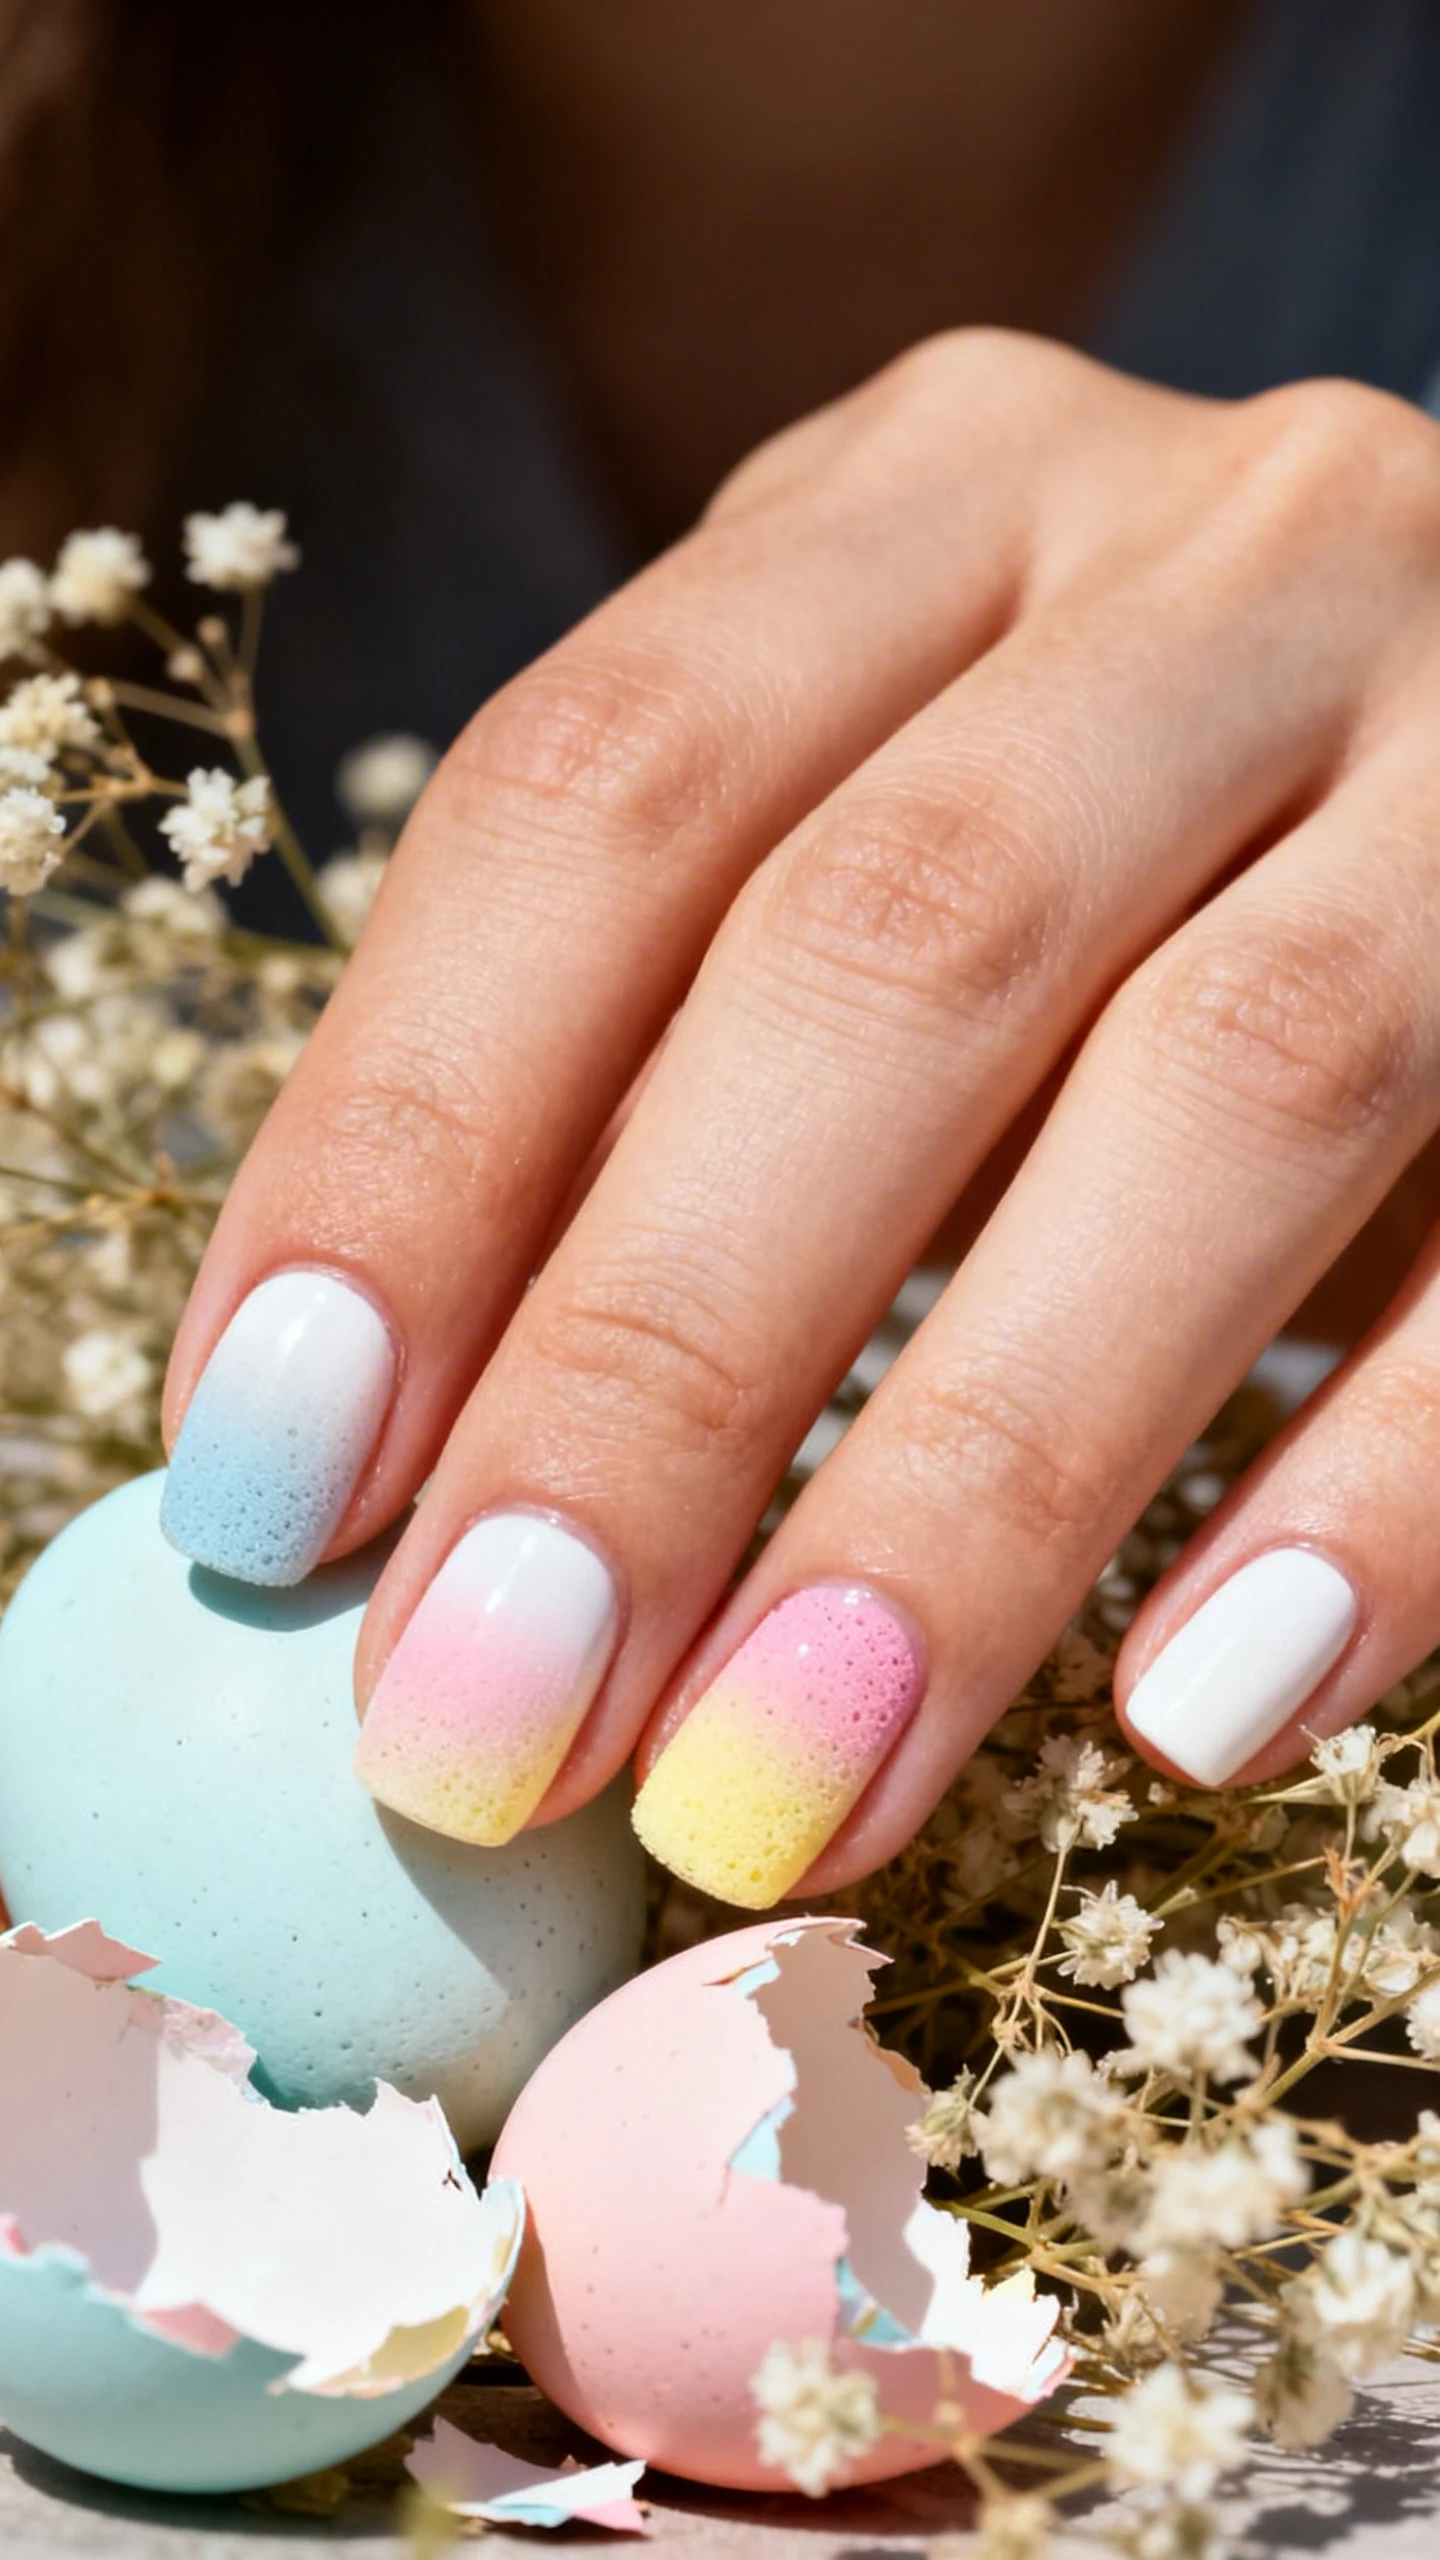
This no-fuss design is ideal if you’re new to aura sponging, or if you want a manicure that pairs with every Easter outfit from your ruffled sundress to your tailored linen blazer. The blended gradient mimics the swirled, matte finish of hand-dyed Easter eggs, without any of the stress of freehand painting.
Skip the bold neon pastels and go for muted, soft tones that feel like spring rain—this design won’t chip halfway through your holiday weekend, thanks to the smooth blending that hides minor tip wear too. It’s also perfect for anyone who wants a subtle Easter nod without obvious chick or bunny motifs, if you’re dressing for a professional holiday event.
Pro tip: Skip the pricey dedicated aura nail sponges and grab a drugstore makeup blending sponge instead—just cut it into 1×1 inch squares for precise, mess-free blending!
Nail Details:
- Base coat: 2 flawless coats of cream nail polish, cured fully after each layer
- Prep sponge: Cut a 1×1 inch square of aura nail sponge, dab lightly into light lavender polish, then blot twice on a paper towel to remove excess product (prevents streaks!)
- First color layer: Press the sponge onto the upper third of each nail, holding for 3 seconds to transfer the color
- Second color layer: Use a fresh sponge dabbed in soft peach polish, press onto the middle third of the nail, blending the edge with the lavender section with gentle circular dabs
- Third color layer: Tiny dab of pastel butter yellow along the cuticle line, blending into the peach gradient for a seamless, blurry fade
- Accent nail: Ring finger gets a single tiny hand-painted white chick’s beak and eye with a thin nail art brush
- Final finish: Satin top coat to lock in the dreamy, non-glare finish

- High-Quality Press-On Nail Kit: All Glamnetic Press-On Nail Sets offer high-quality salon style and feature protective U…
- Everyone loves a classic french tip mani, but we’re all about changing it up with summer-approved hues! Our Confetti Pre…
- Premium Durability with Up To 2 Weeks Per Wear – High-quality is our middle name. This customizable nail set can be trim…
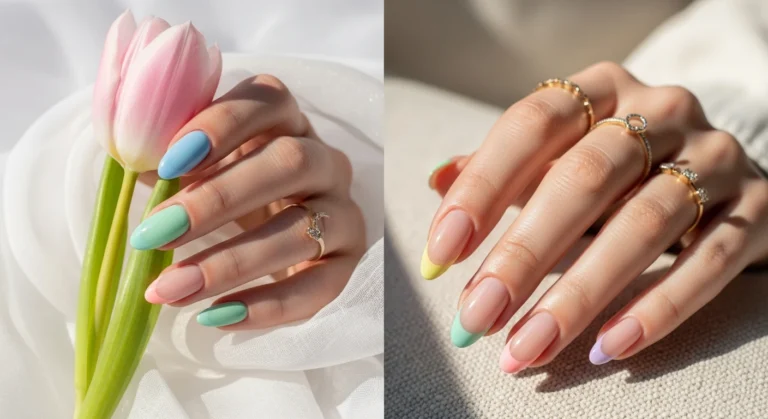
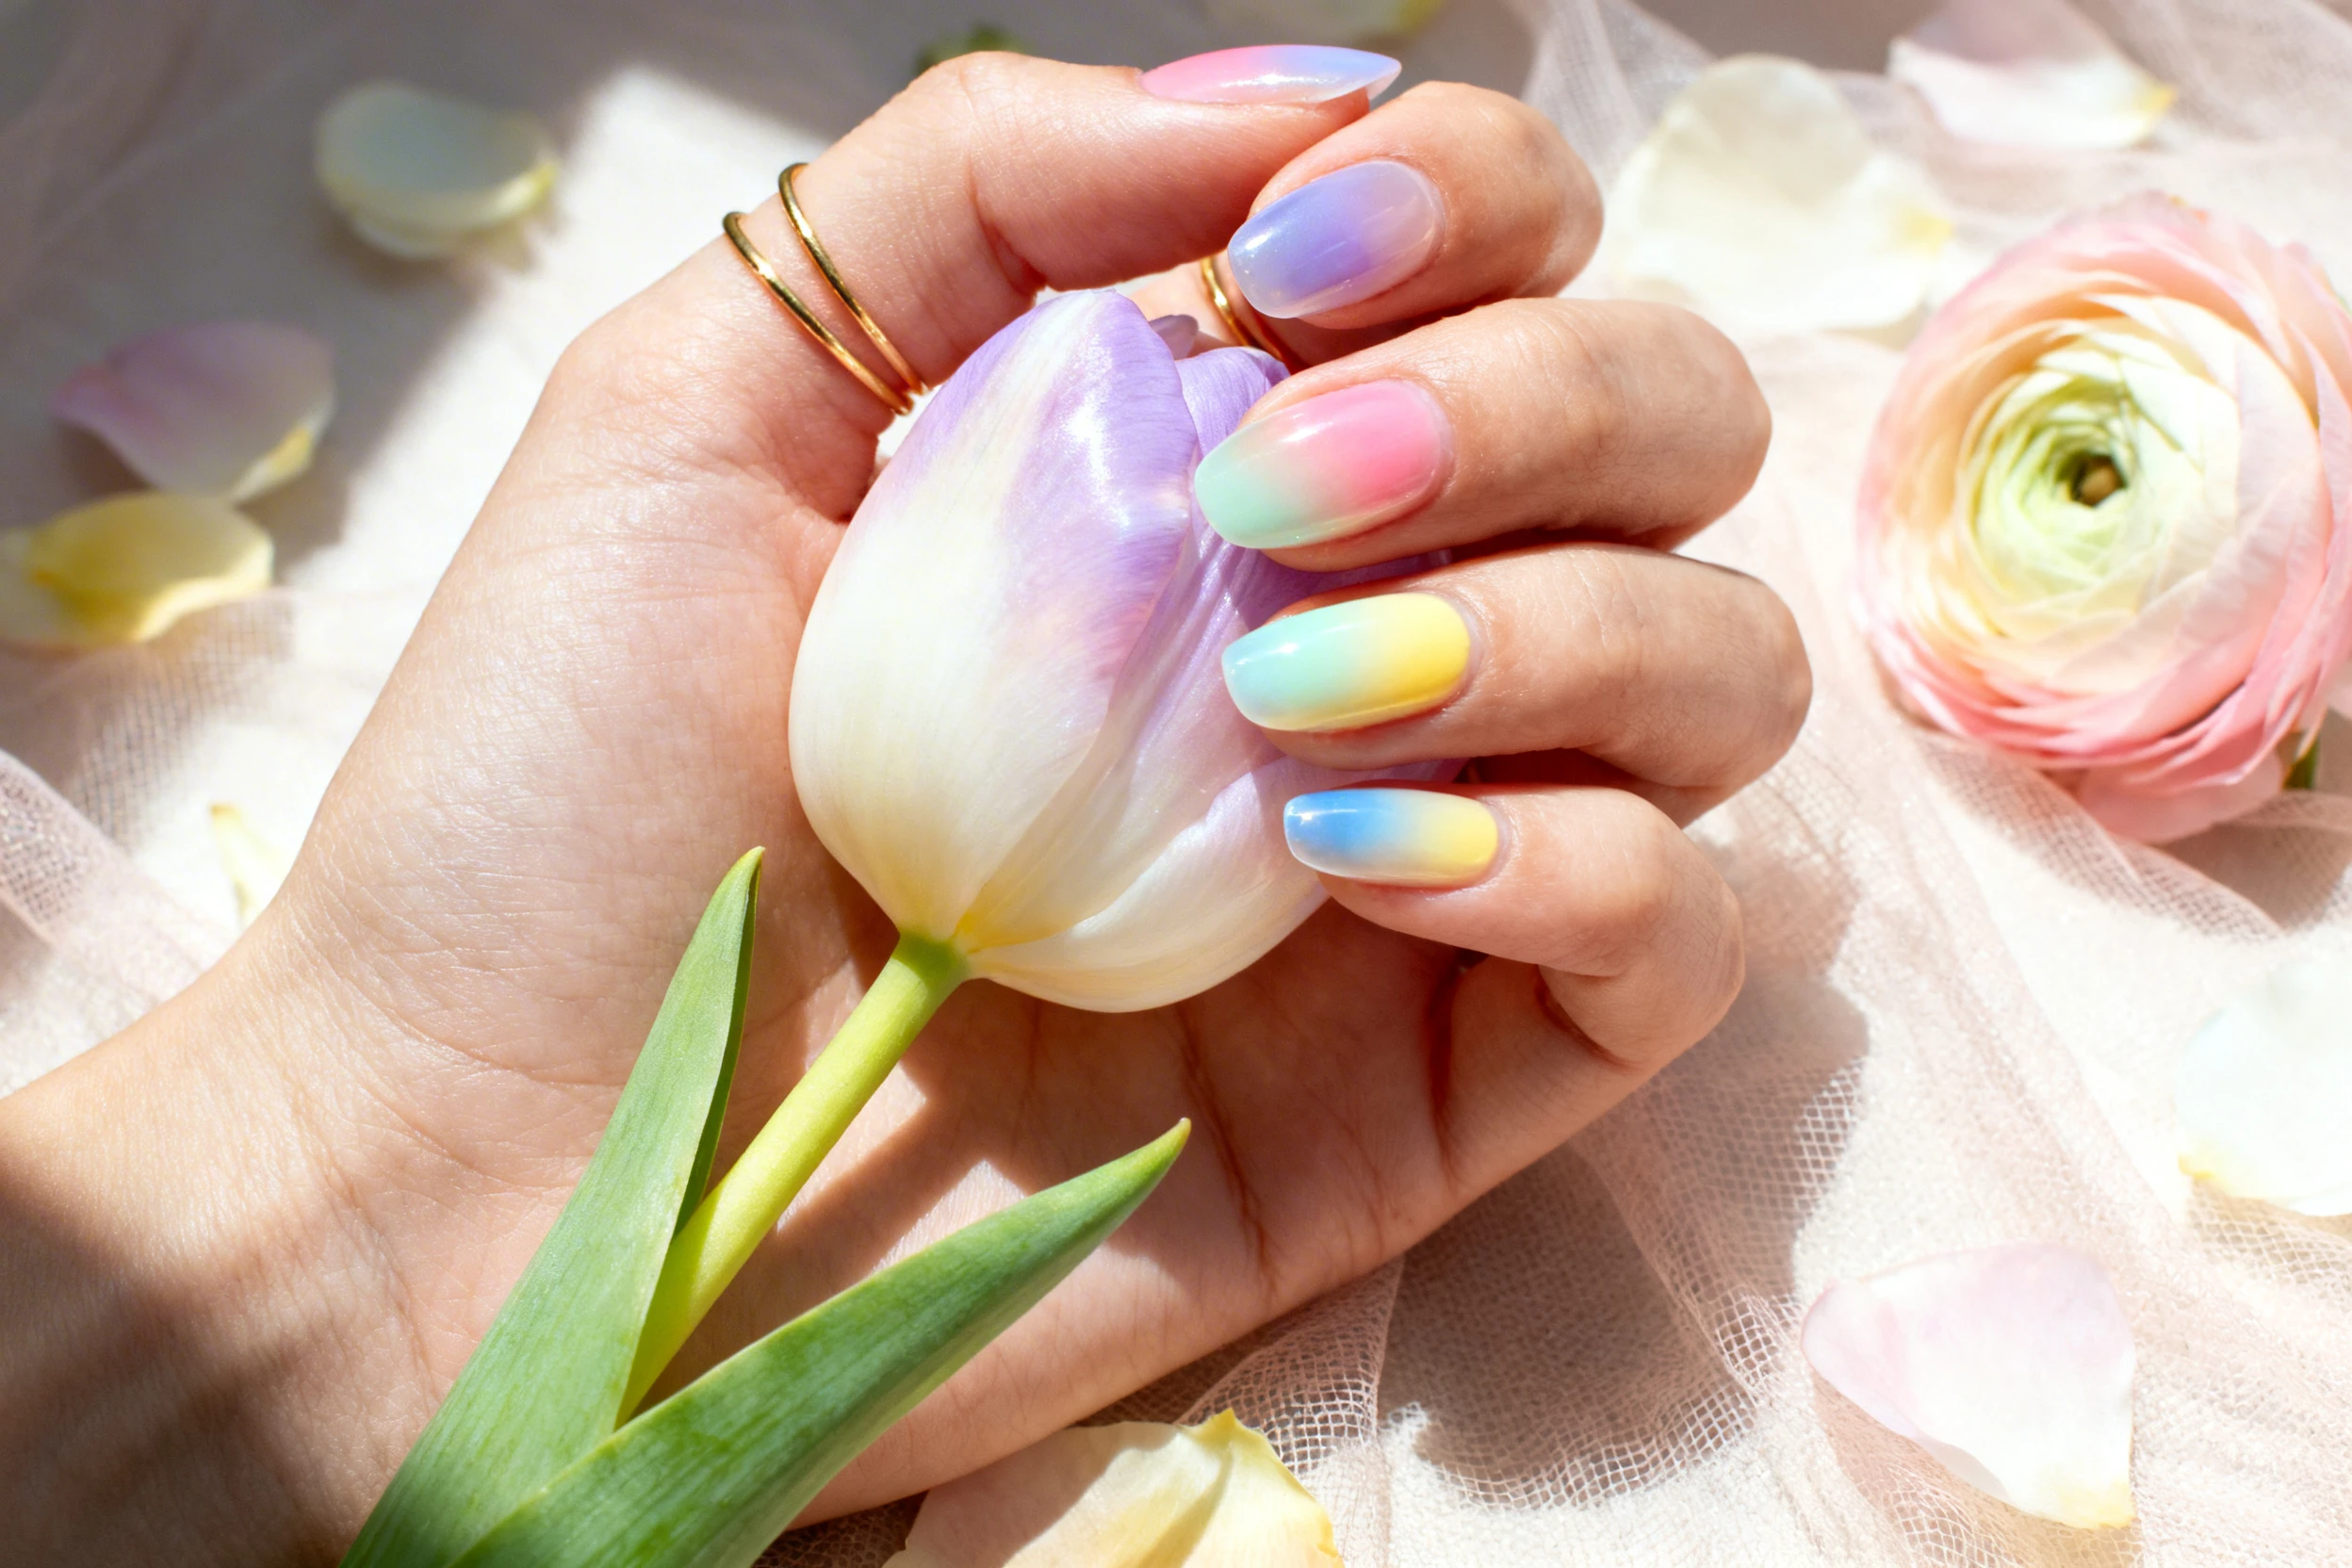
2. Wildflower Meadow Aura Nail Blends
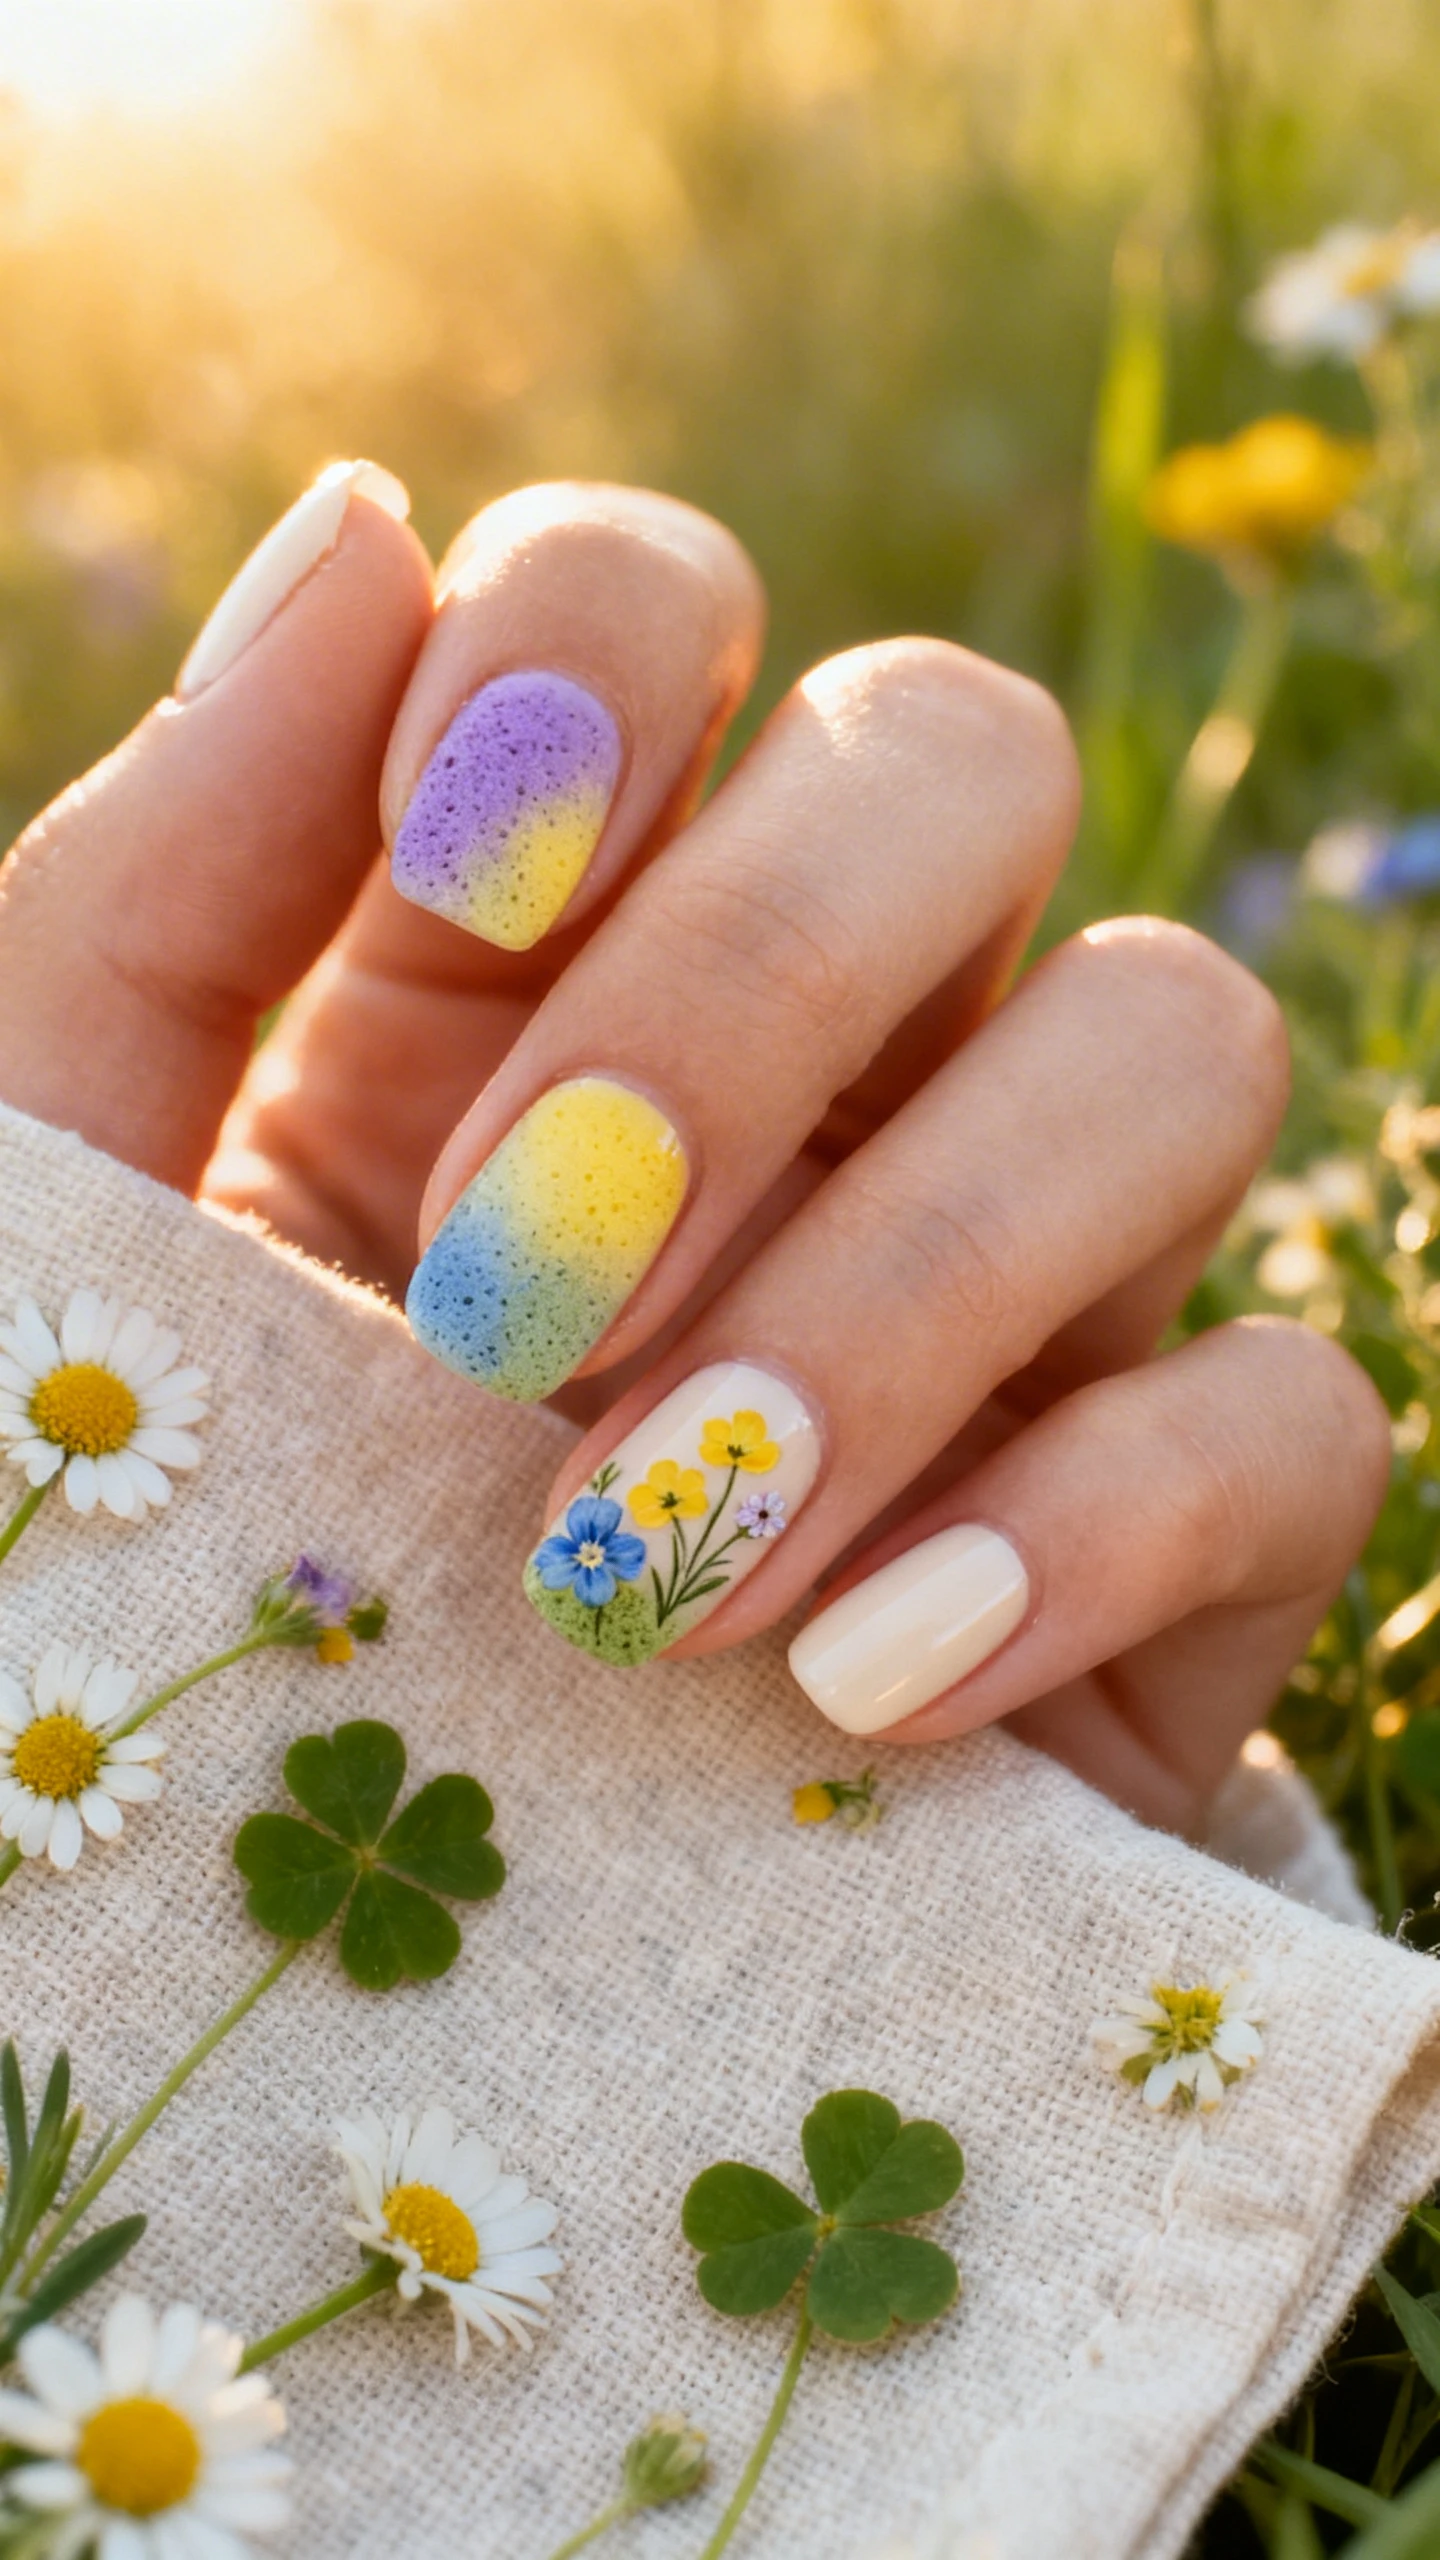
This design is made for the girl who spends every Easter picking wildflowers in her grandma’s backyard—soft, layered, and packed with subtle, blooming details. The aura sponge lets you layer multiple pastel hues without creating a muddy mess, and the blended edges keep the look feeling airy, not cluttered.
It’s perfect for brunch photoshoots, since each nail has a slightly different color blend, so no two nails look identical, adding that effortless, lived-in spring vibe. You can even swap out the hues to match your favorite wildflower varieties, from daisies to crocuses!
Pro tip: Use a separate sponge for each color to avoid accidentally mixing tones and creating a muddy, dull gradient.
Nail Details:
- Base coat: 2 smooth coats of sand nail polish, cured fully after each layer
- First aura layer: Dab sponge into pale baby pink polish, press onto upper nail bed, hold 2 seconds
- Second aura layer: Fresh sponge dabbed in pale cornflower blue, press onto middle nail bed, blend edges with pink
- Third aura layer: Fresh sponge dabbed in soft mint green, press onto lower cuticle area, blend edges with blue
- Wildflower details: Tiny dabs of butter yellow polish on 2-3 circular spots per nail to mimic daisy centers
- Accent nail: Middle finger gets a thin sponge-stamped soft lavender stem down the nail side
- Final finish: Glossy top coat to make pastel hues pop against the sand base
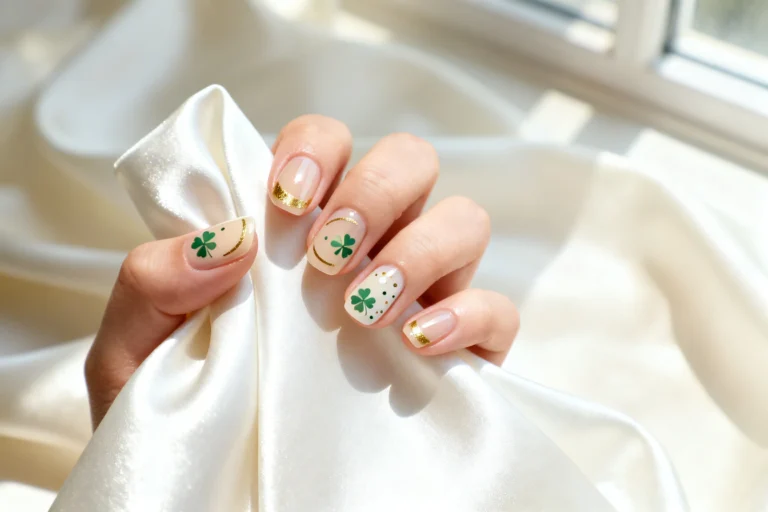
3. Marshmallow Bunny Aura Pastel Nails
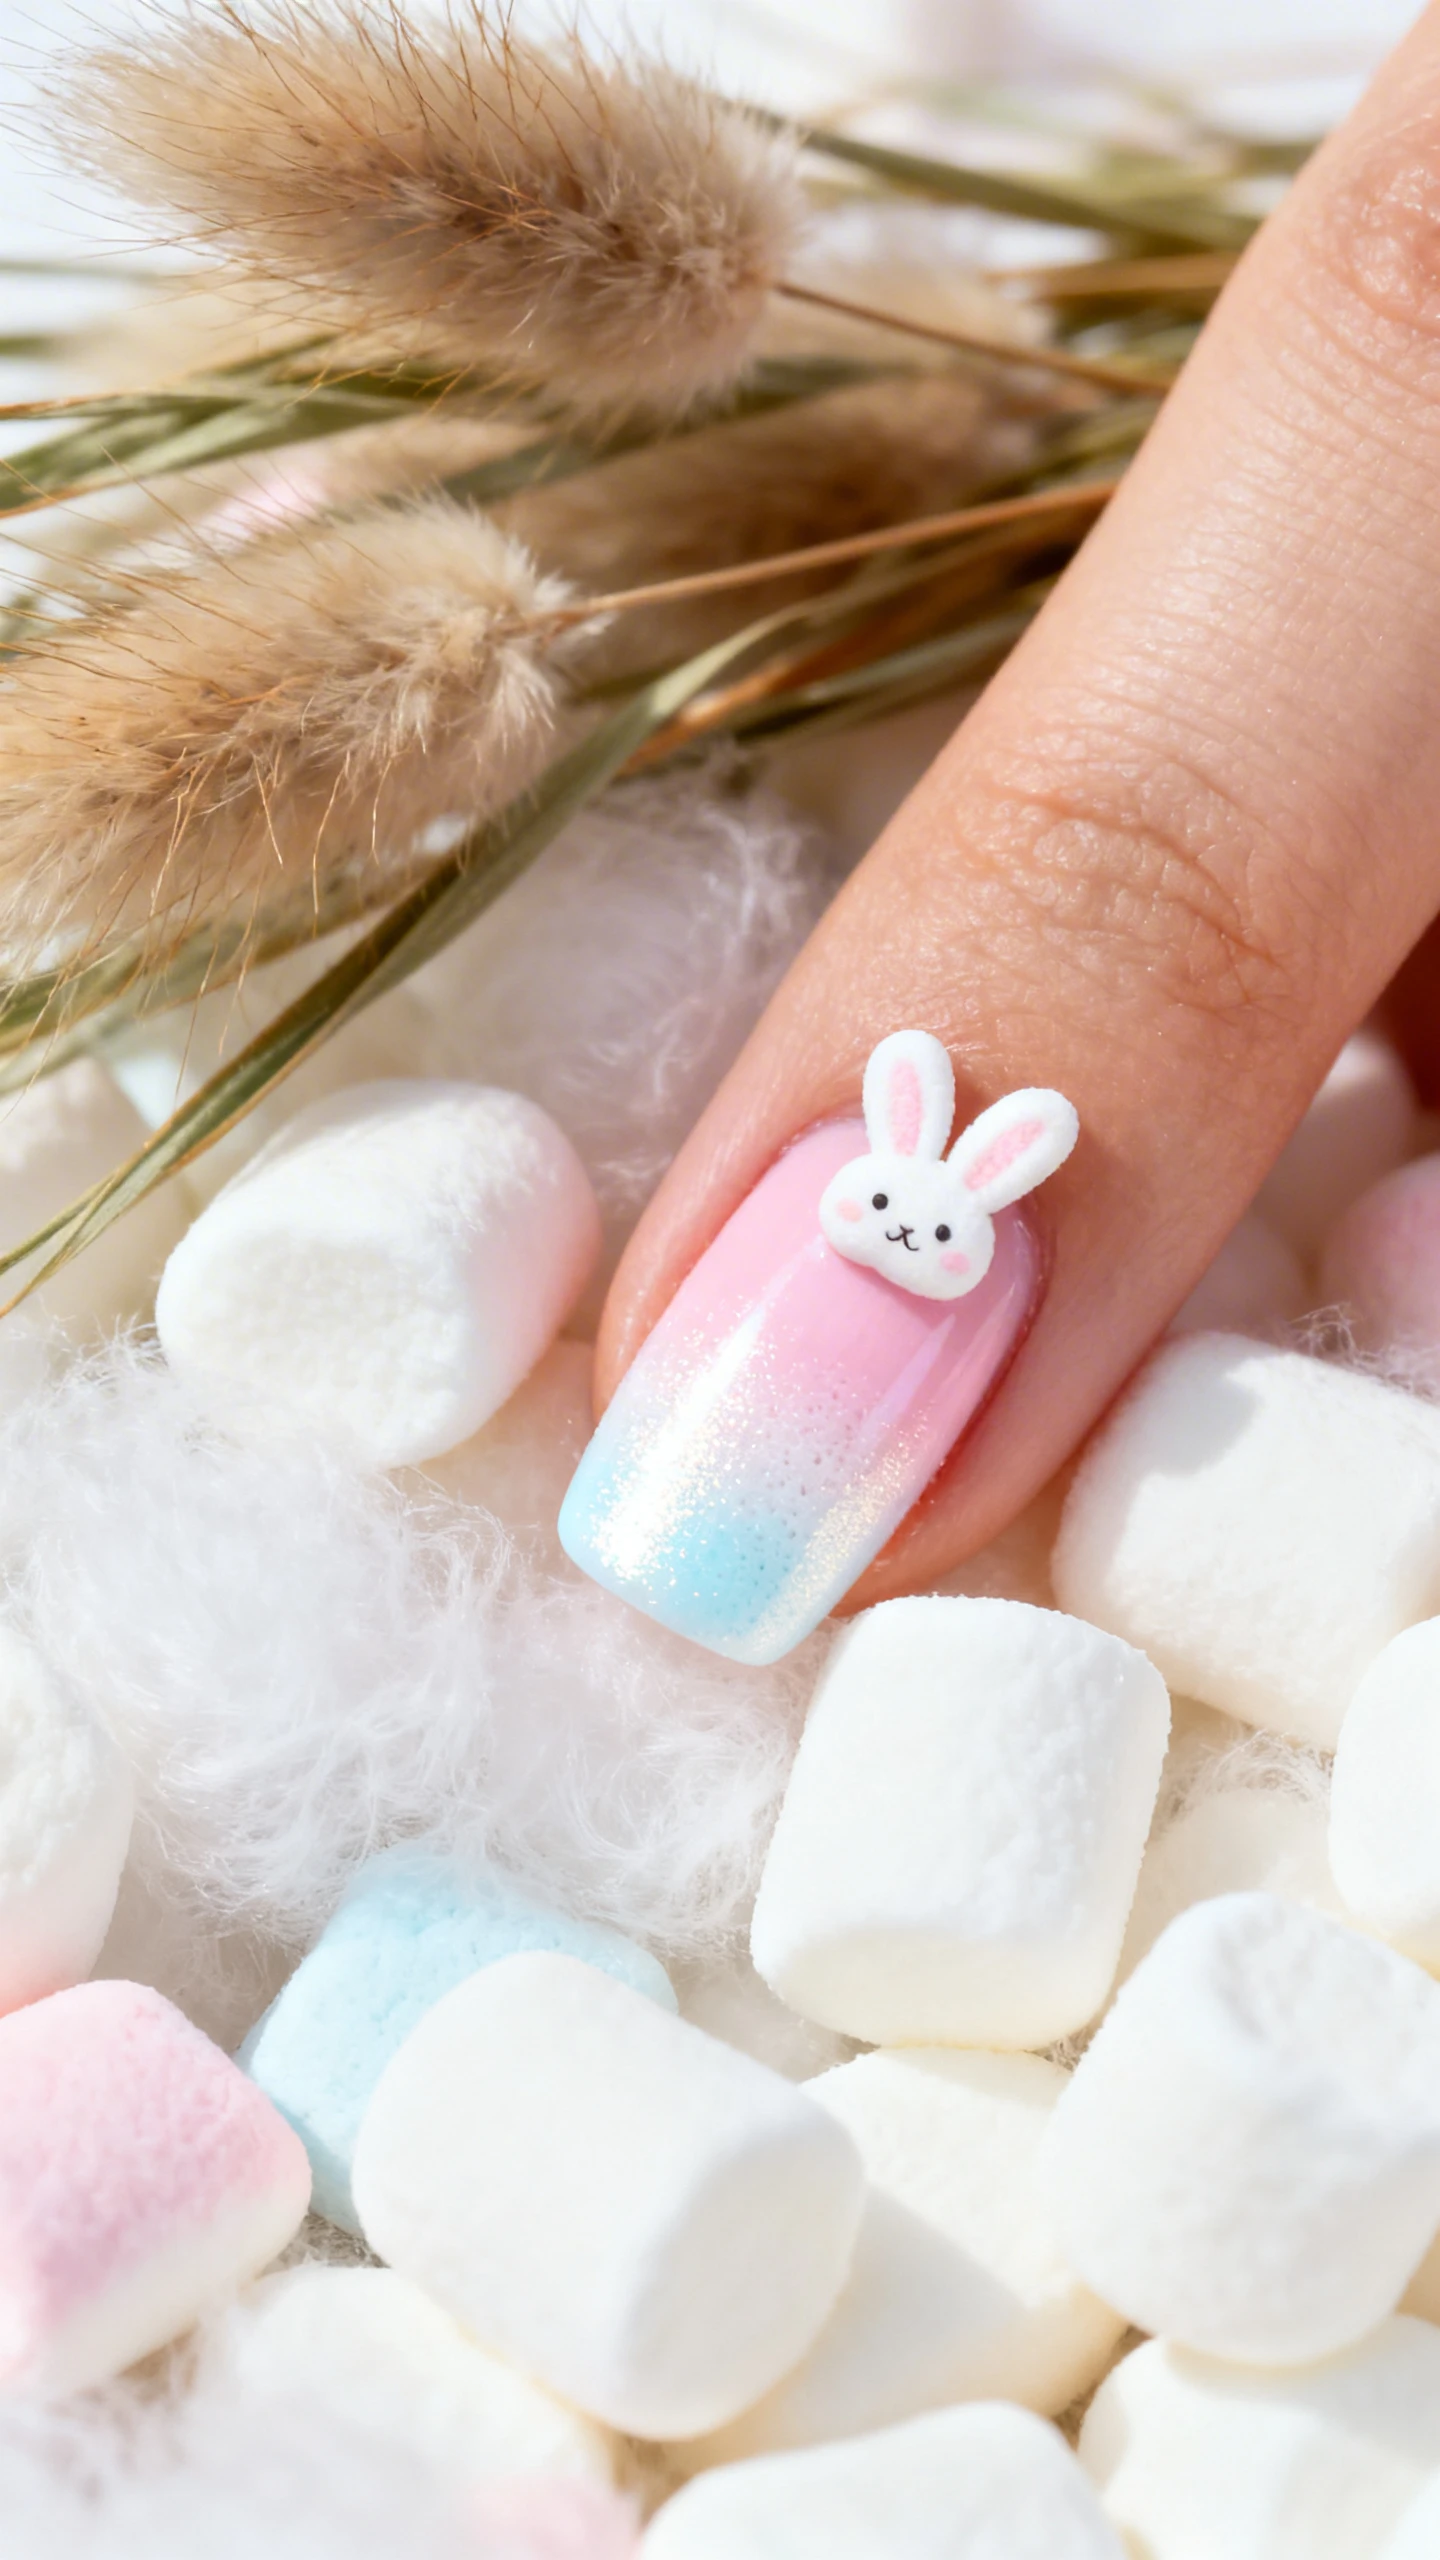
If you’re craving a manicure that feels like a hug, this marshmallow bunny design is it—soft, fluffy, and just a little bit whimsical, perfect for anyone who loves all things cozy Easter. The aura sponge creates a blurred, gradient edge that looks like the fur of a fluffy baby bunny, without any of the hassle of freehand fur detailing.
It pairs perfectly with your favorite bunny-themed Easter sweater, or even a simple white linen top, and it’s subtle enough for work meetings before the holiday weekend. The muted gradient won’t clash with any of your holiday outfits, either!
Pro tip: Mix two pastel polishes on a paper plate before dabbing your sponge for a more blended, natural fur-like edge.
Nail Details:
- Base coat: 2 flawless coats of cream nail polish, cured fully after each layer
- Bunny aura edge: Dab sponge into a mix of blush pink and peach polish (blot excess first!), press along free edge of each nail, hold 2 seconds
- Blend gradient: Use clean section of sponge to blend pink-peach edge into cream base for soft, fuzzy look
- Accent nails: Thumb and ring finger get tiny hand-painted pink bunny nose + 3 thin white whiskers per side
- Final finish: Satin top coat to keep the finish looking fluffy and non-glare
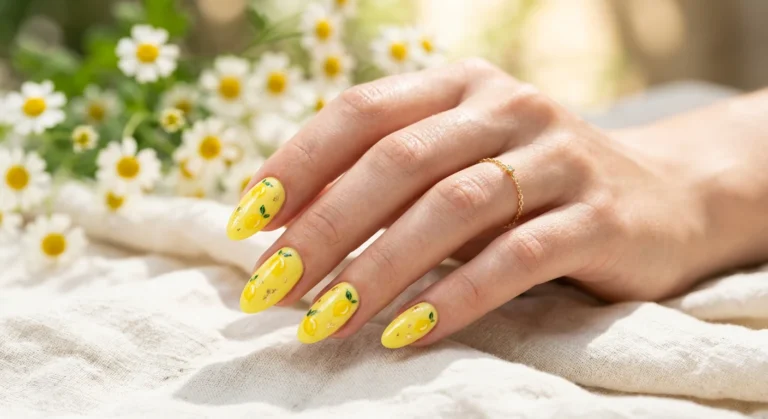
4. Citrus Easter Aura Gradient Nails
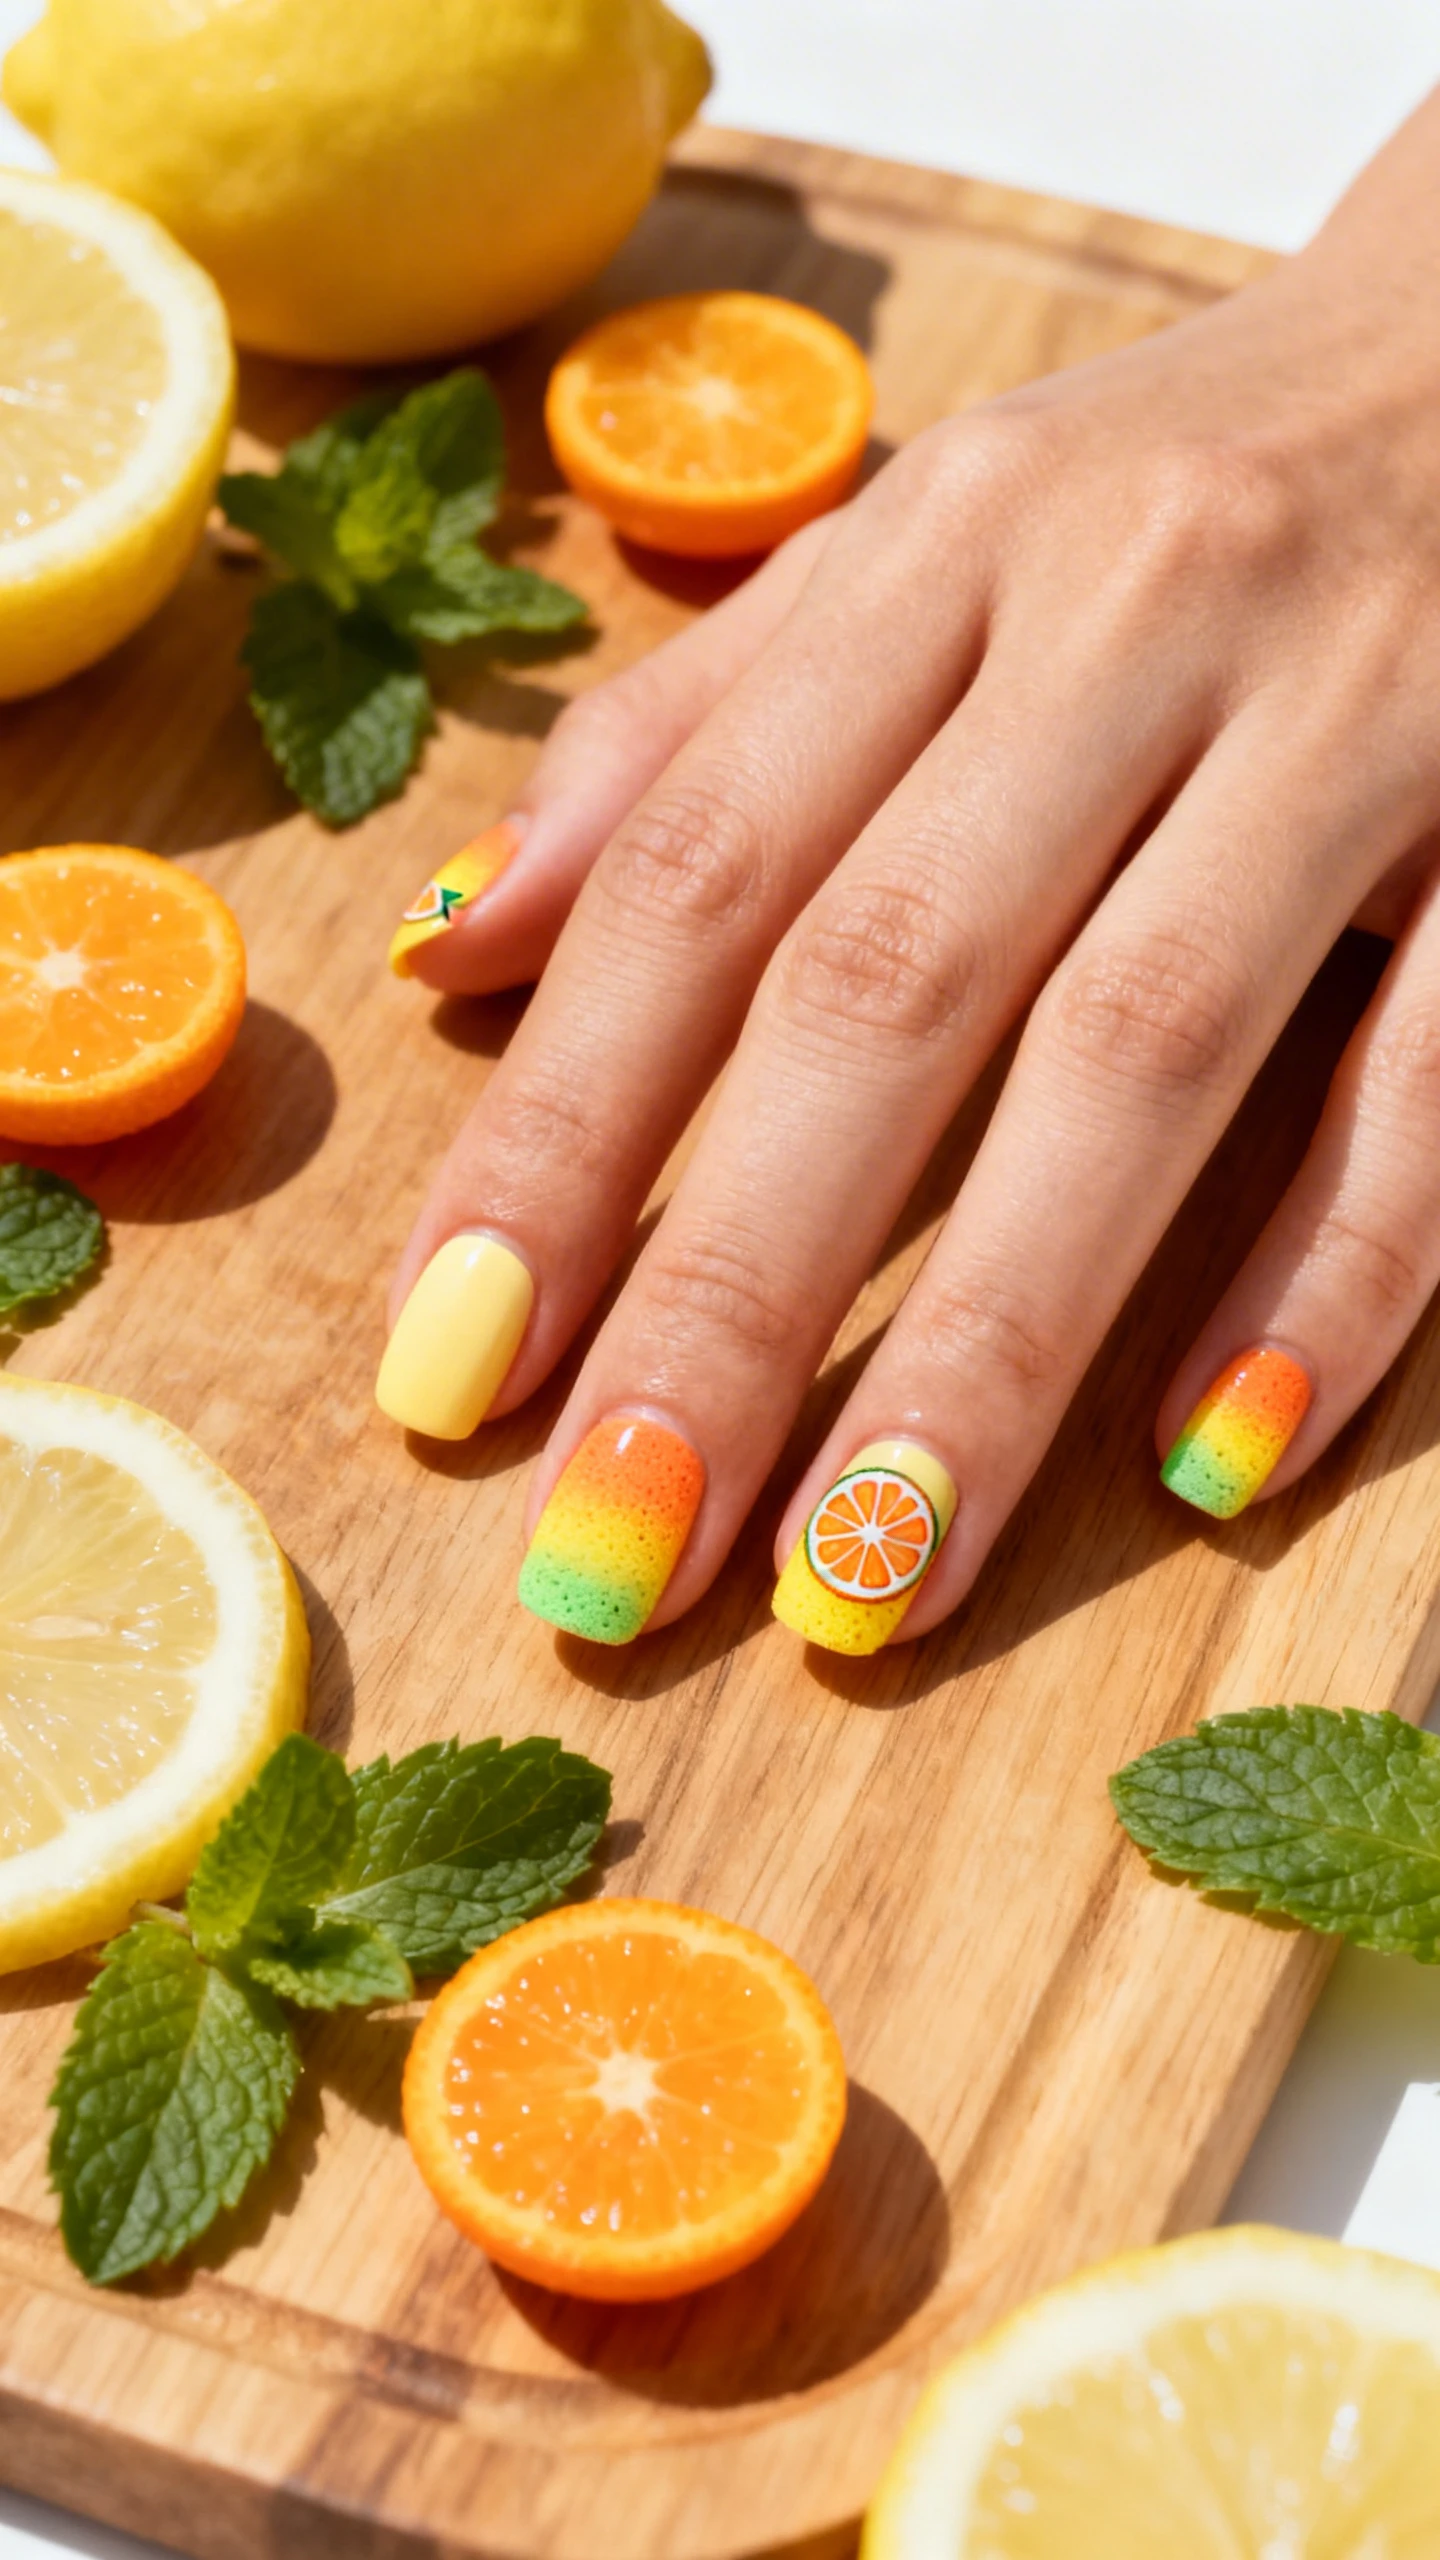
This bright but soft citrus-themed aura design is perfect for anyone who loves a little pop of spring color without going overboard—think fresh lemon slices, ripe peach halves, and tart lime wedges, all blended into a dreamy gradient. The aura sponge lets you layer citrusy pastels without creating a streaky, messy look, and it’s ideal for anyone who wants a manicure that stands out at Easter dinner.
It pairs perfectly with citrus-themed Easter treats, like lemon cupcakes or orange punch, and it’s a fun way to tie your manicure to your holiday menu. Even if you’re not a citrus fan, you can swap the hues for your favorite spring fruits!
Pro tip: Use a dry paper towel to dab excess polish off your sponge between each color layer to keep tones bright and avoid muddying the gradient.
Nail Details:
- Base coat: 2 smooth coats of tan nail polish, cured fully after each layer
- First citrus layer: Dab sponge into pastel lemon yellow, press onto upper nail bed, hold 2 seconds
- Second citrus layer: Fresh sponge dabbed in soft peach-orange, press onto middle nail bed, blend edges with yellow
- Third citrus layer: Fresh sponge dabbed in pale lime green, press onto lower cuticle area, blend edges with orange
- Citrus details: Tiny dabs of dark butter yellow on yellow section to mimic lemon seeds
- Accent nail: Middle finger gets a thin sponge-stamped pale lime green lime wedge outline
- Final finish: Glossy top coat to make citrus hues pop against the tan base

- High-Quality Press-On Nail Kit: All Glamnetic Press-On Nail Sets offer high-quality salon style and feature protective U…
- French Top Natural Almond Nails – Each nail features a tapered fit towards the cuticle to give you the most natural look…
- Premium Durability with Up To 2 Weeks Per Wear – High-quality is our middle name. This customizable nail set can be trim…
5. Lamb’s Ear Soft Aura Nails
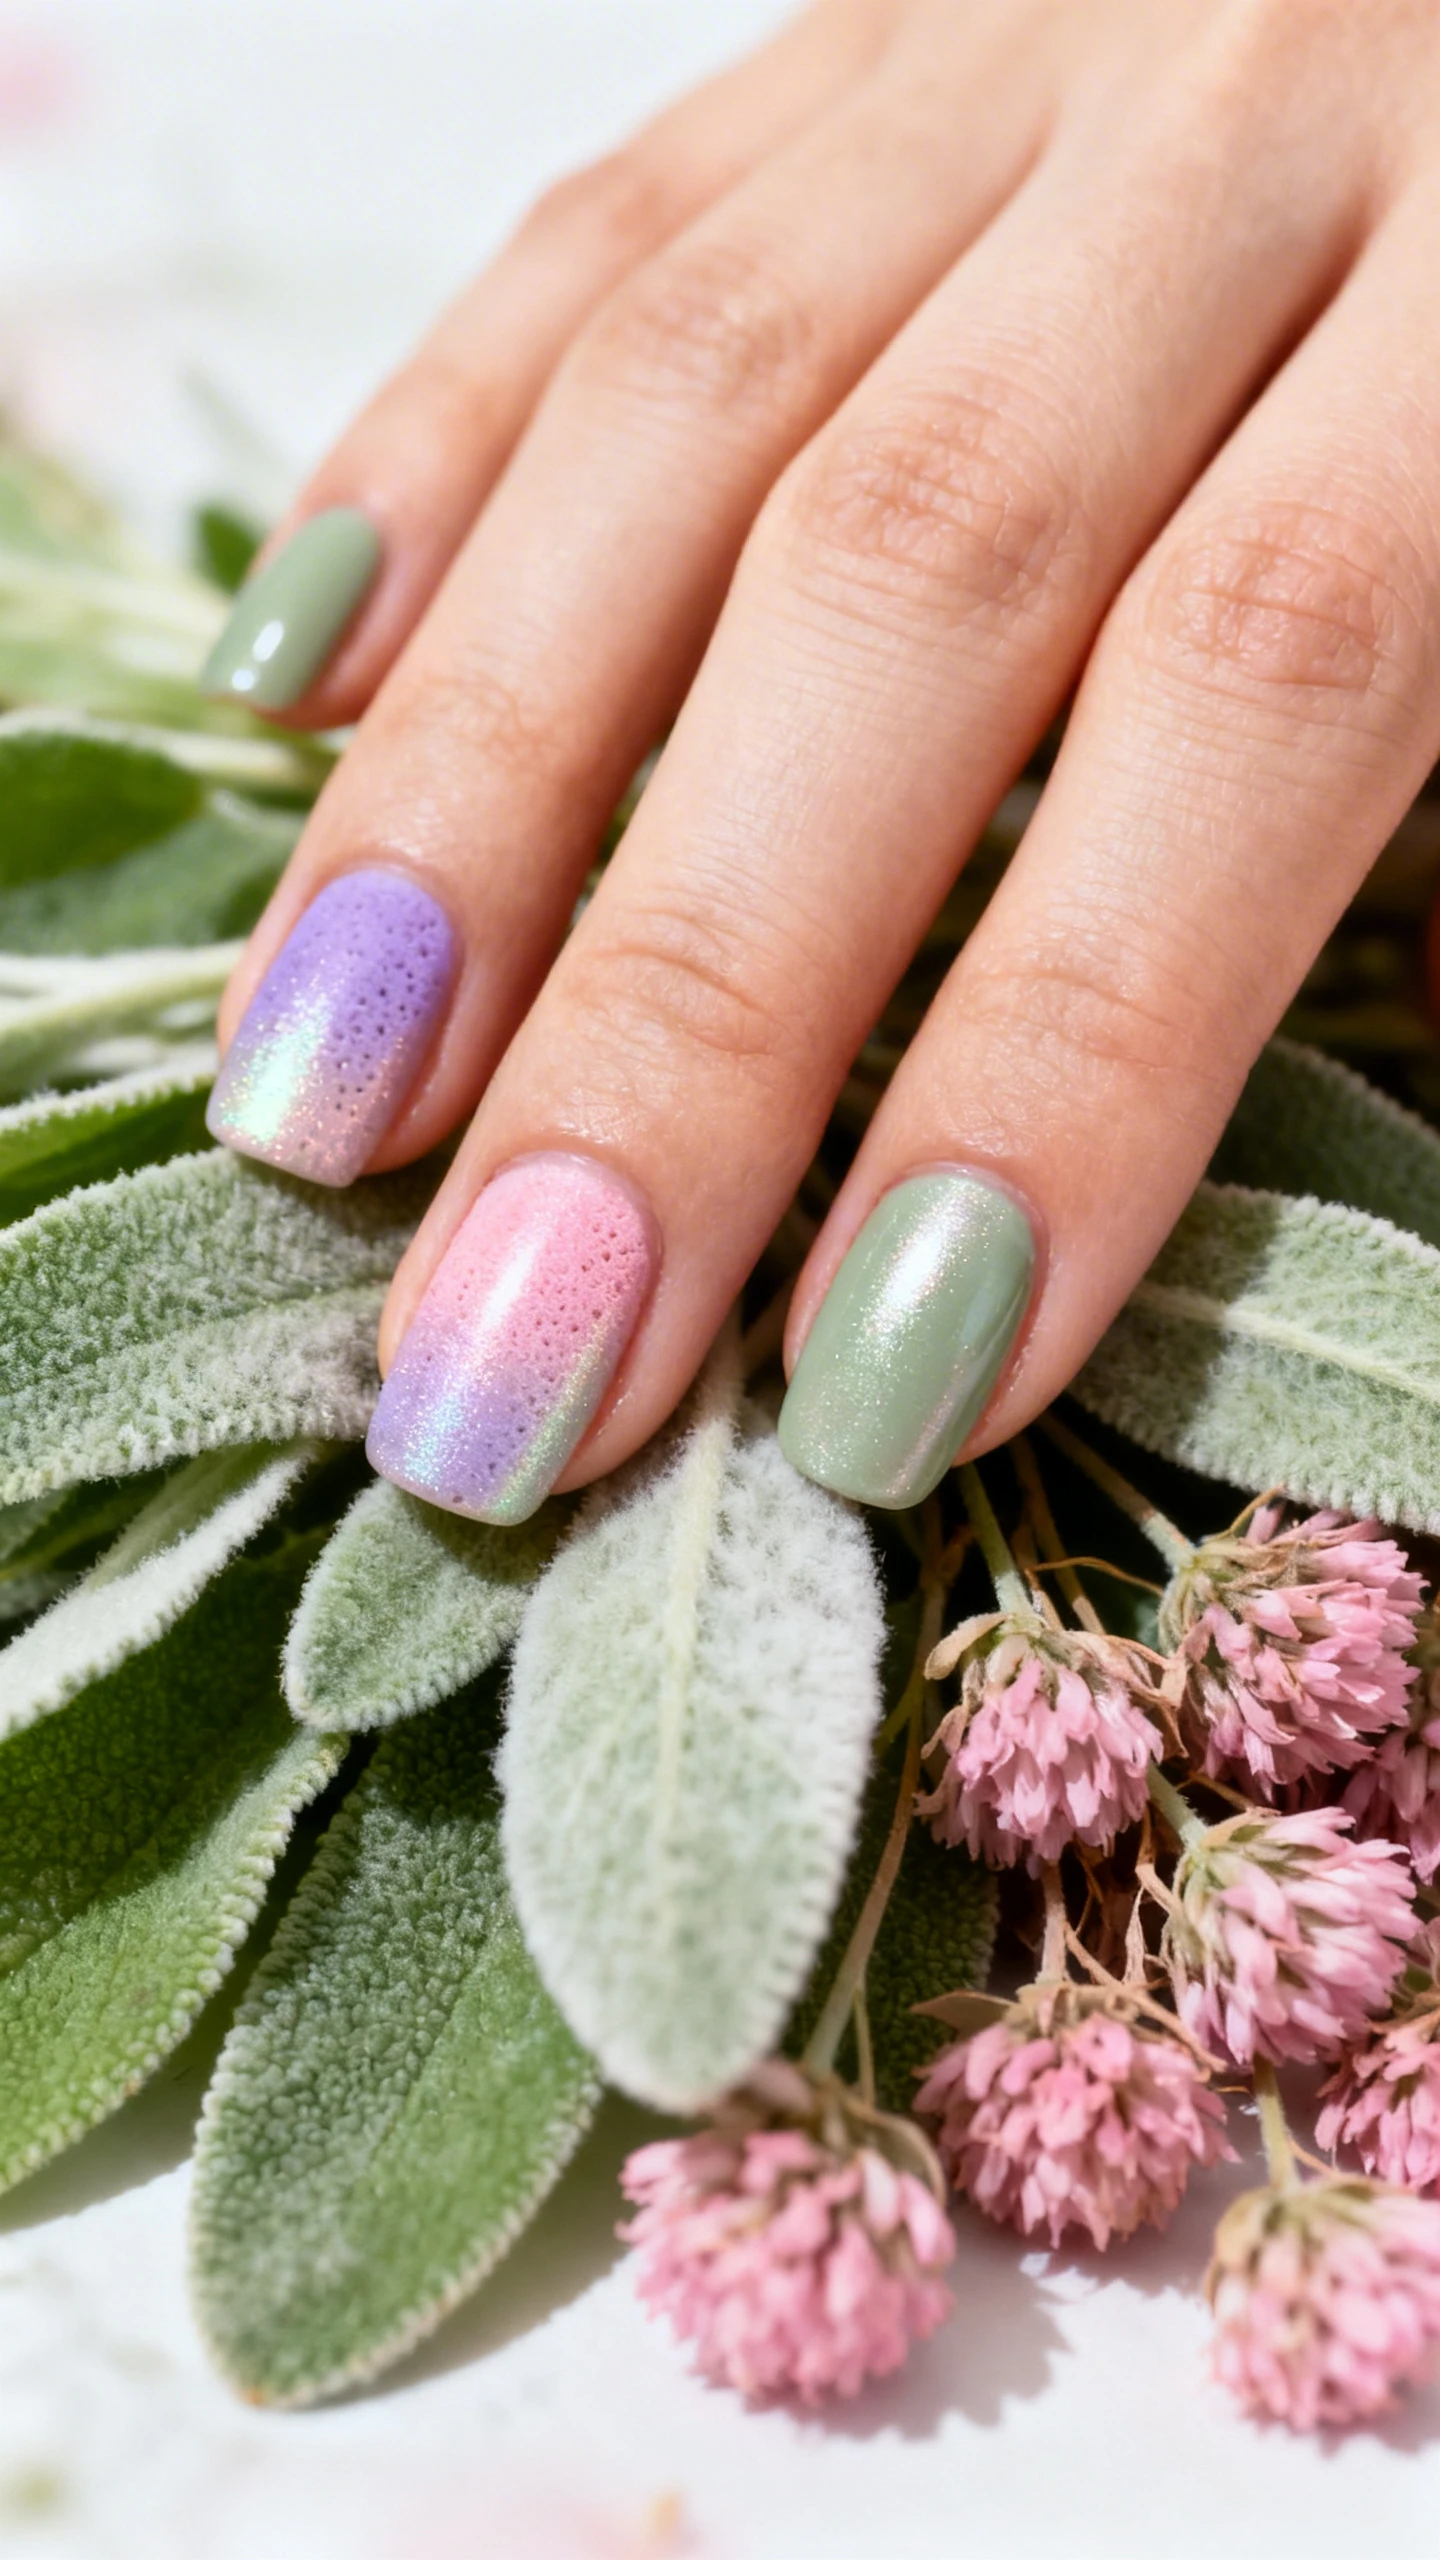
If you’re a fan of quiet, minimalist Easter manicures, this lamb’s ear design is perfect for you—soft, muted, and inspired by the fuzzy, velvety leaves of lamb’s ear plants that pop up in spring gardens. The aura sponge creates a blurred, gradient blend that mimics the soft texture of lamb’s ear, without any of the hassle of freehand fuzzy detailing.
It’s perfect for anyone who prefers understated holiday manicures, and it pairs beautifully with neutral Easter outfits, like a tan linen dress or a cream sweater. The muted tones also make it a great choice for anyone who wants a spring manicure that lasts beyond Easter weekend.
Pro tip: Use a tiny corner of your sponge for precise dabs along the cuticle line to avoid getting polish on your skin.
Nail Details:
- Base coat: 2 flawless coats of cream nail polish, cured fully after each layer
- First aura layer: Dab sponge into muted sage green, press onto upper third of each nail, hold 2 seconds
- Second aura layer: Fresh sponge dabbed in pale pink, press onto middle third of nail, blend edges with sage green
- Third aura layer: Fresh sponge dabbed in soft lavender, press onto lower cuticle line, blend edges with pink
- Accent nail: Ring finger gets a thin sponge-stamped sage green sprig down the nail side
- Final finish: Satin top coat to keep the finish looking soft and velvety

- You Will Get:12 nail sizes 24 press on nails short ensure a totally custom fit, plus we give you everything needed just …
- Superior Quality: The short press on nails sticky tabs are made of high-grade ABS material, the fake nails press ons wit…
- Lasting Effect:Wear them weeks straight or a few days – You Decide!You can use the nail glue sticker we gave you. Howeve…
At the end of the day, the best Easter manicure is one that makes you feel happy and festive—without the stress of complicated designs. These five aura sponge designs are all beginner-friendly, use affordable tools, and deliver that soft, dreamy spring vibe we all crave for the holiday. Whether you opt for the subtle eggshell gradient, the wildflower meadow blend, or the cozy marshmallow bunny nails, you’ll turn heads at every Easter gathering.
Pro final tip: Keep a pack of cut-up aura nail sponges in your manicure kit for quick, easy touch-ups or last-minute design changes ahead of holiday plans. Happy Easter, and happy painting!