5 Glossy Top Coats to Protect Your Easter Inspired Nails
Spring nails deserve a happy ending—the kind of glassy, mirror-shine topper that seals in pastel art, prevents chips during egg hunts, and keeps every delicate dot and swirl looking day-one fresh. If you’ve ever spent an hour perfecting a tiny bunny ear only to smudge it while scrolling, you know the heartbreak. Good news: the right glossy top coat is your insurance policy. Below, you’ll find five crowd-favorite looks—each paired with expert notes on choosing and applying the perfect shiny shield, so your Easter-inspired manicure snaps like it belongs on a mood board.
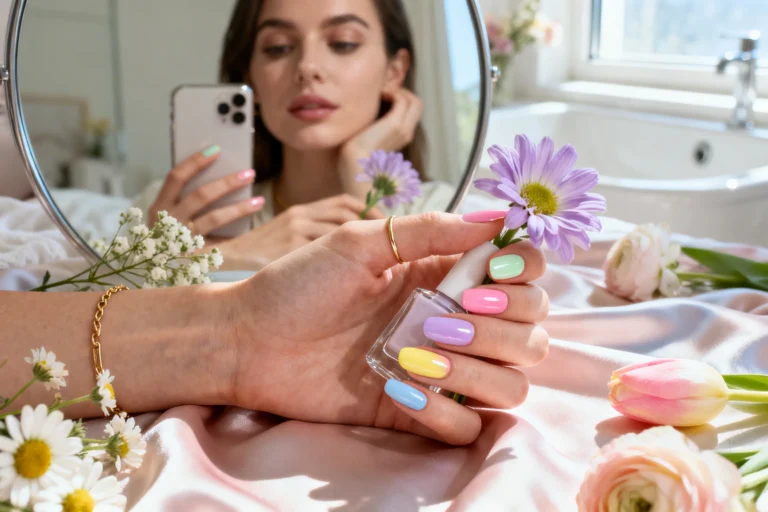
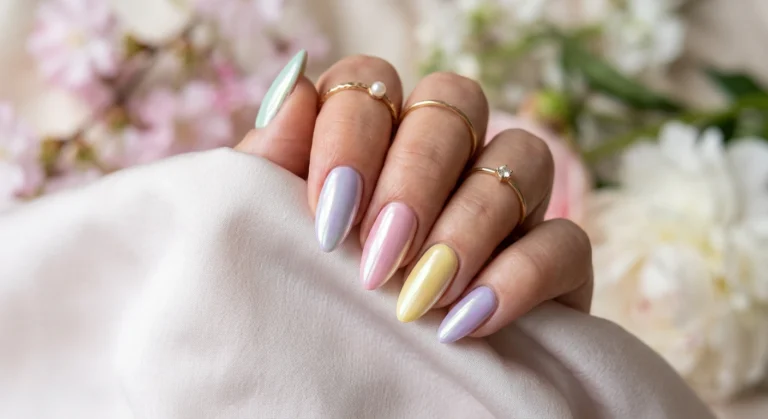
1) Jellybean High-Gloss Skittles
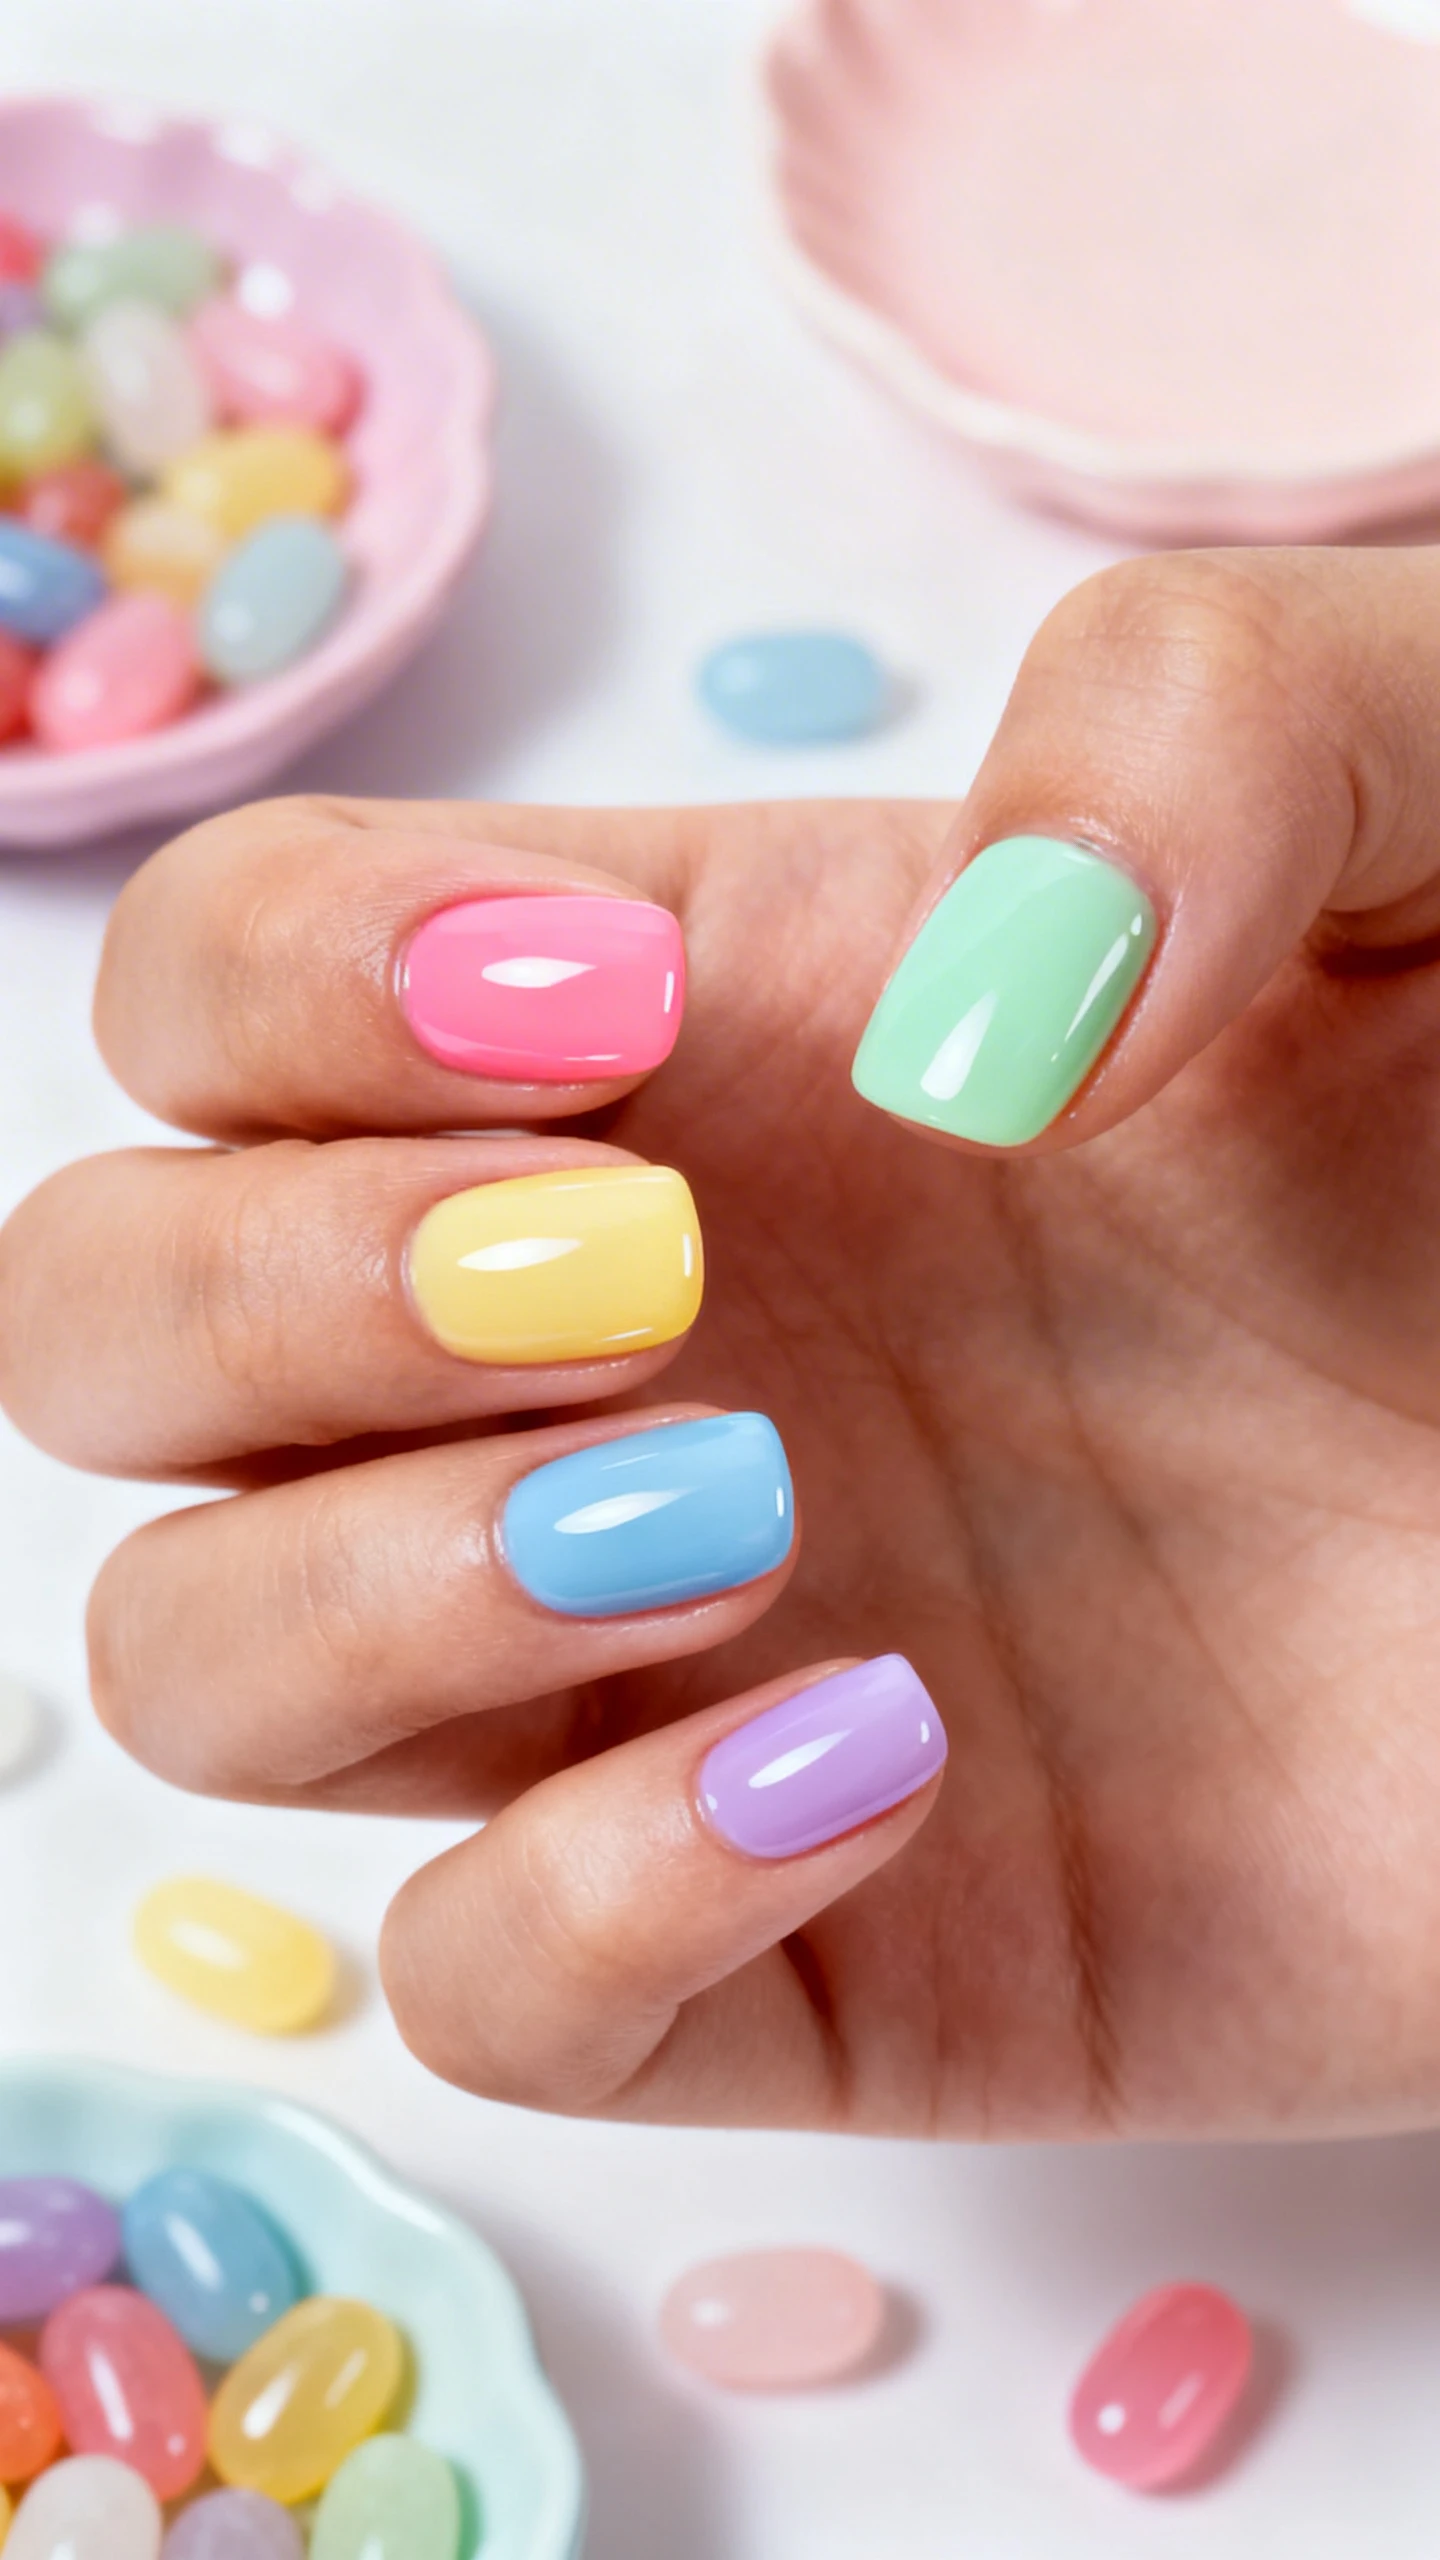
This candy-bright manicure is a celebration of color and shine. It’s playful, simple to DIY, and looks salon-polished with a high-performance quick-dry, glossy top coat. Skittles nails are also low-risk: if you ding a finger while painting, you can easily fix a single color without redoing the whole hand. The glossy finish makes every shade look juicier, like freshly polished jellybeans.
To lock in that vibrant, candy-shell look, use a formula that’s self-leveling and resistant to color fading. For longer wear, float the brush lightly over the nail—don’t press. The thinner your layers of color, the shinier and smoother your top coat will appear on top.
Nail Details:
– Shape: Short to medium round or soft square for a modern, plump “jellybean” silhouette.
– Base: Opaque pastel polishes in five different colors across each hand.
– Colors: Bubblegum pink, mint green, butter yellow, sky blue, and lavender—one color per nail.
– Finish: Ultra-glossy, glass-like top coat with a high-shine, non-tacky finish.
– Accent: Optional micro-fleck shimmer top coat on the ring finger only, sealed beneath the glossy layer.
– Overall look: Smooth, even color blocks with no visible brushstrokes, edges clean at the cuticle, and a gleaming, rounded shine that catches light at the tips.
2) Speckled Eggshell Shimmer
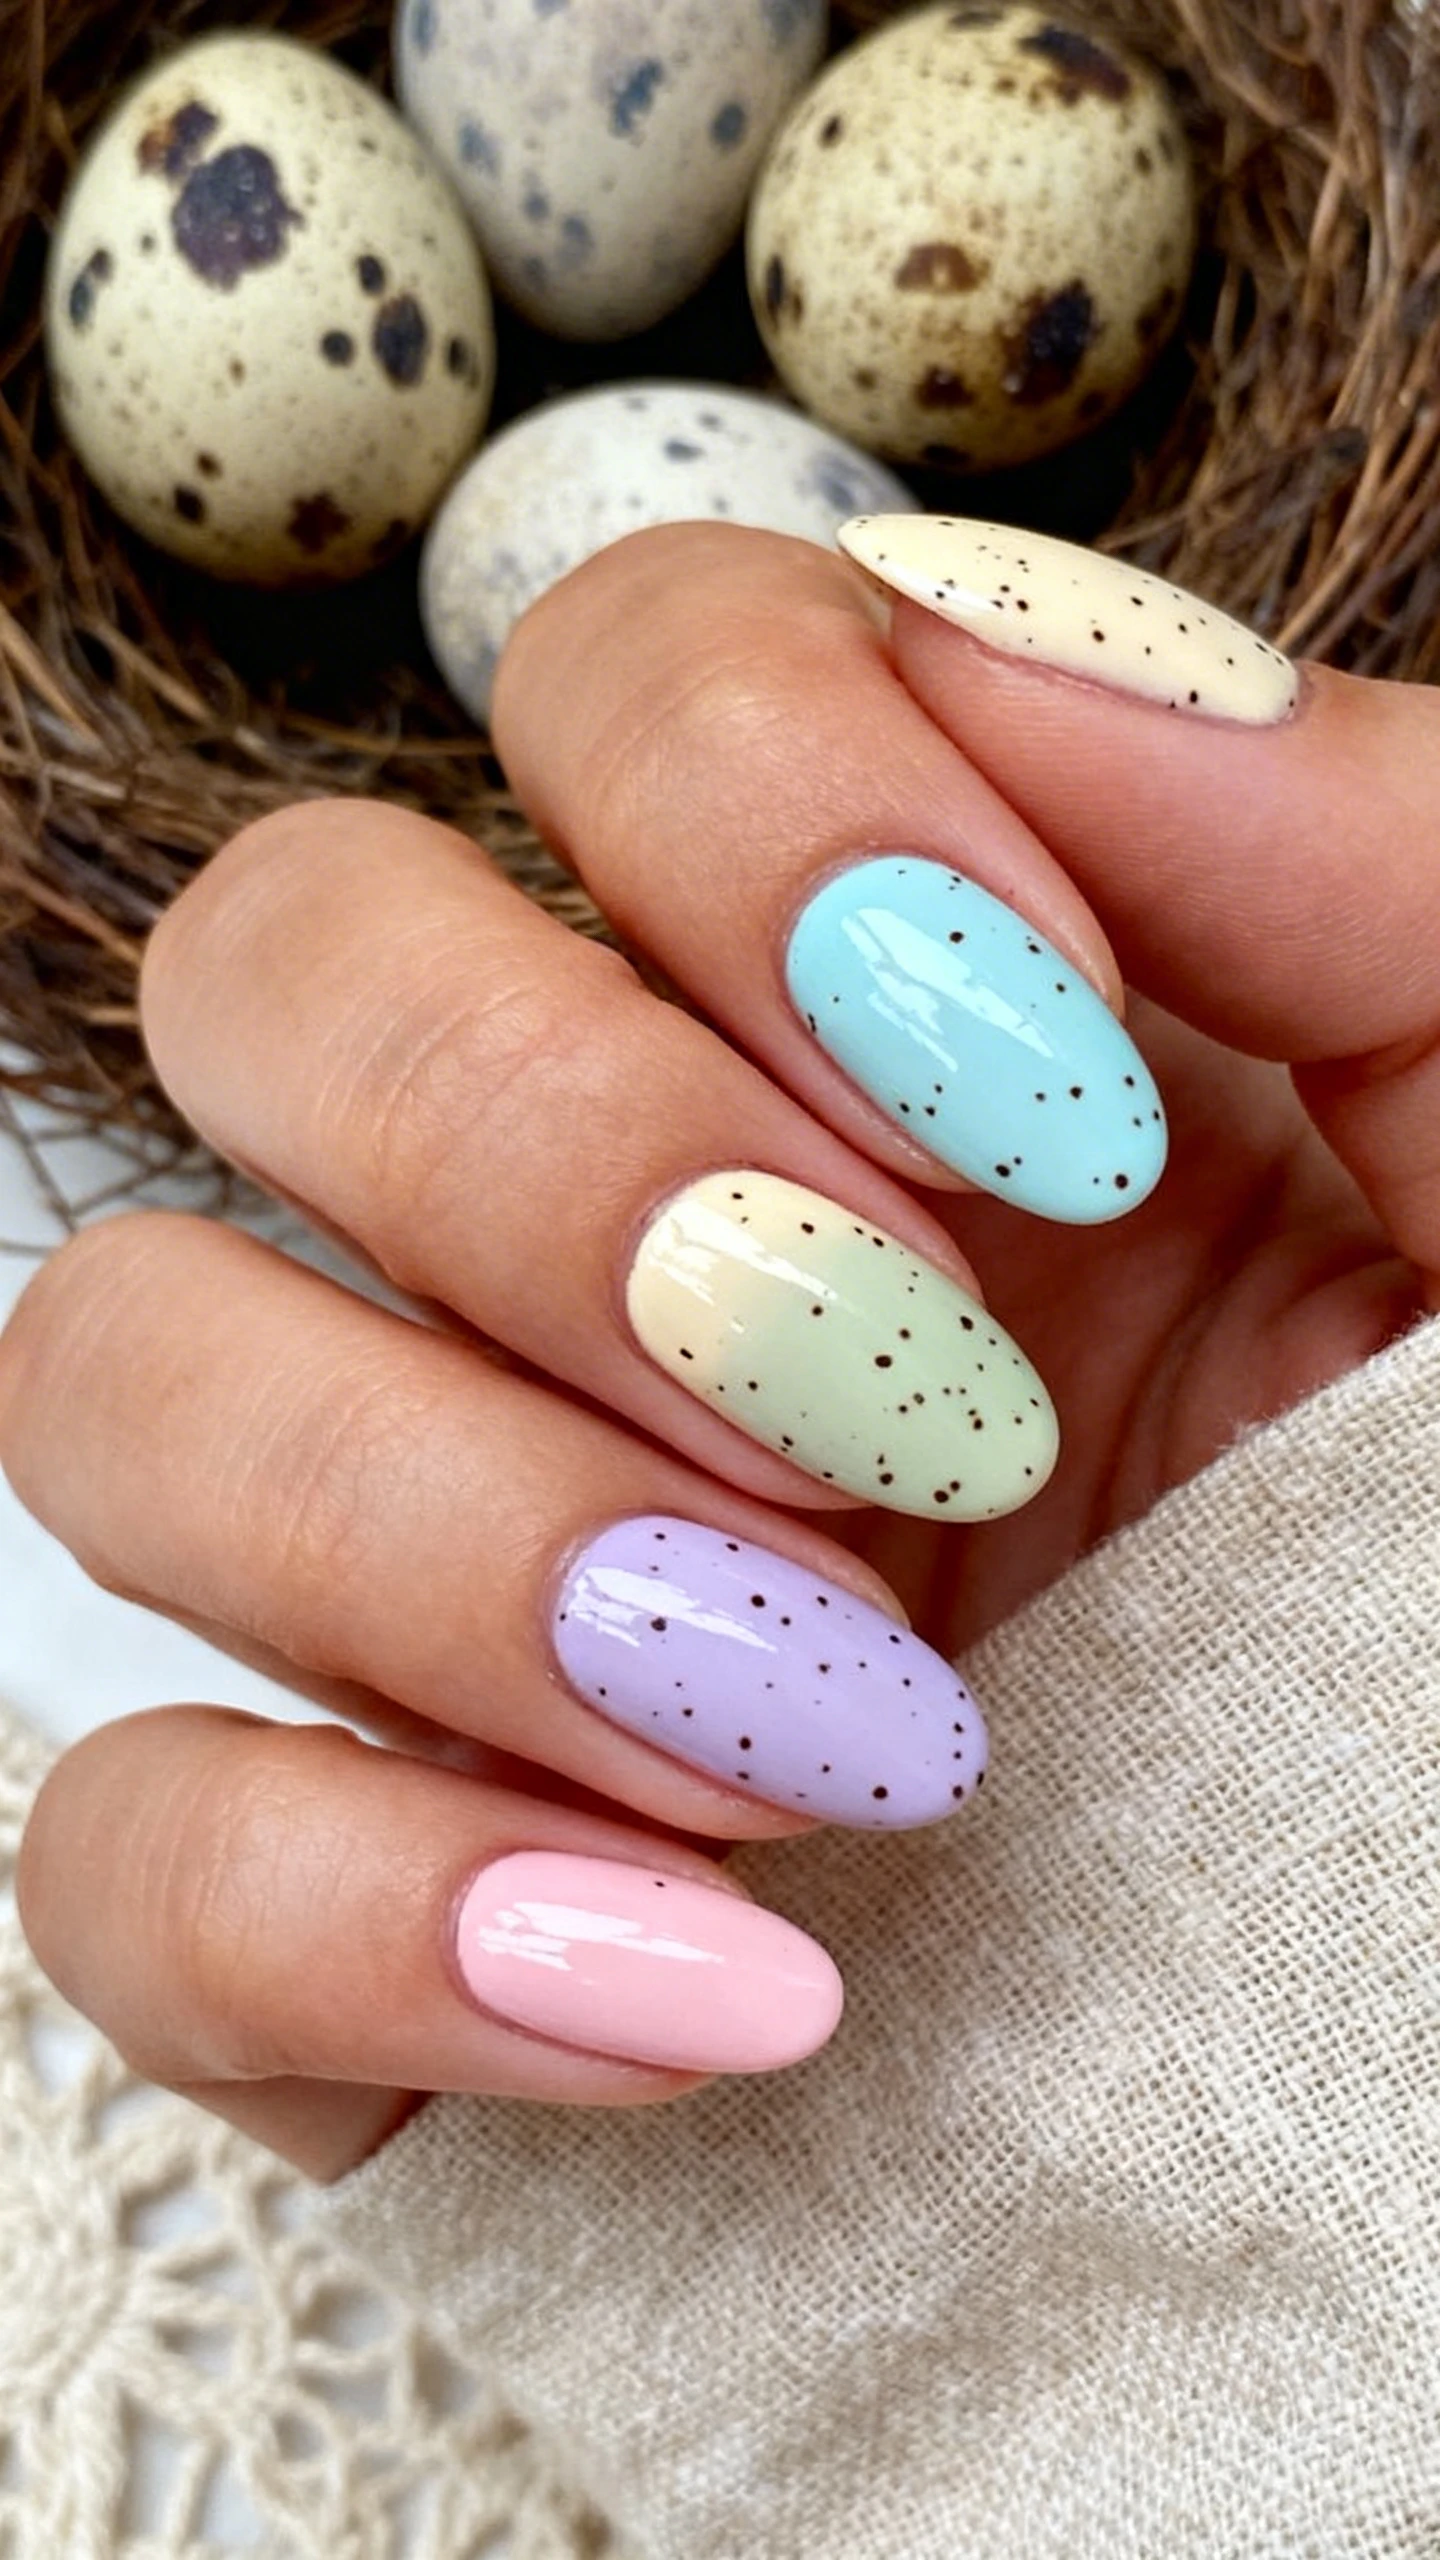
Here’s the sweet spot between cozy and chic: soft pastels with tiny speckles that mimic hand-dyed eggs. A chip-resistant glossy topper is key—the speckled effect can feel slightly textured, and the shine smooths everything into a professional finish while preserving that playful freckle detail. It’s a vibe that reads elevated, not elementary.
Pro move: choose a top coat that won’t smear delicate splatter work. Let your speckles dry for at least 10 minutes, then apply your glossy coat in a light-floating motion. The result: crisp speckles suspended under a crystal-clear shine.
Nail Details:
– Shape: Medium oval for an egg-like silhouette.
– Base: Soft pastel cremes.
– Colors: Pale robin’s egg blue, light cream, muted sage, lilac, and blush pink.
– Pattern: Fine black and dark brown micro-speckles scattered randomly on each nail; density varies slightly nail to nail.
– Technique: Speckles created with a tiny fan brush or a toothbrush flick for organic droplets; allow full dry-down before top coat.
– Finish: High-gloss, gel-like top coat that evens texture without dulling the speckles.
– Overall look: Delicate, matte-looking speckles sealed under a smooth, reflective surface with clean, rounded edges.
3) Pastel French with Sugar-Glaze Shine
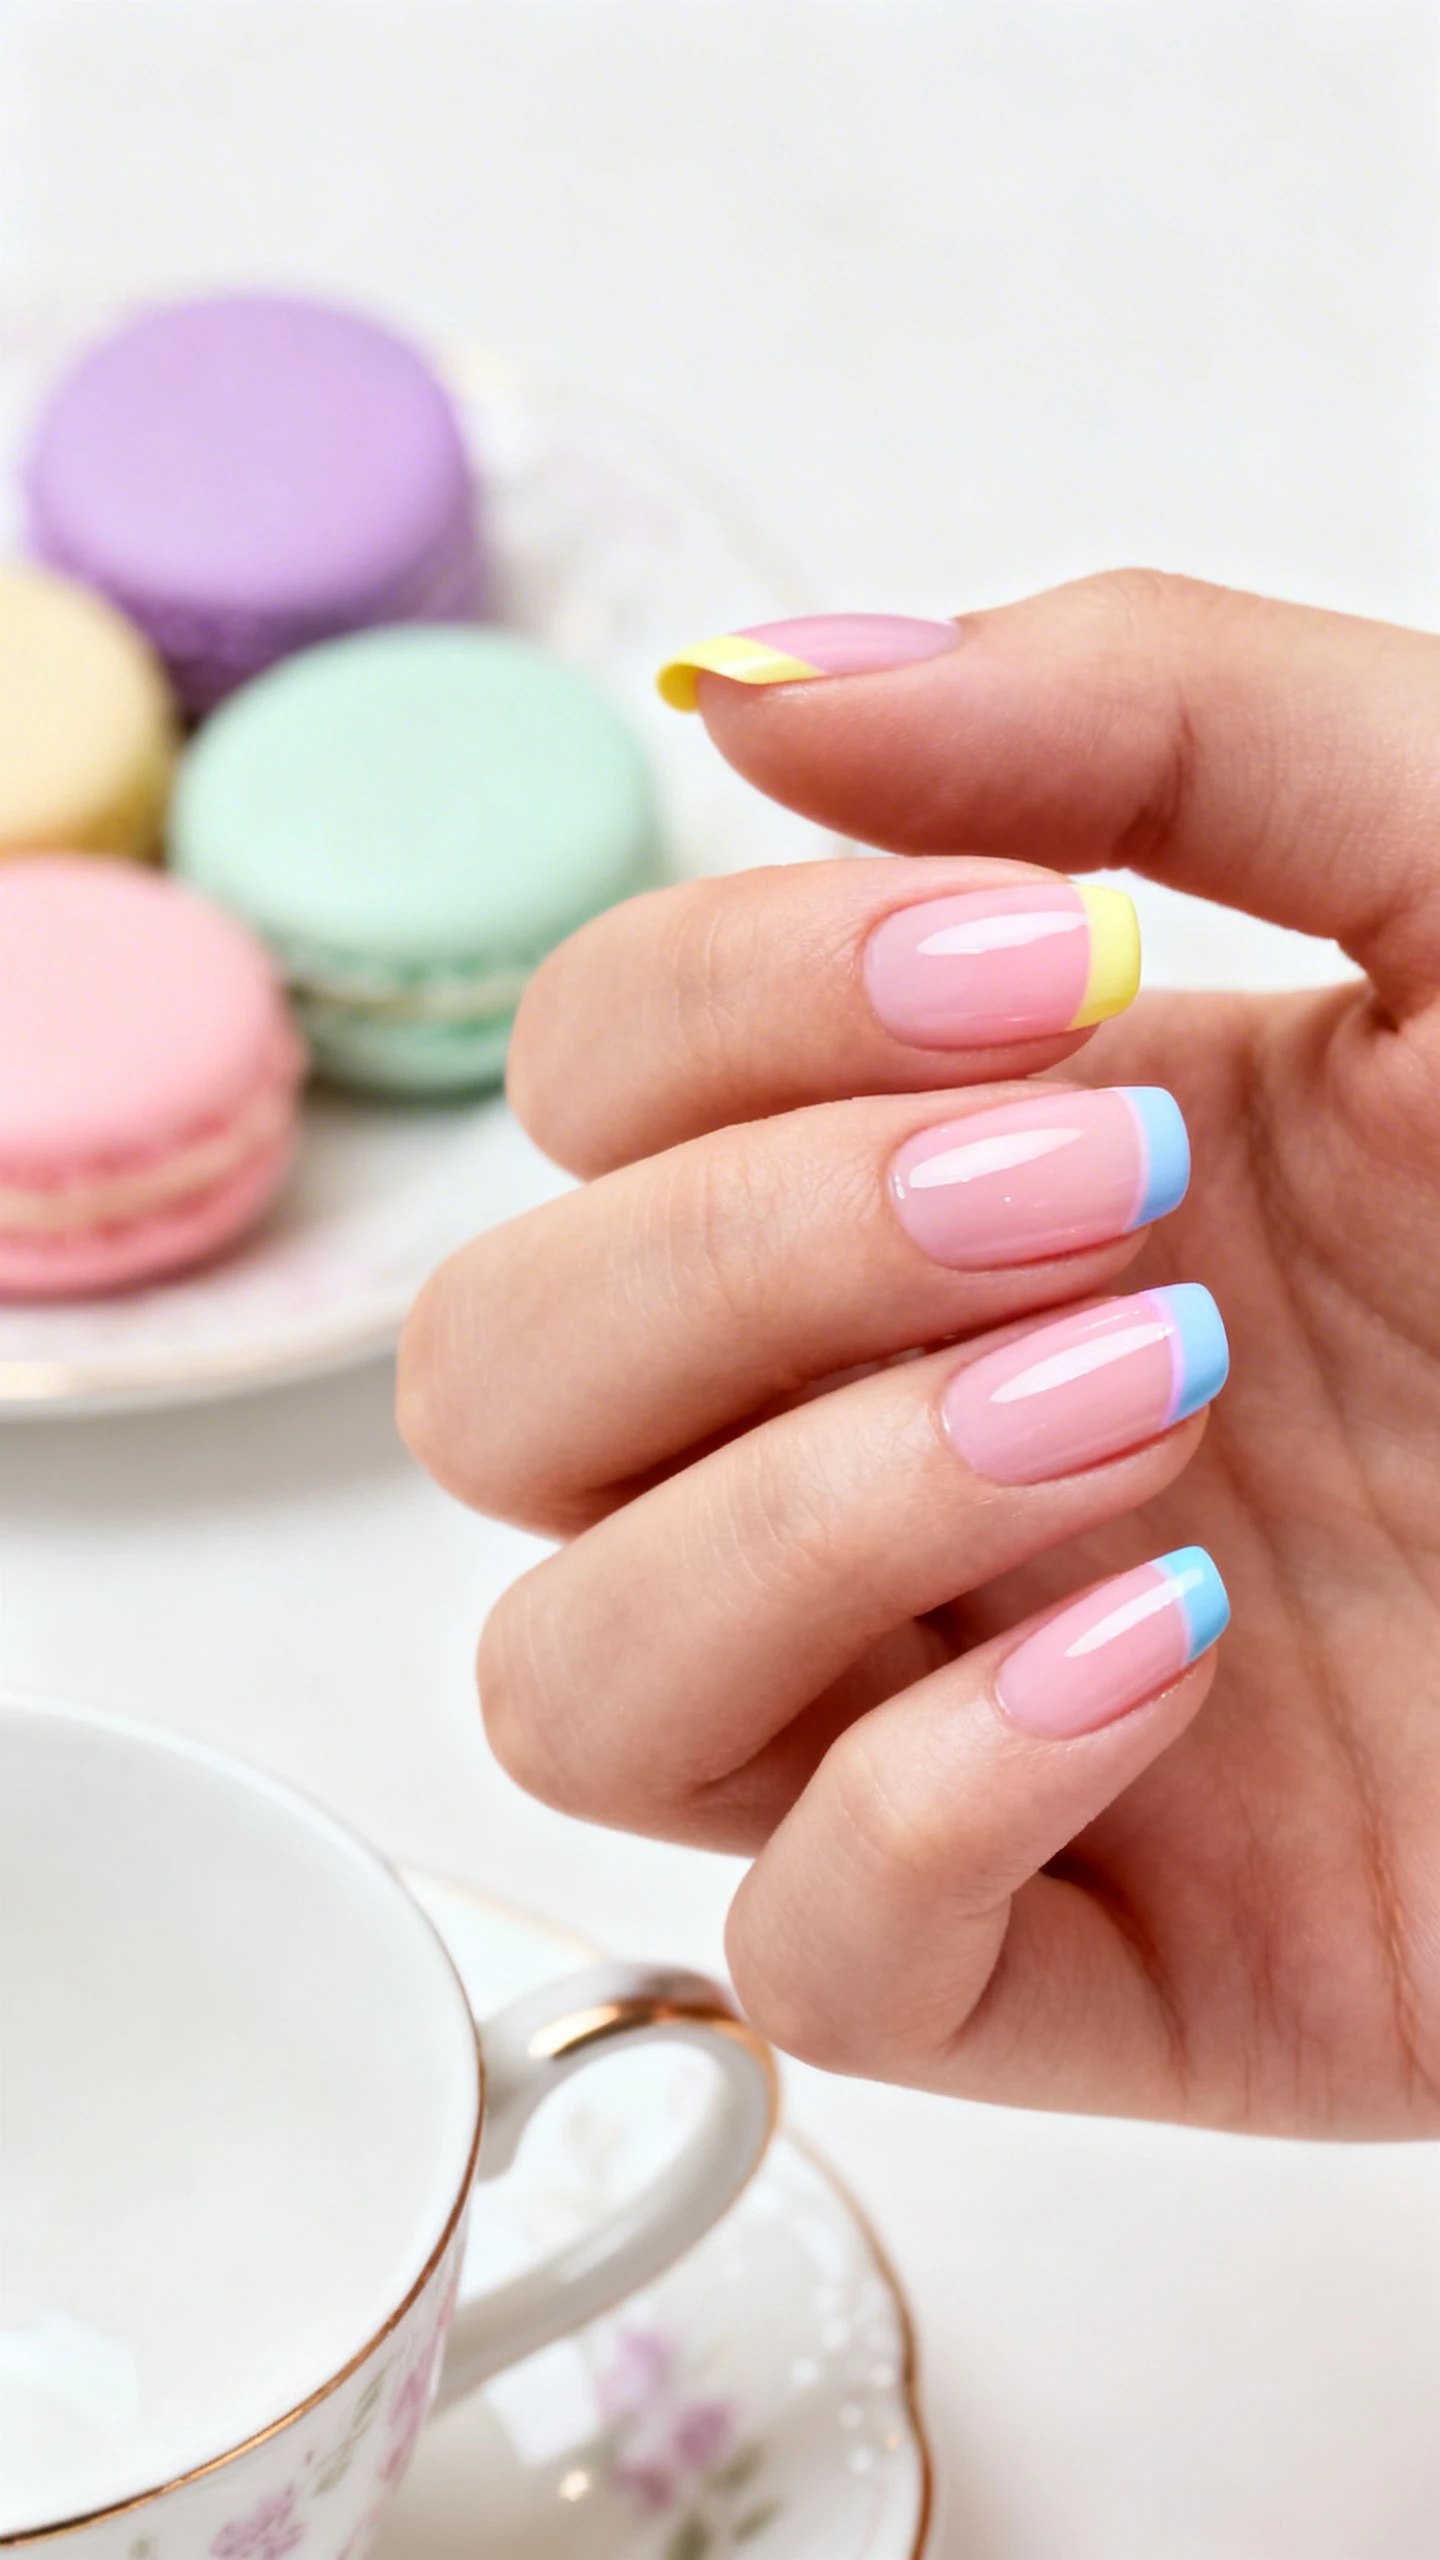
Consider this the grown-up Easter French: airy pastel tips with a glossy “glaze” that catches light like spun sugar. The soft-tone tips feel festive but elegant, and the right long-wear, glossy top coat keeps the smile line crisp and your manicure chip-free through brunch and beyond. Bonus: the shine magnifies the curvature of the tip, making your nails look longer and more refined.
For the brightest, glassiest finish, use two thin layers of top coat—curing in natural light between coats if it’s a standard air-dry formula. Seal the free edge to protect those pastel tips from tipwear.
Nail Details:
– Shape: Medium almond or short oval for a sleek, elongated look.
– Base: Sheer pink or sheer cream to create a clean, healthy-looking bed.
– Tips: Soft pastel micro-French or classic French, about 1–2 mm wide.
– Colors: Lemon sorbet yellow, icy mint, lilac, and sky blue—either one color for all tips or alternating per nail.
– Lines: Crisp, even smile lines with symmetrical curves; no visible streaking.
– Accent: Optional fine holographic line directly under the pastel tip on ring fingers.
– Finish: Ultra-glossy, syrupy top coat that creates a jelly-like shine; edge capped to minimize chips.
– Overall look: Sheer base with neat pastel tips, luminous glaze top coat that reflects a soft highlight down the nail center.
Top Coat Tip
French tips love shine. If your top coat tends to shrink at the tip, wrap the edge first with a tiny swipe, then float a full coat over the entire nail to avoid receding lines.
4) Bunny Ears + Meadow Dots

If you’re into playful art but want a manicure that still feels editorial, try minimalist bunny ears paired with meadow-inspired dots. A crystal-clear glossy shield turns this into a miniature illustration sealed under glass. The shine protects delicate linework and keeps fine dots from lifting or fading.
Choose a top coat labeled non-yellowing to preserve crisp whites. Apply your top coat in a single, confident stroke where possible to avoid dragging thin details. If you have ridges, consider a smoothing top coat to level the canvas before your final gloss layer.
Nail Details:
– Shape: Short to medium squoval or oval for a clean art canvas.
– Base: Soft cream or very sheer pink for a bright, clean background.
– Feature nail: On each hand, the ring finger shows a small white bunny ear silhouette near the cuticle or sidewall—two slender, rounded ears with a light pink inner-ear detail.
– Supporting nails: Scattered micro-dots suggesting a fresh meadow.
– Colors: White for ears, pastel pink for inner ears, and dots in mint, pale yellow, lilac, and light coral; dot sizes vary slightly for an organic feel.
– Placement: Ears off-center for a modern composition; dots evenly distributed with some negative space.
– Finish: High-shine, glassy top coat that keeps linework crisp and dots sealed flat.
– Overall look: Clean background with a single, charming motif; airy spacing; reflective shine that highlights the tiny art beneath.
Application Hack
When protecting fine details, let the art dry completely—3–5 extra minutes—then “float” the top coat by loading the brush and barely touching the surface, avoiding drag.
5) Pastel Plaid Wrap with Vinyl Shine
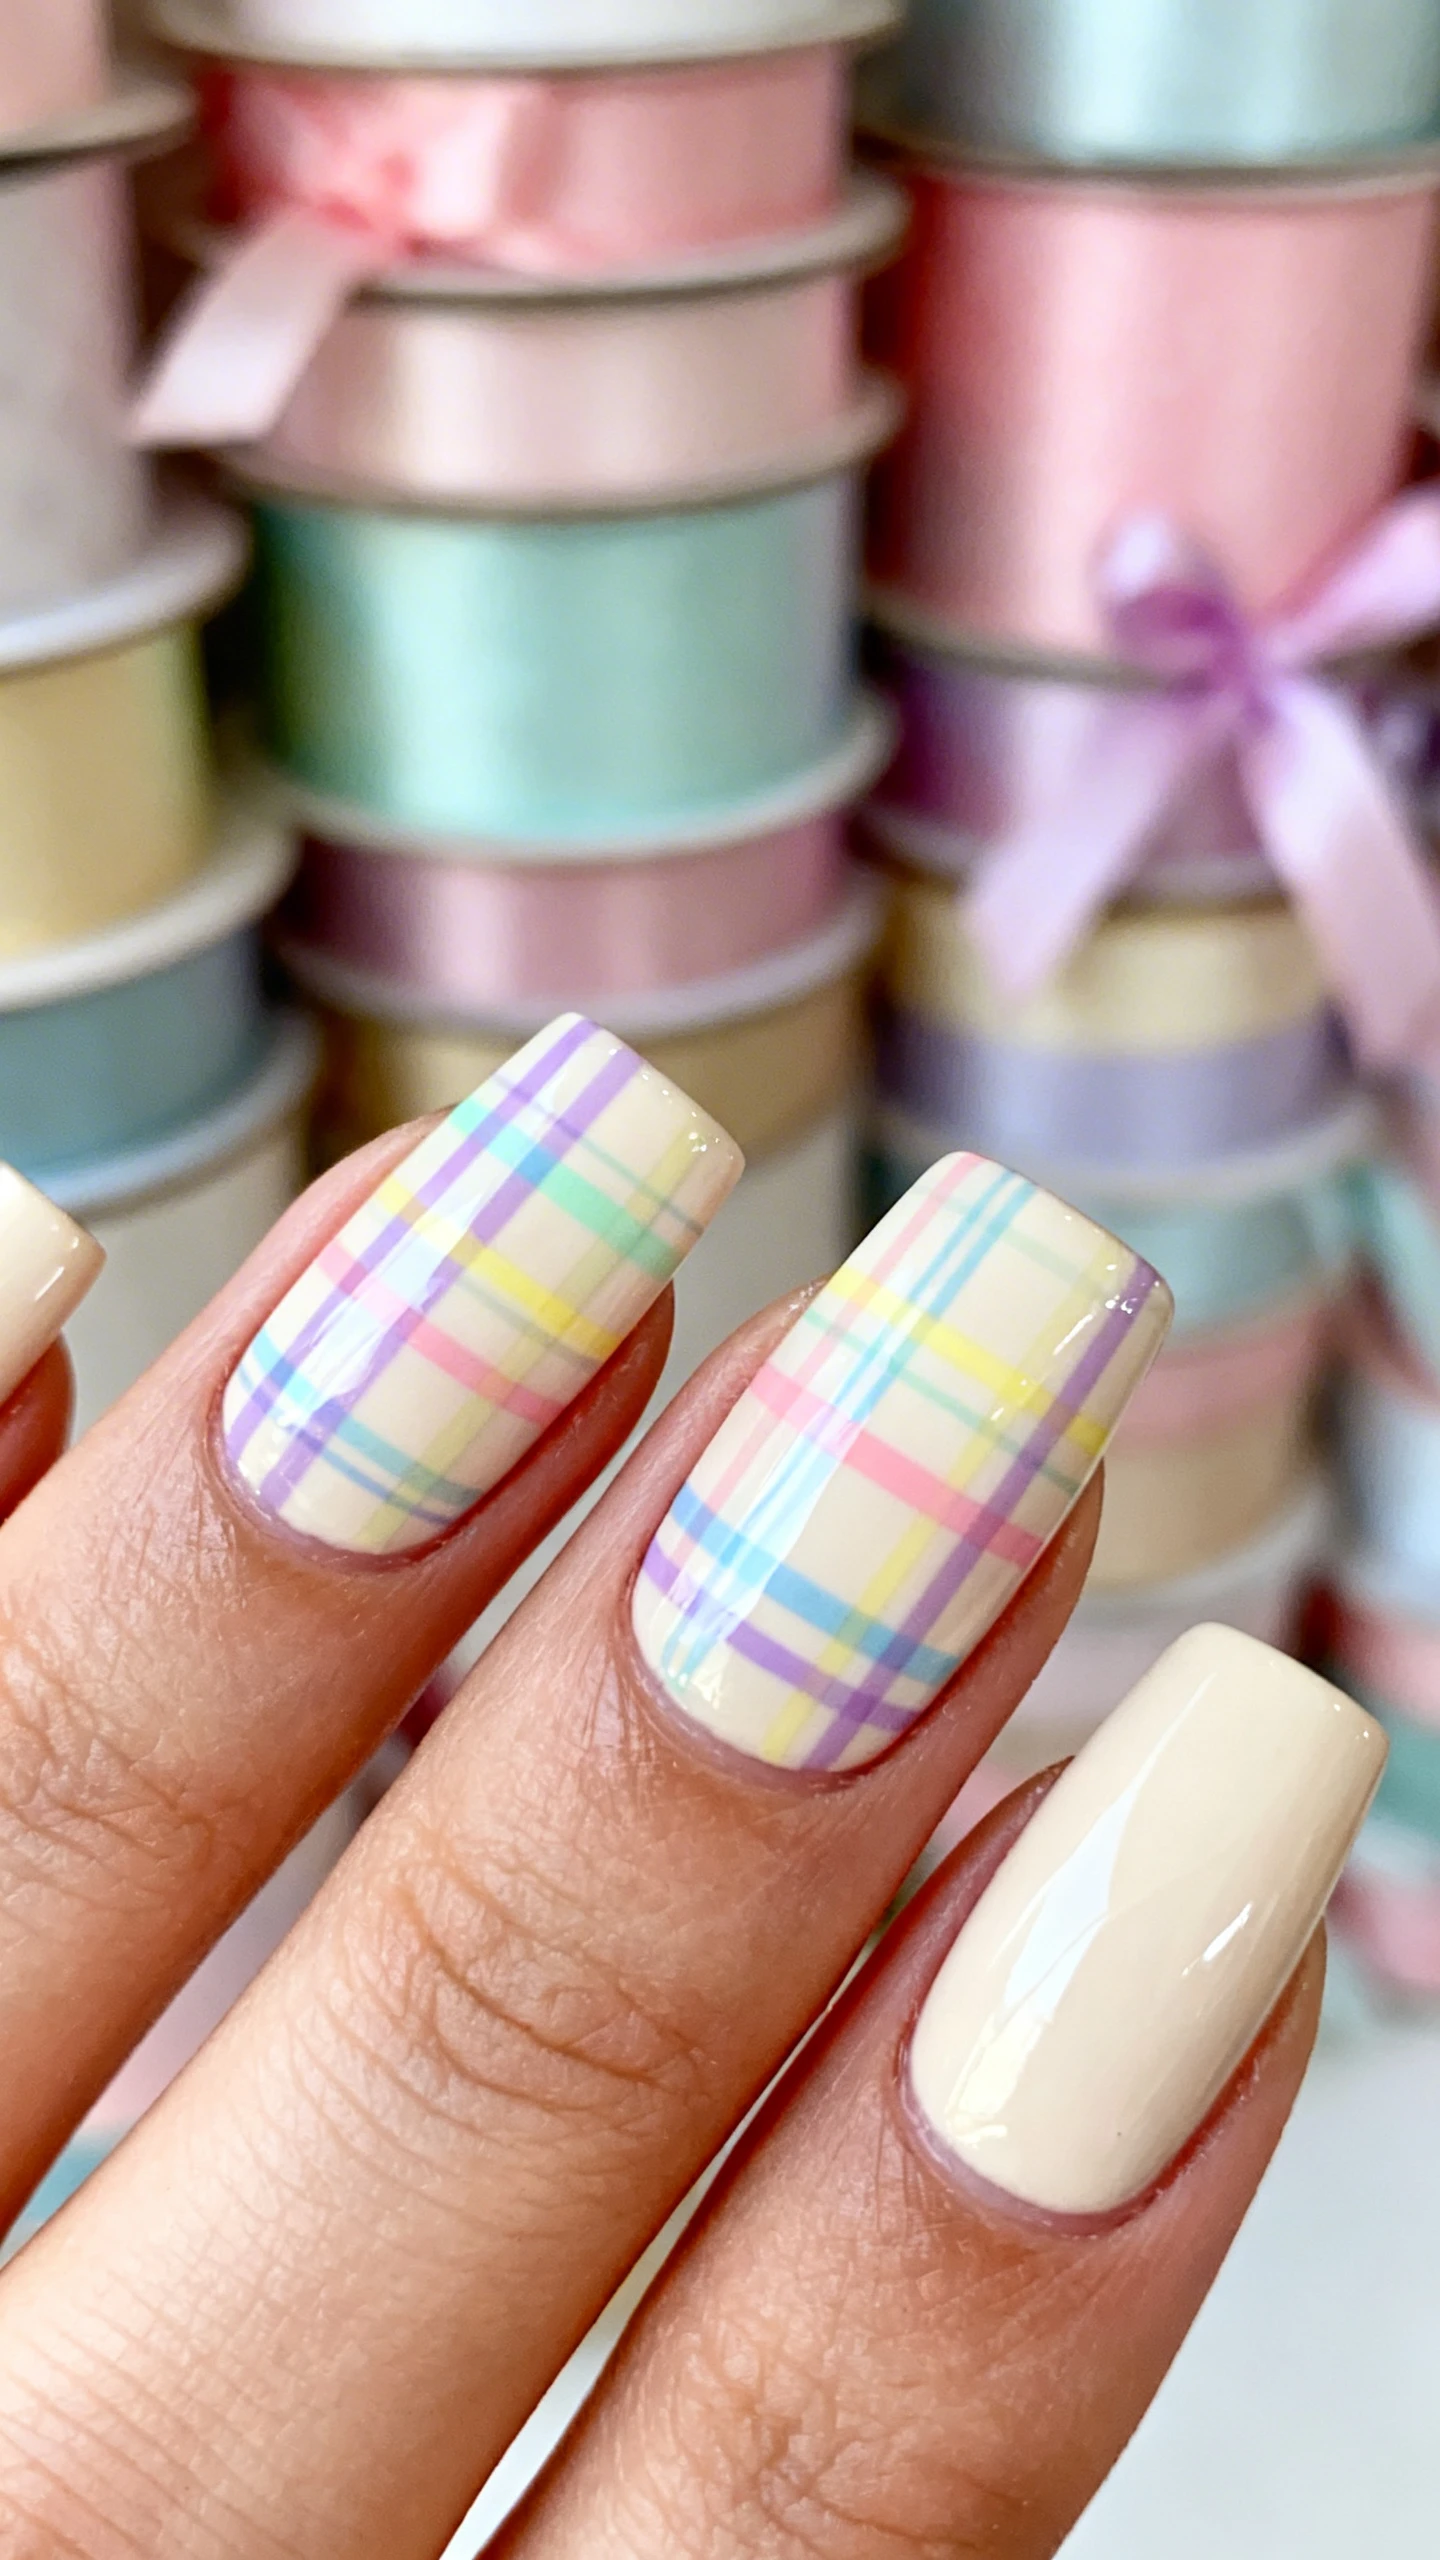
Pastel plaid is the cozy cardigan of Easter nails—structure, softness, and a whole lot of charm. When you top it with a slick, almost vinyl-like gloss, the pattern looks ultra-crisp and intentional. A durable, glossy top coat won’t just add shine—it fuses multiple lines and layers into a smooth, cohesive surface that resists snags and daily wear.
To keep lines vibrant, use a fast-dry top coat that doesn’t blur pigment. Work in thin layers and cure each hand alone (for regular polish, give a few minutes between coats). The shiny, leveled finish makes your plaid read like a professional wrap.
Nail Details:
– Shape: Medium to long square or soft square to emphasize the linear pattern.
– Base: Opaque cream or pale sand for high contrast.
– Pattern: Pastel plaid created with fine striping lines—horizontal and vertical—with varying widths.
– Colors: Lavender, mint, butter yellow, baby blue, and a touch of soft coral; the thinnest lines may be white for brightness.
– Line style: Some lines semi-transparent and some opaque to create layered dimension; consistent spacing across nails.
– Accent nail: Middle finger with a slightly denser plaid for visual balance.
– Finish: Ultra-glossy, vinyl-like top coat that self-levels, eliminating any ridges from layered striping.
– Overall look: Crisp, colorful grid with luminous shine and a smooth surface that feels like a gel overlay.
Pro Finish Tips for Maximum Gloss
- Float, don’t press: Load your brush well and let the product glide. This prevents brush marks and preserves art.
- Cap the free edge: Run the brush along the tip to minimize tipwear—essential for light pastels.
- Two thin layers beat one thick: You’ll get more depth and longer wear without bubbles.
- Mind dry times: Let designs set 5–10 minutes before top coat. For heavy art, double it.
- Clean cuticles: A crisp outline elevates shine. Use a tiny brush dipped in remover to perfect the edge before top coat.

- High-Quality Press-On Nail Kit: All Glamnetic Press-On Nail Sets offer high-quality salon style and feature protective U…
- Everyone loves a classic french tip mani, but we’re all about changing it up with summer-approved hues! Our Confetti Pre…
- Premium Durability with Up To 2 Weeks Per Wear – High-quality is our middle name. This customizable nail set can be trim…
Glossy Top Coat Features to Look For
- Quick-dry for smudge prevention when layering delicate art.
- Self-leveling to smooth speckles, stripes, and micro-embellishments.
- Non-yellowing UV filters to keep whites and creams bright.
- Flexible, chip-resistant polymers for longer wear on thin pastel coats.
- Scuff-resistance so your shine stays mirror-like longer.
How to Make Your Shine Last
- Refresh every 3–4 days: A single thin layer of top coat reactivates gloss and seals micro-cracks.
- Gloves for chores: Detergents are shine killers. Protect that finish.
- Cuticle oil daily: Hydrated nails flex instead of chip; oil also boosts surface gleam.
- Avoid hot water immediately post-mani: Give polish a full hour to set, even with quick-dry formulas.
Whether you’re team Skittles or devoted to delicate speckles, a stellar glossy top coat is the difference between “cute” and “can’t stop staring.” Pick the formula that suits your art—fast-dry for intricate details, self-leveling for layered designs, non-yellowing for milky bases—and finish with confident, floating strokes. Your Easter manicure will look sealed, shiny, and ready for every photo op, from basket close-ups to brunch cheers. Shine on.