5 Floral Stamps for Easter Nail Ideas Spring
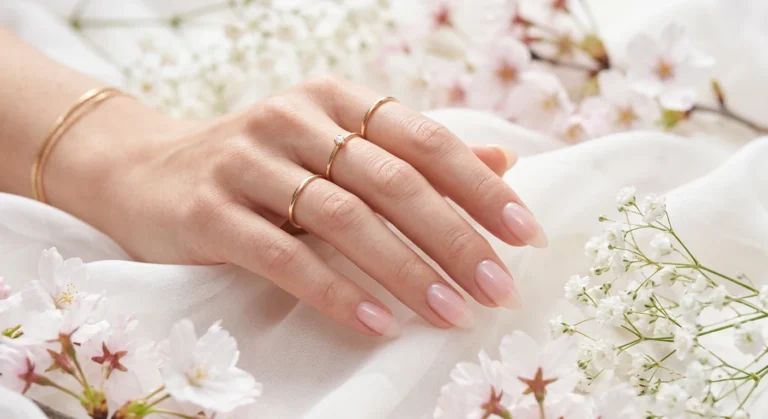
Spring is officially calling our names! The birds are chirping a little louder, the sun is sticking around a bit longer, and that heavy winter coat is finally ready to be retired. But let’s be real—the most exciting part of the season changing is the transition in our beauty routines. It’s time to stash those deep, moody burgundies and vampy blacks and welcome back the soft, vibrant hues that scream new beginnings.
If you love nail art but maybe don’t have the steadiest hand for free-hand painting, I have fantastic news for you. Stamping plates are the absolute unsung heroes of the manicure world. They allow you to create intricate, salon-quality designs that look like they took hours to paint, but in reality, only take minutes. For Easter and the spring season, floral stamps are the perfect way to get into the spirit without looking like a walking bouquet. We are talking delicate lines, perfect petals, and patterns that are just *chef’s kiss*.
Whether you are planning a chic Easter brunch, heading out for a sunny garden party, or just want your fingertips to look fresh and aesthetic for your own enjoyment, I have curated the ultimate list of inspiration. Grab your stamper, your favorite polishes, and let’s dive into these five stunning floral stamp designs that are about to become your new obsession.
1. The Soft Pastel Daisy Chain
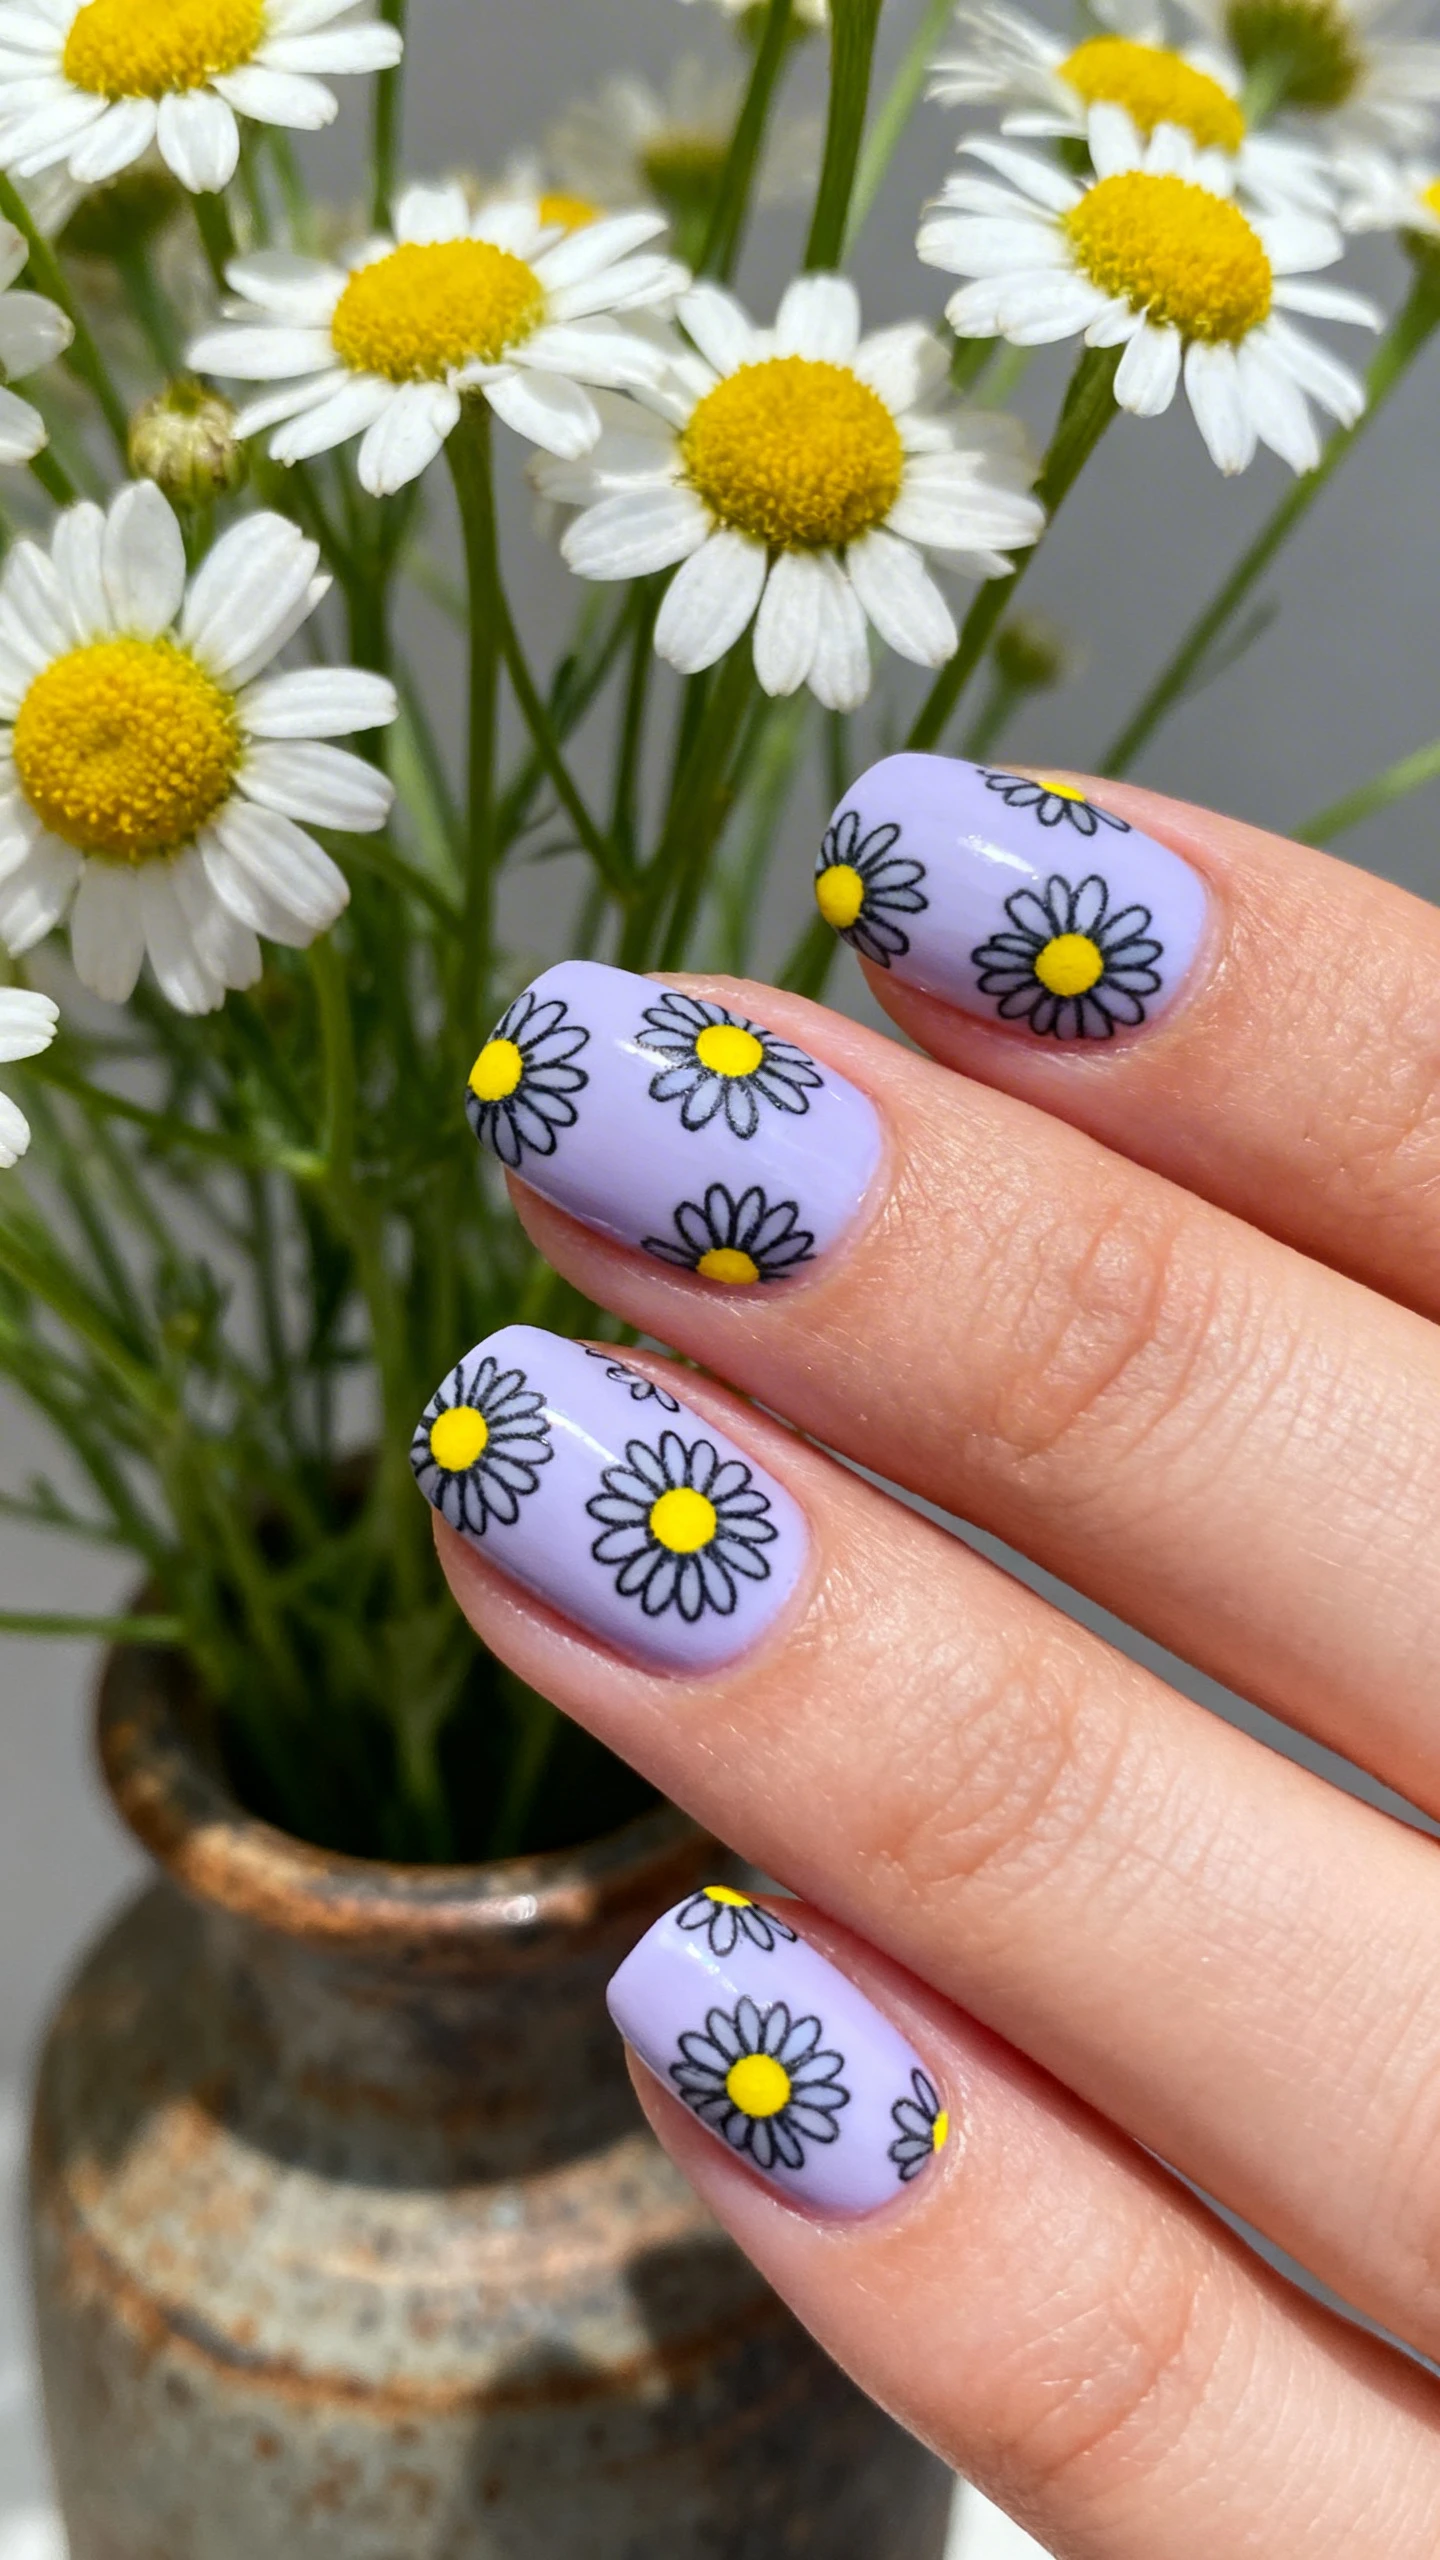
There is something so effortlessly cheerful about daisies. They are the quintessential spring flower, representing innocence and purity, but they can also be incredibly trendy when done right. For this first look, we are moving away from the standard white daisy on a stark white base and instead embracing the “Pastel Goth” and “Coquette” aesthetics that are dominating TikTok and Pinterest right now. This design is all about softness and dimension. It’s playful enough for an egg hunt but sophisticated enough for a dinner date.
The beauty of using a stamping plate for daisies is the crisp outline. Hand-painting petals can often result in shaky lines, but a stamp gives you that perfect, crisp black or dark grey outline every single time. This design utilizes a technique called “double stamping” or “coloring in,” where you stamp the outline first and then go back in with a brush or a sponge to fill the petals with color. It sounds complex, but it’s actually very therapeutic!
Nail Details:
* Base Color: A soft, creamy lilac or baby blue polish applied evenly across all nails.
* Pattern: Scattered daisy clusters. The stamp features the outline of the daisies in a dark charcoal grey (softer than black).
* Accent: The centers of the daisies are stamped with a bright, lemon yellow. Some petals are filled in with a sheer white polish to add depth against the pastel base.
* Finish: A high-gloss, quick-drying top coat to make the colors pop.
Why This Design Works
This look is incredibly versatile because you can customize the base color to match any outfit. If you’re wearing a soft yellow dress, switch the base to a buttercream polish and keep the daisies white. The key here is keeping the pastel tones light and airy. Avoid neons; we want that dreamy, cloud-like vibe. Since the pattern is floral but the base is a solid block color, it doesn’t feel overwhelming. It’s just the right amount of “extra.” Plus, if you happen to get a chip, a pastel base is much easier to fix than a complex pattern!
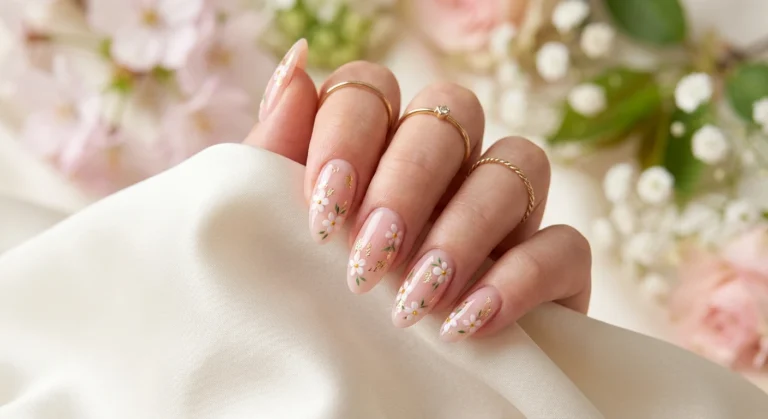
2. Vintage Rose Garden French Tips
The French tip has made a massive comeback, but it has evolved far beyond the original white smile line. We are seeing colorful tips, geometric lines, and now, intricate art tucked right at the base of the nail. This “Vintage Rose Garden” design is perfect for Easter Sunday. It feels elegant, expensive, and incredibly polished. Think of it as the “Old Money” aesthetic meets the modern floral trend. It’s a nod to classic manicures but with a romantic, botanical twist that feels fresh for spring.
Instead of covering the whole nail, we are framing the art. By placing the roses near the cuticle area or along the tip, you create a negative space that makes the nails look longer and slender. This is a great trick if you have shorter nail beds and want to elongate them without wearing extensions. The stamping plate you want to look for here should feature dense clusters of roses and leaves, resembling a vintage wallpaper or a tea cup pattern.
Nail Details:
* Base Color: A sheer, milky beige or soft pink jelly polish. It should be translucent enough to see the natural nail through it slightly, creating a “your nails but better” look.
* Pattern: A dense, cascading cluster of dark pink and red roses with sage green leaves.
* Placement: The floral cluster is stamped diagonally across the tip of the nail, mimicking a modern French tip, or concentrated at the moon of the nail for a half-moon look.
* Finish: A matte top coat is optional here, but a matte finish over the roses adds a velvety, vintage texture that is absolutely to die for.
Styling Tips for the Vintage Vibe
To really sell this look, keep your nail shape almond or oval. These soft shapes complement the romantic curves of the rose stamps perfectly. When choosing your stamping polish for the roses, opt for a formula with high pigmentation. You want those reds and pinks to look rich and juicy against the sheer base. If you want to add a bit of bling for Easter, a single rhinestone placed at the center of the largest rose on your ring finger adds just the right amount of sparkle without crossing into tacky territory.
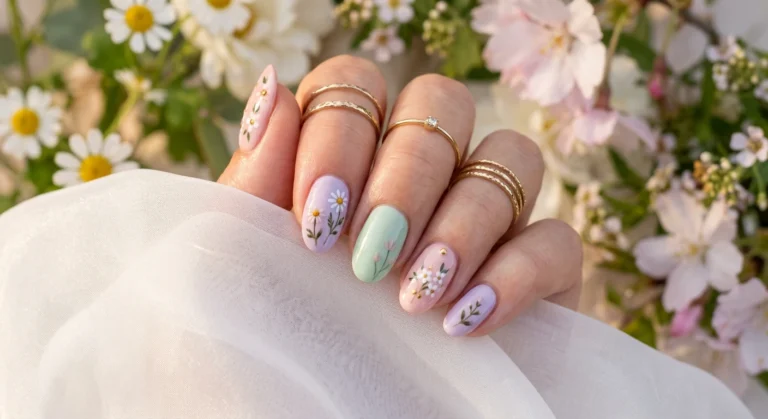
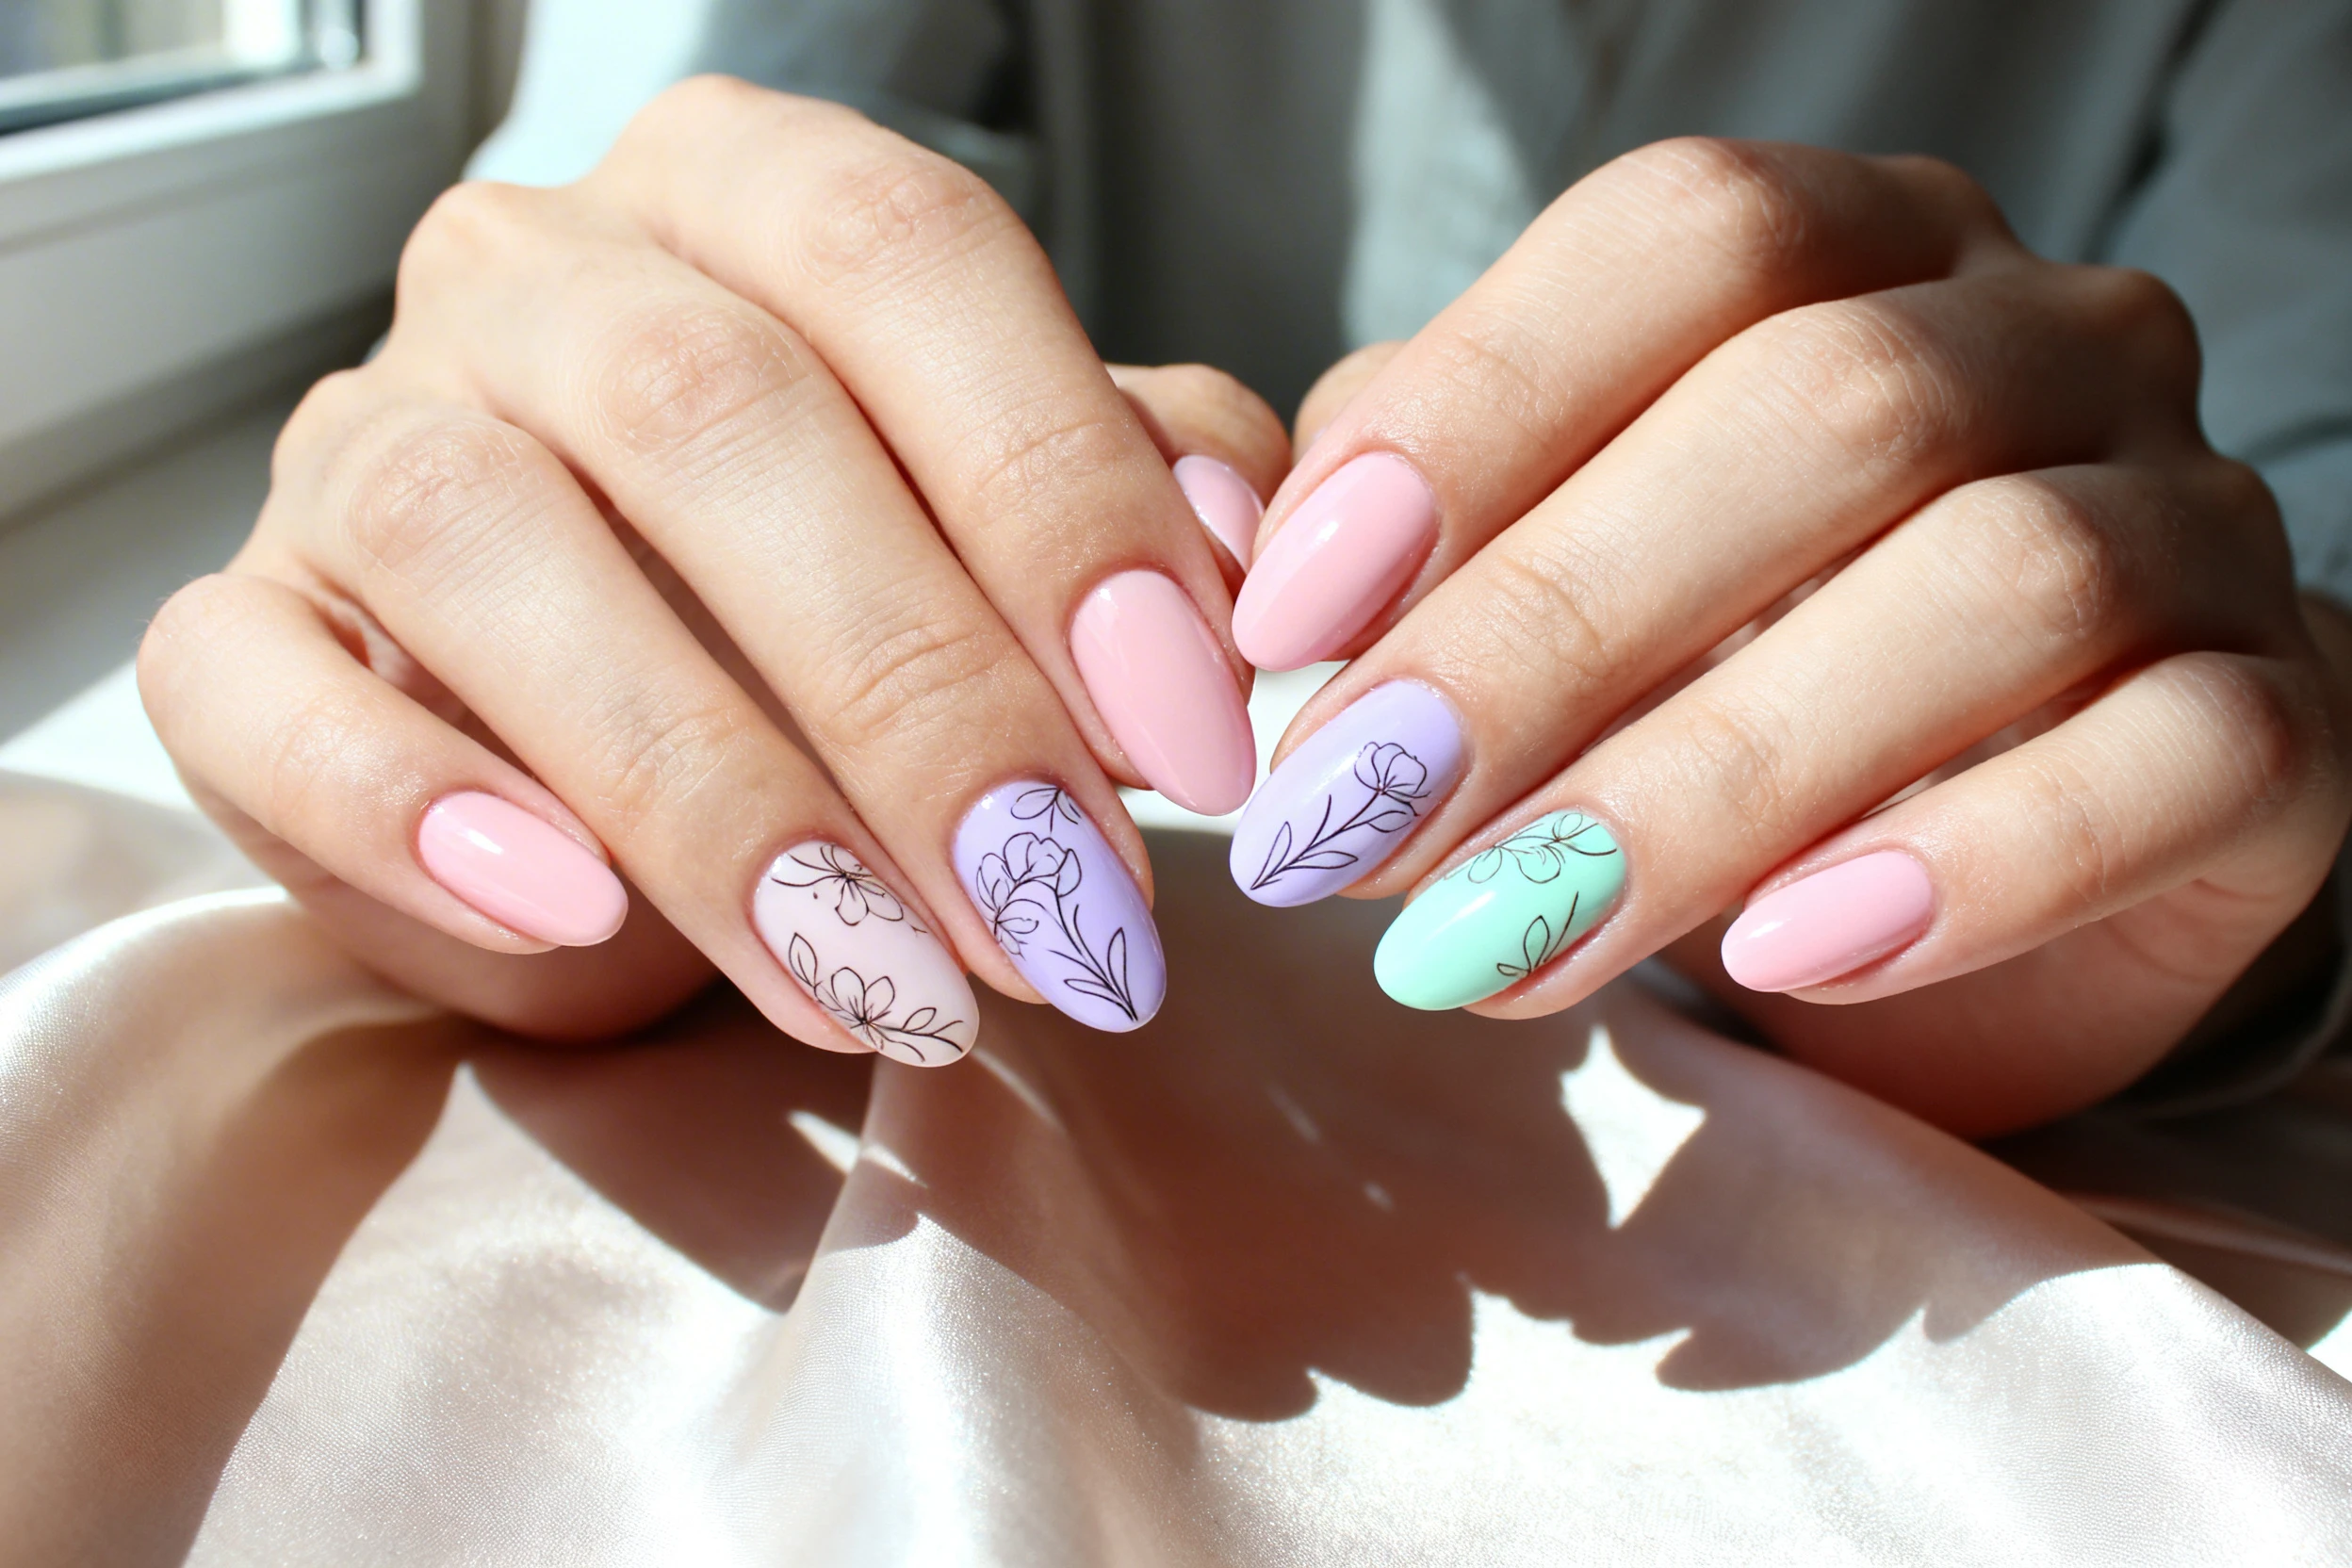
3. Abstract Wildflower Meadow
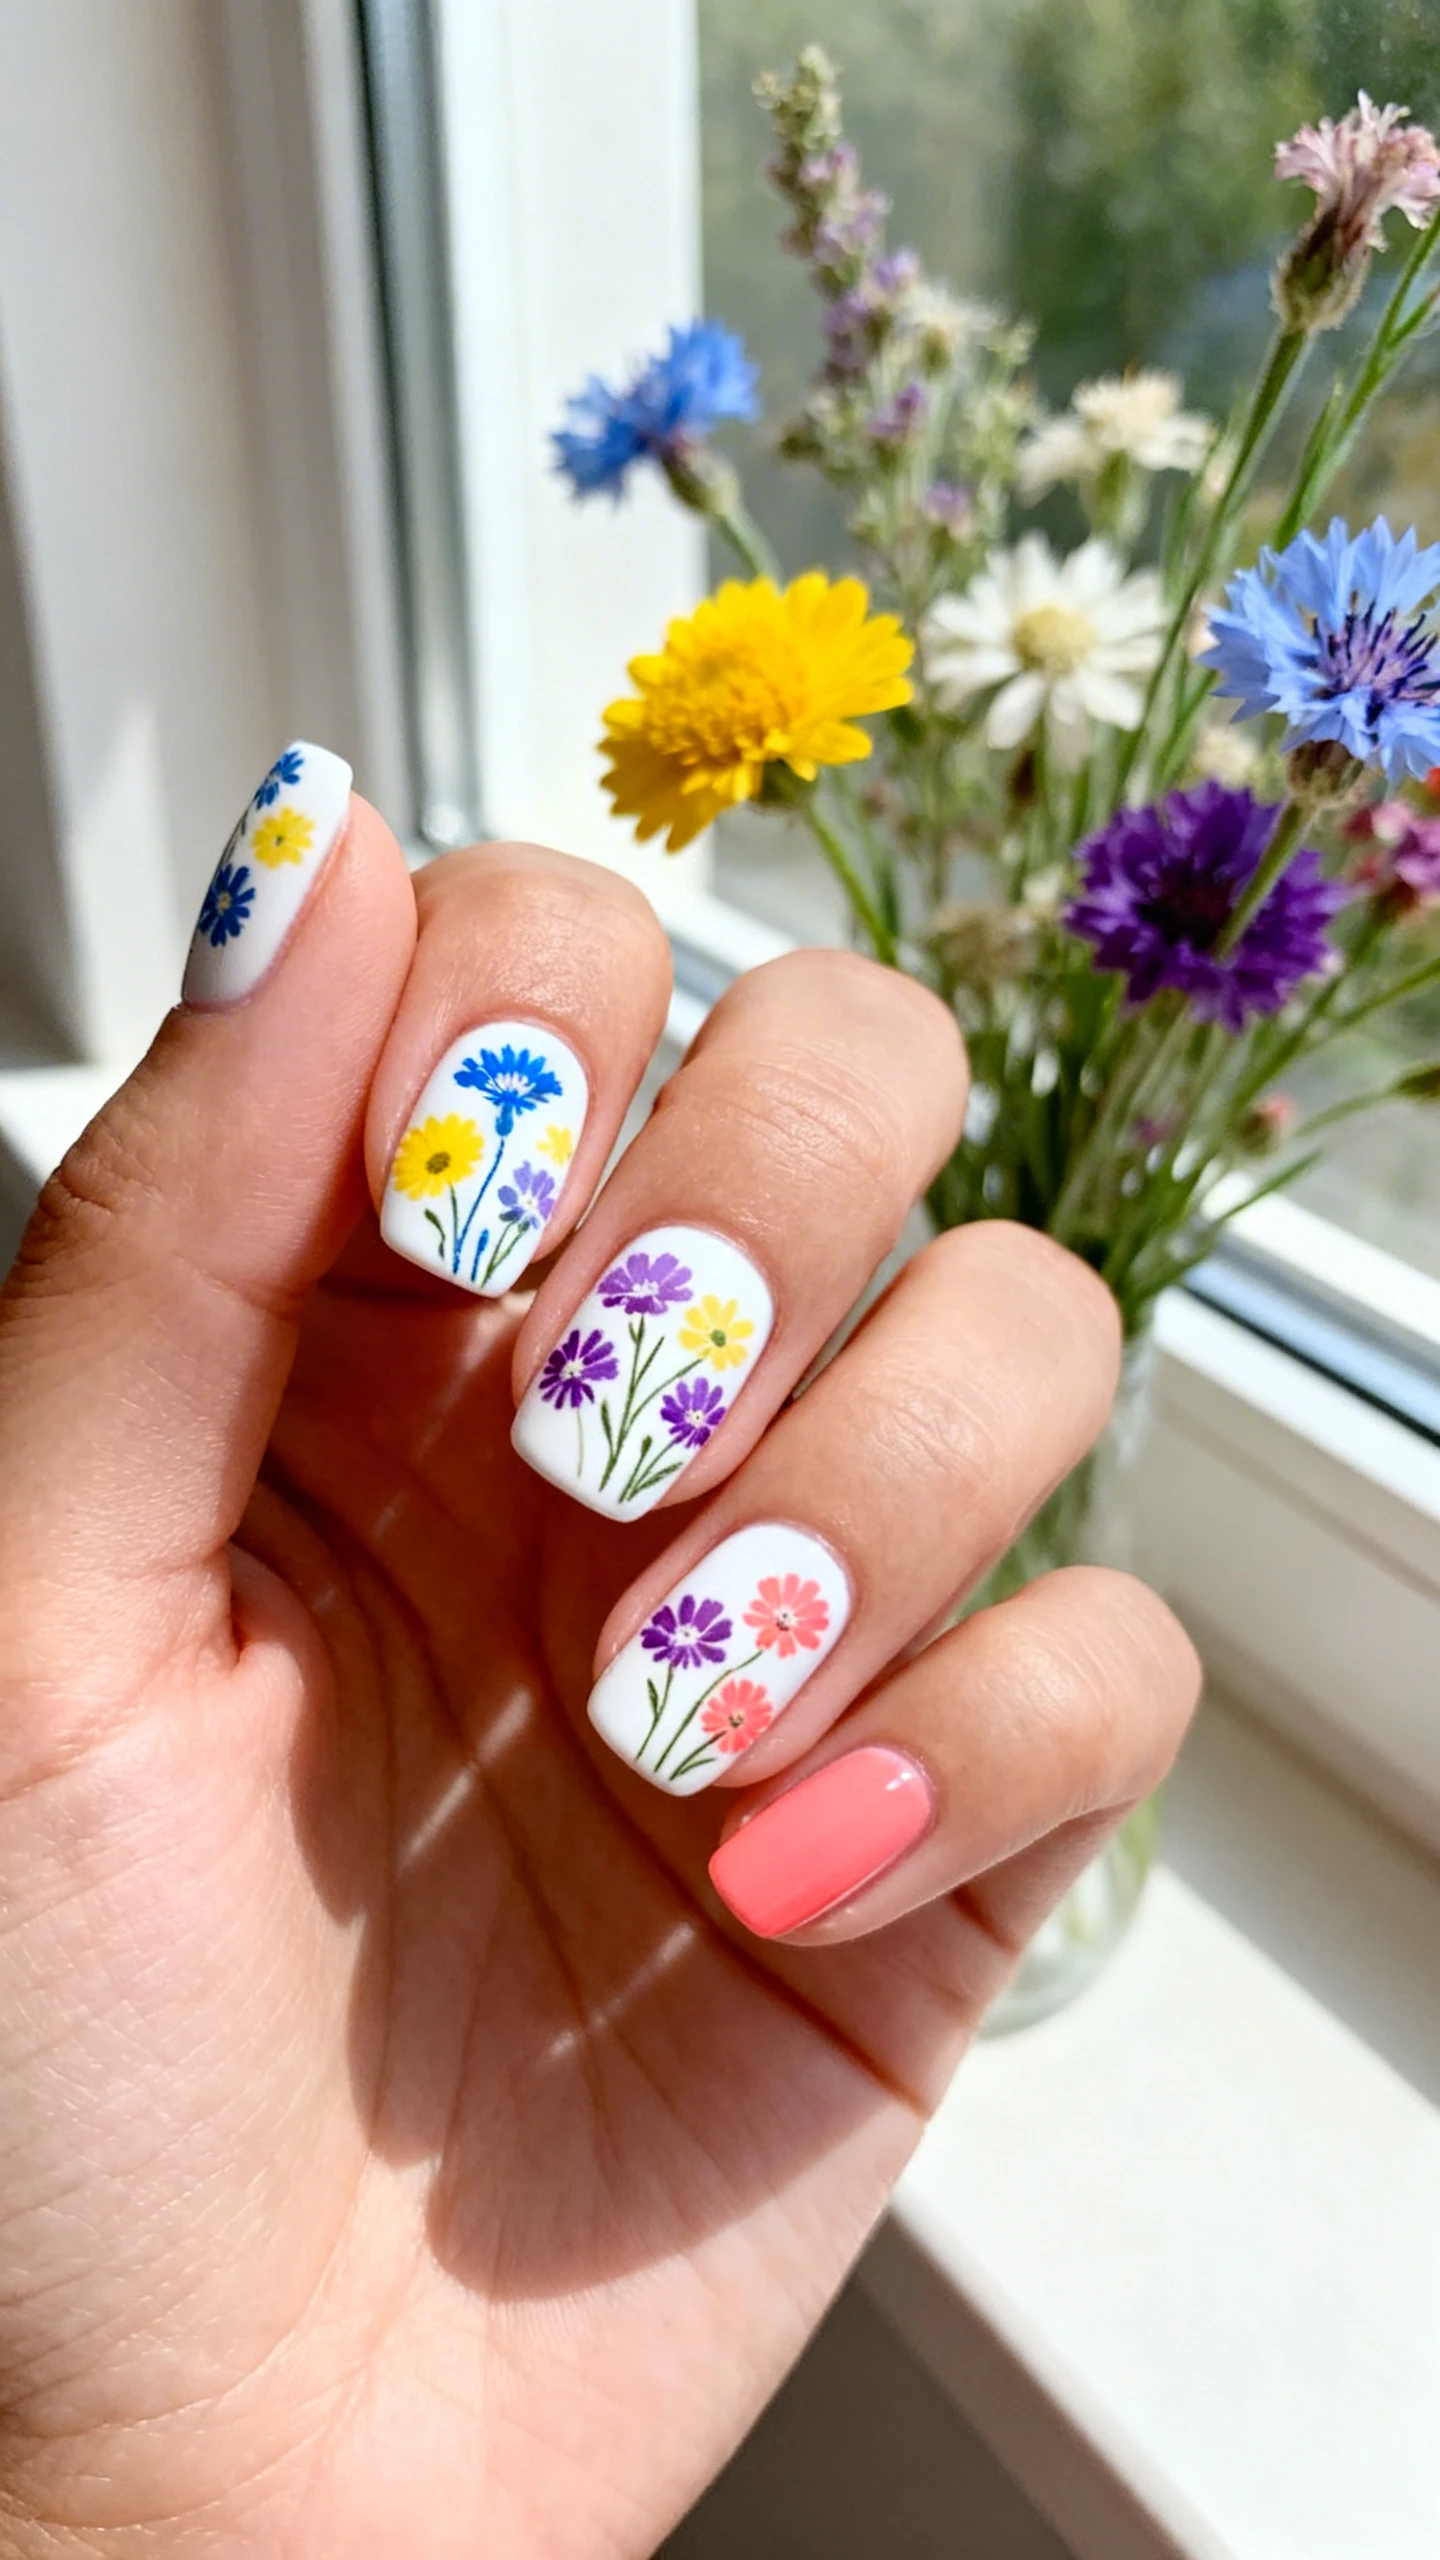
For the maximalists out there, this one is for you. The “Abstract Wildflower” design is inspired by Monet paintings and wildflower fields where nothing is perfectly in line, but everything is beautiful. This look embraces the “scattered” trend. It’s colorful, it’s bright, and it captures the chaotic energy of nature blooming all at once. This is a fantastic choice if you are wearing a neutral outfit and want your nails to be the main accessory.
The trick to nailing this with a stamping plate is to use a plate that has individual, smaller images rather than one large full-nail decal. You want a plate that offers single stems of lavender, tulips, daffodils, and greenery. This allows you to curate the placement on each nail so that no two nails look exactly the same. It creates an organic, hand-painted feel that is surprisingly achievable with a stamper.
Nail Details:
* Base Color: A crisp, clean white or a very light sand cream to act as the canvas.
* Pattern: A mix of different floral stamps in cornflower blue, sunny yellow, lavender purple, and coral pink.
* Layout: The flowers are stamped at random angles, some overlapping slightly, with green leafy stems connecting them. They should look like they are “growing” out from the cuticle or floating across the nail.
* Finish: A glossy top coat to seal in the colorful chaos.
Pro-Tip for Scattering
When you are scattering multiple images on one nail, work quickly but carefully. Use a clear jelly stamper so you can see exactly where you are placing the image before you roll it onto the nail. Don’t worry if a flower hangs off the edge of the nail—that actually adds to the abstract, artistic vibe! It makes it look like a continuous meadow. If you are worried about the polish smudging since you are doing multiple layers, make sure your base coat is 100% dry before you start stamping, and use a stamping polish that dries relatively fast.
4. Romantic Cherry Blossom Drizzle

Cherry blossoms, or Sakura, are the ultimate symbol of spring. There is a specific aesthetic that comes with cherry blossom nails—it’s feminine, pink, and undeniably cute. This design moves away from the static branch look and instead focuses on falling petals and soft gradients. It mimics the feeling of standing under a tree when the wind blows and the petals dance around you. It’s a very “K-beauty” inspired look that is delicate and incredibly flattering on all skin tones.
To achieve this “drizzle” effect, we are going to combine a bit of sponge gradient work with our stamping. The background shouldn’t be a solid block; it needs to look like a spring sky at sunset or a soft dawn. This adds depth behind the darker pink petals, making them really stand out. This is one of those designs that looks complicated but relies heavily on the tools doing the heavy lifting.
Nail Details:
* Base Color: A soft gradient blending from a pale pink at the cuticle to a warm peach or soft coral at the free edge.
* Pattern: Delicate cherry blossom branches and individual falling petals. The stamps are in a deeper, dusty rose color with darker brownish-grey branches.
* Placement: The main branch is stamped on an angle, usually from the middle of the nail bed towards the tip, with loose petals stamped “falling” down towards the cuticle.
* Finish: A shimmering top coat or a “glass” top coat to give it a dewy, fresh morning glow.
Getting the Gradient Right
Before you even pick up your stamper, sponge that gradient onto your nails! Use a makeup sponge and dab the two pink colors together on the sponge, then dab it gently onto the nail. It doesn’t have to be perfect because the stamps will cover most of the transition area. This gradient base is what gives the manicure its “Romantic” title. It provides a softness that a solid creme base just can’t achieve. When choosing your plate, look for one that has varying sizes of petals—some large, some tiny specks—to create realistic perspective.
5. Cottagecore Ditsy Floral & Gingham
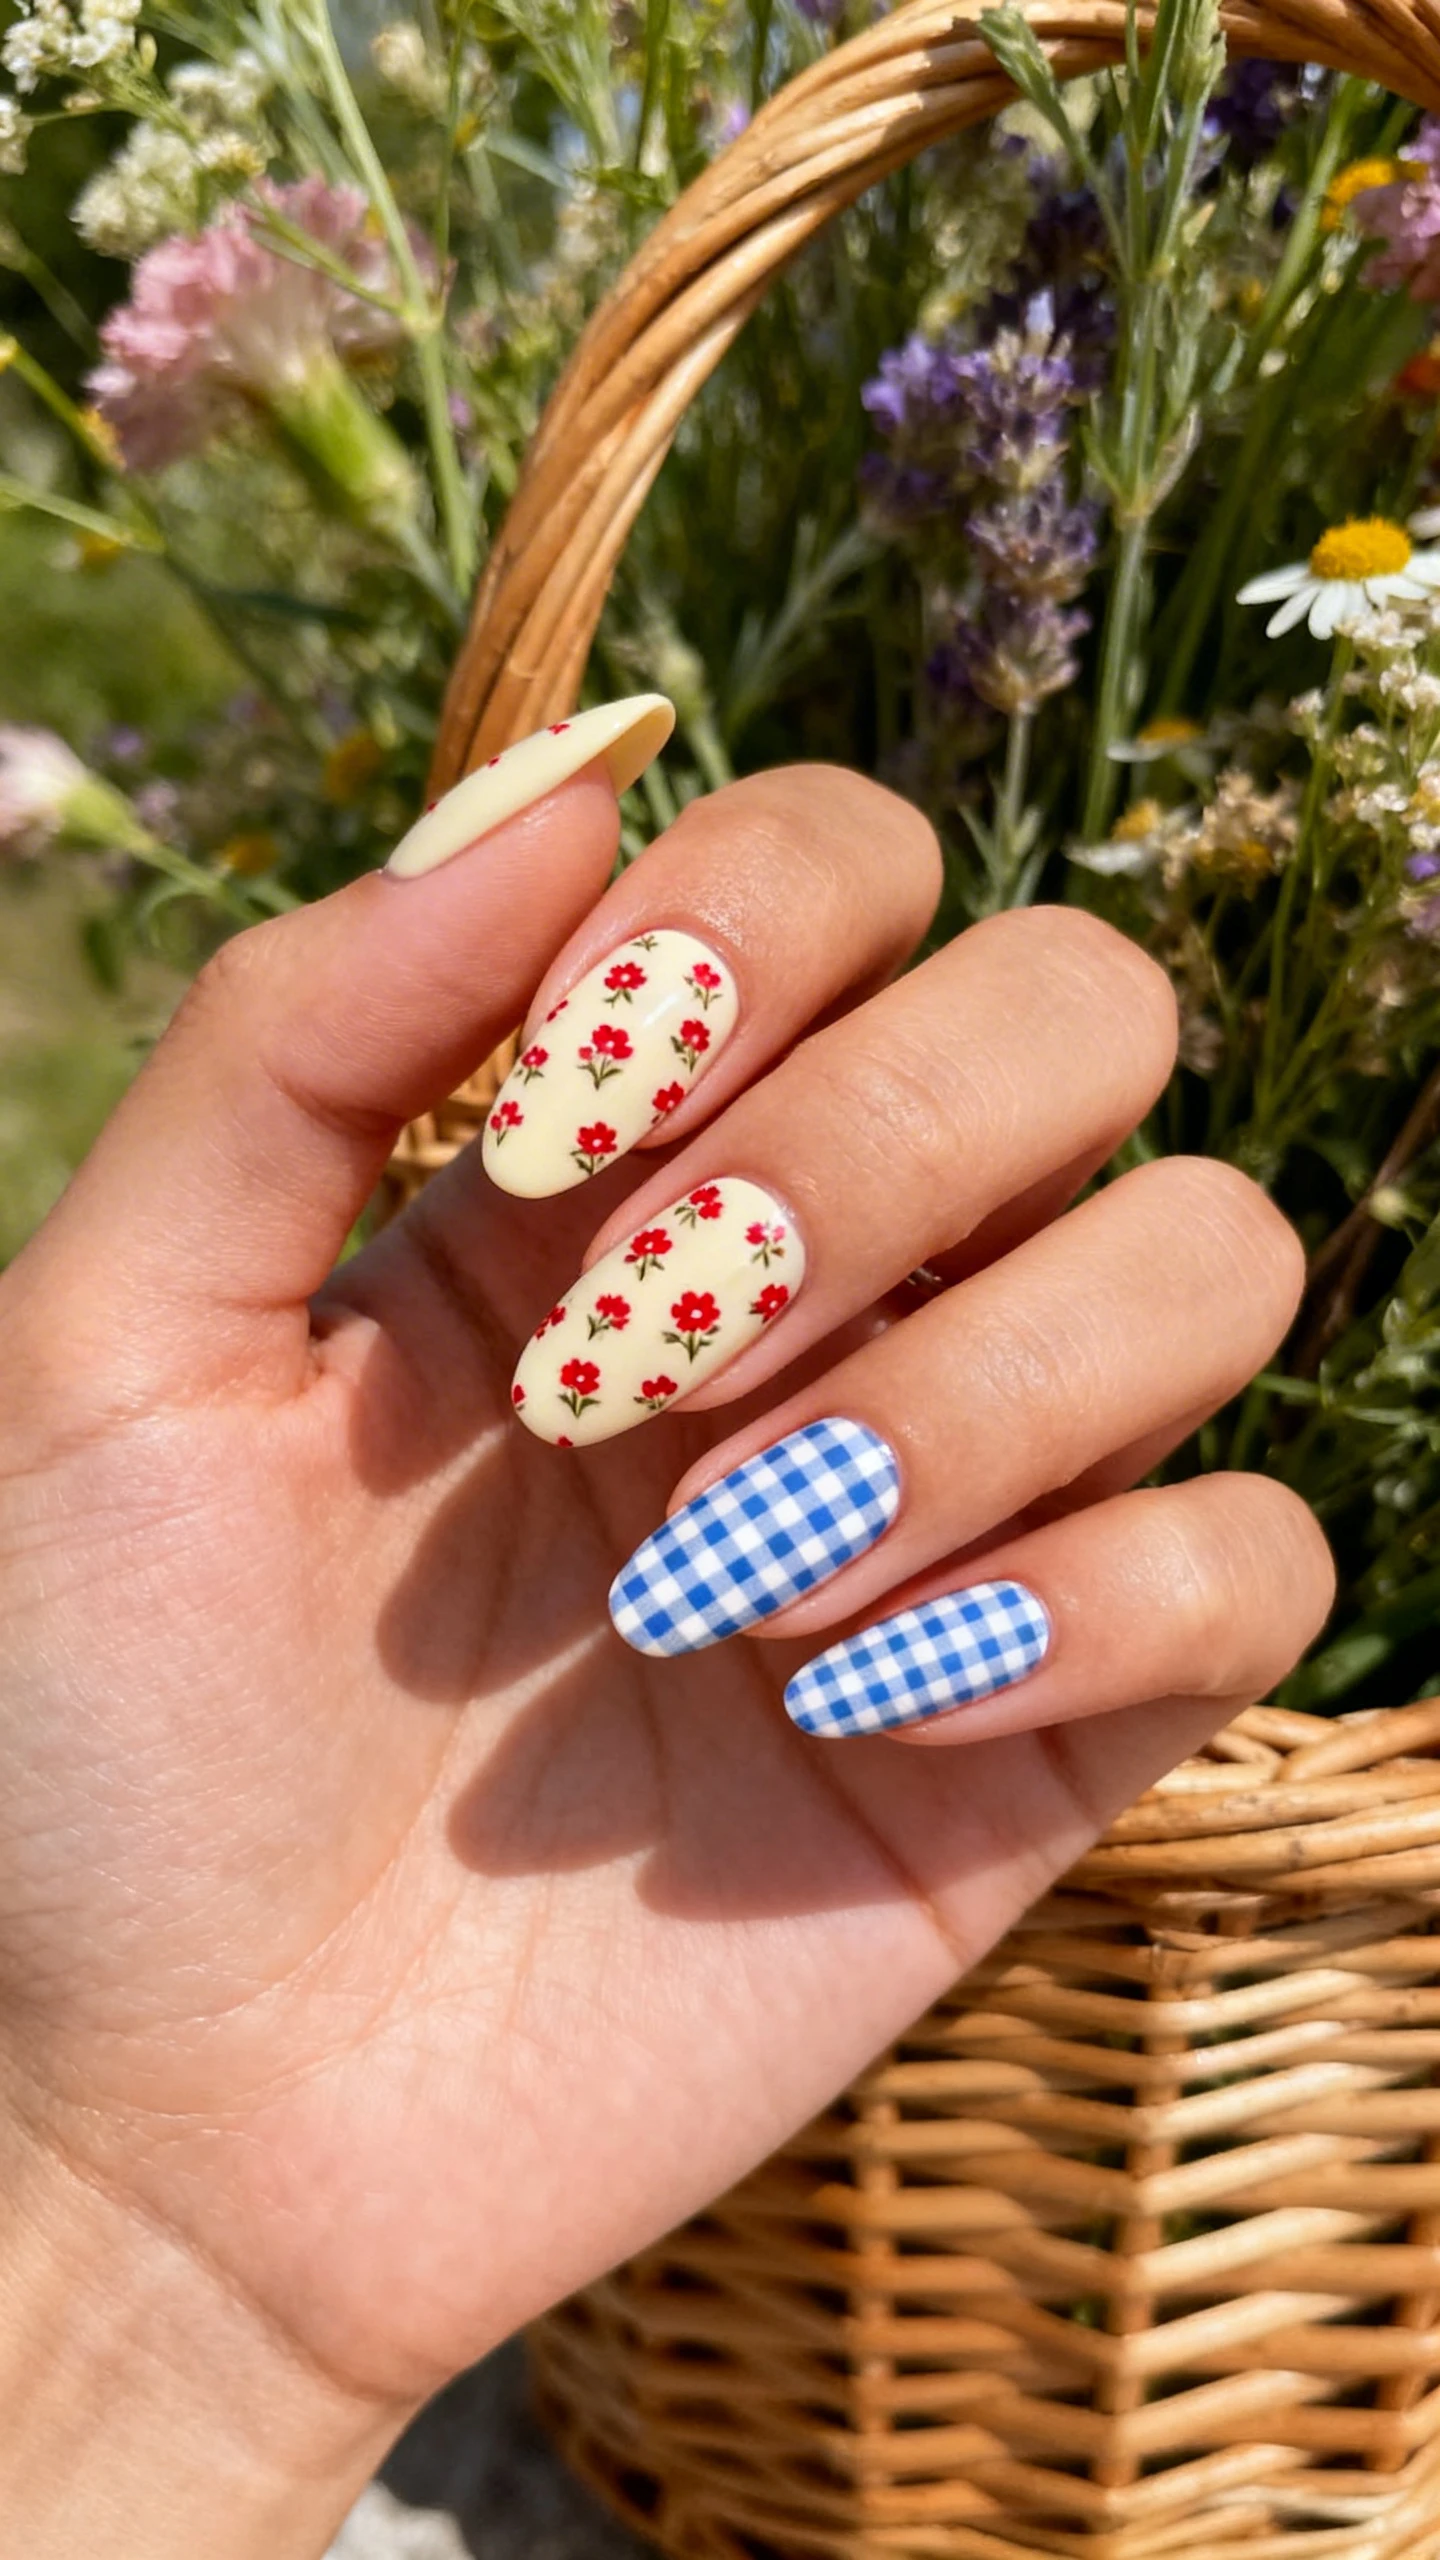
If you spend any time on social media, you know the “Cottagecore” aesthetic isn’t going anywhere. It romanticizes rural life, baking, gardening, and simple pleasures. This nail art design is the physical embodiment of that vibe. It combines two patterns: ditsy floral (those tiny, scattered flowers usually found on vintage dresses) and gingham (plaid). Mixing patterns can be scary, but when done in a cohesive color palette, it is high-fashion and so much fun.
This is a great opportunity to use different plates on different fingers to create a cohesive “set.” We aren’t doing the same design on every nail. Instead, we are alternating. This keeps the eye moving and makes the manicure look like a custom set from a high-end nail artist. It’s quirky, it’s adorable, and it is absolutely perfect for an Easter picnic.
Nail Details:
* Base Color: A soft, creamy almond or milky white.
* Pattern (Accent Nails): A fine blue and white or pink and white gingham check pattern stamped over the base.
* Pattern (Main Nails): Tiny, micro-ditsy flowers in red or yellow scattered densely across the nail.
* Finish: A glossy top coat to keep it looking fresh and clean like a new cotton dress.
How to Mix Patterns Like a Pro
The secret to mixing gingham and florals is the color scale. Keep the gingham lines thin and the colors soft. A bright, neon plaid will clash with delicate flowers. You want the gingham to look like a soft tablecloth. On your thumb, ring finger, and maybe pinky, do the gingham. On the index and middle, do the ditsy floral. Or, do the gingham on just the ring finger as a statement accent and keep the rest floral. To tie it all together, ensure the “white” space in both the gingham and the floral pattern is the same shade. This continuity is what makes the mix look intentional and stylish rather than messy.
Final Thoughts on Spring Stamping
Floral stamping is honestly the best way to level up your nail game for the season without the stress of freehand art. Whether you prefer the soft romance of cherry blossoms or the bold energy of a wildflower meadow, there is a plate out there for you. Don’t be afraid to mix and match plates, play with colors, and experiment with placement. The best part about nail art is that it grows out, so you can try something new next week! Happy Spring, and happy stamping!