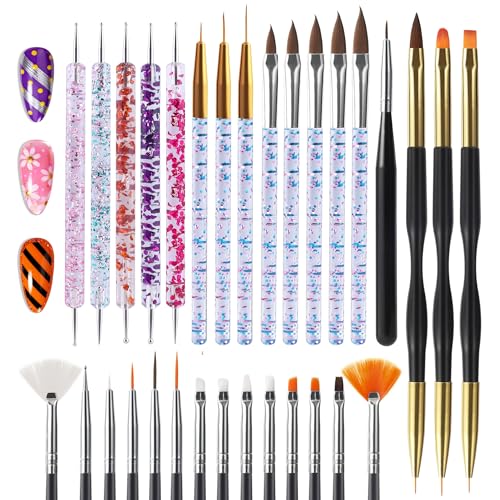
5 Essential Brushes for Detailed St Patrick’s Day Nail Ideas You’ll Love
Ready to go full-on lucky-chic? St. Patrick’s Day nail art is having a major moment—think refined shamrocks, micro rainbows, and metallic accents that feel modern, not costume-y. The secret to getting crisp lines and whimsical detail is all about using the right brushes and pairing them with clever, on-trend designs. Below, you’ll find five standout nail looks—each tied to an essential brush—so you can paint like a pro without sacrificing your sanity. Expect fresh color stories, elegant Irish nods, and smart tips to keep your manicure glossy and grin-inducing.
1. Fine-Line Clover Chains
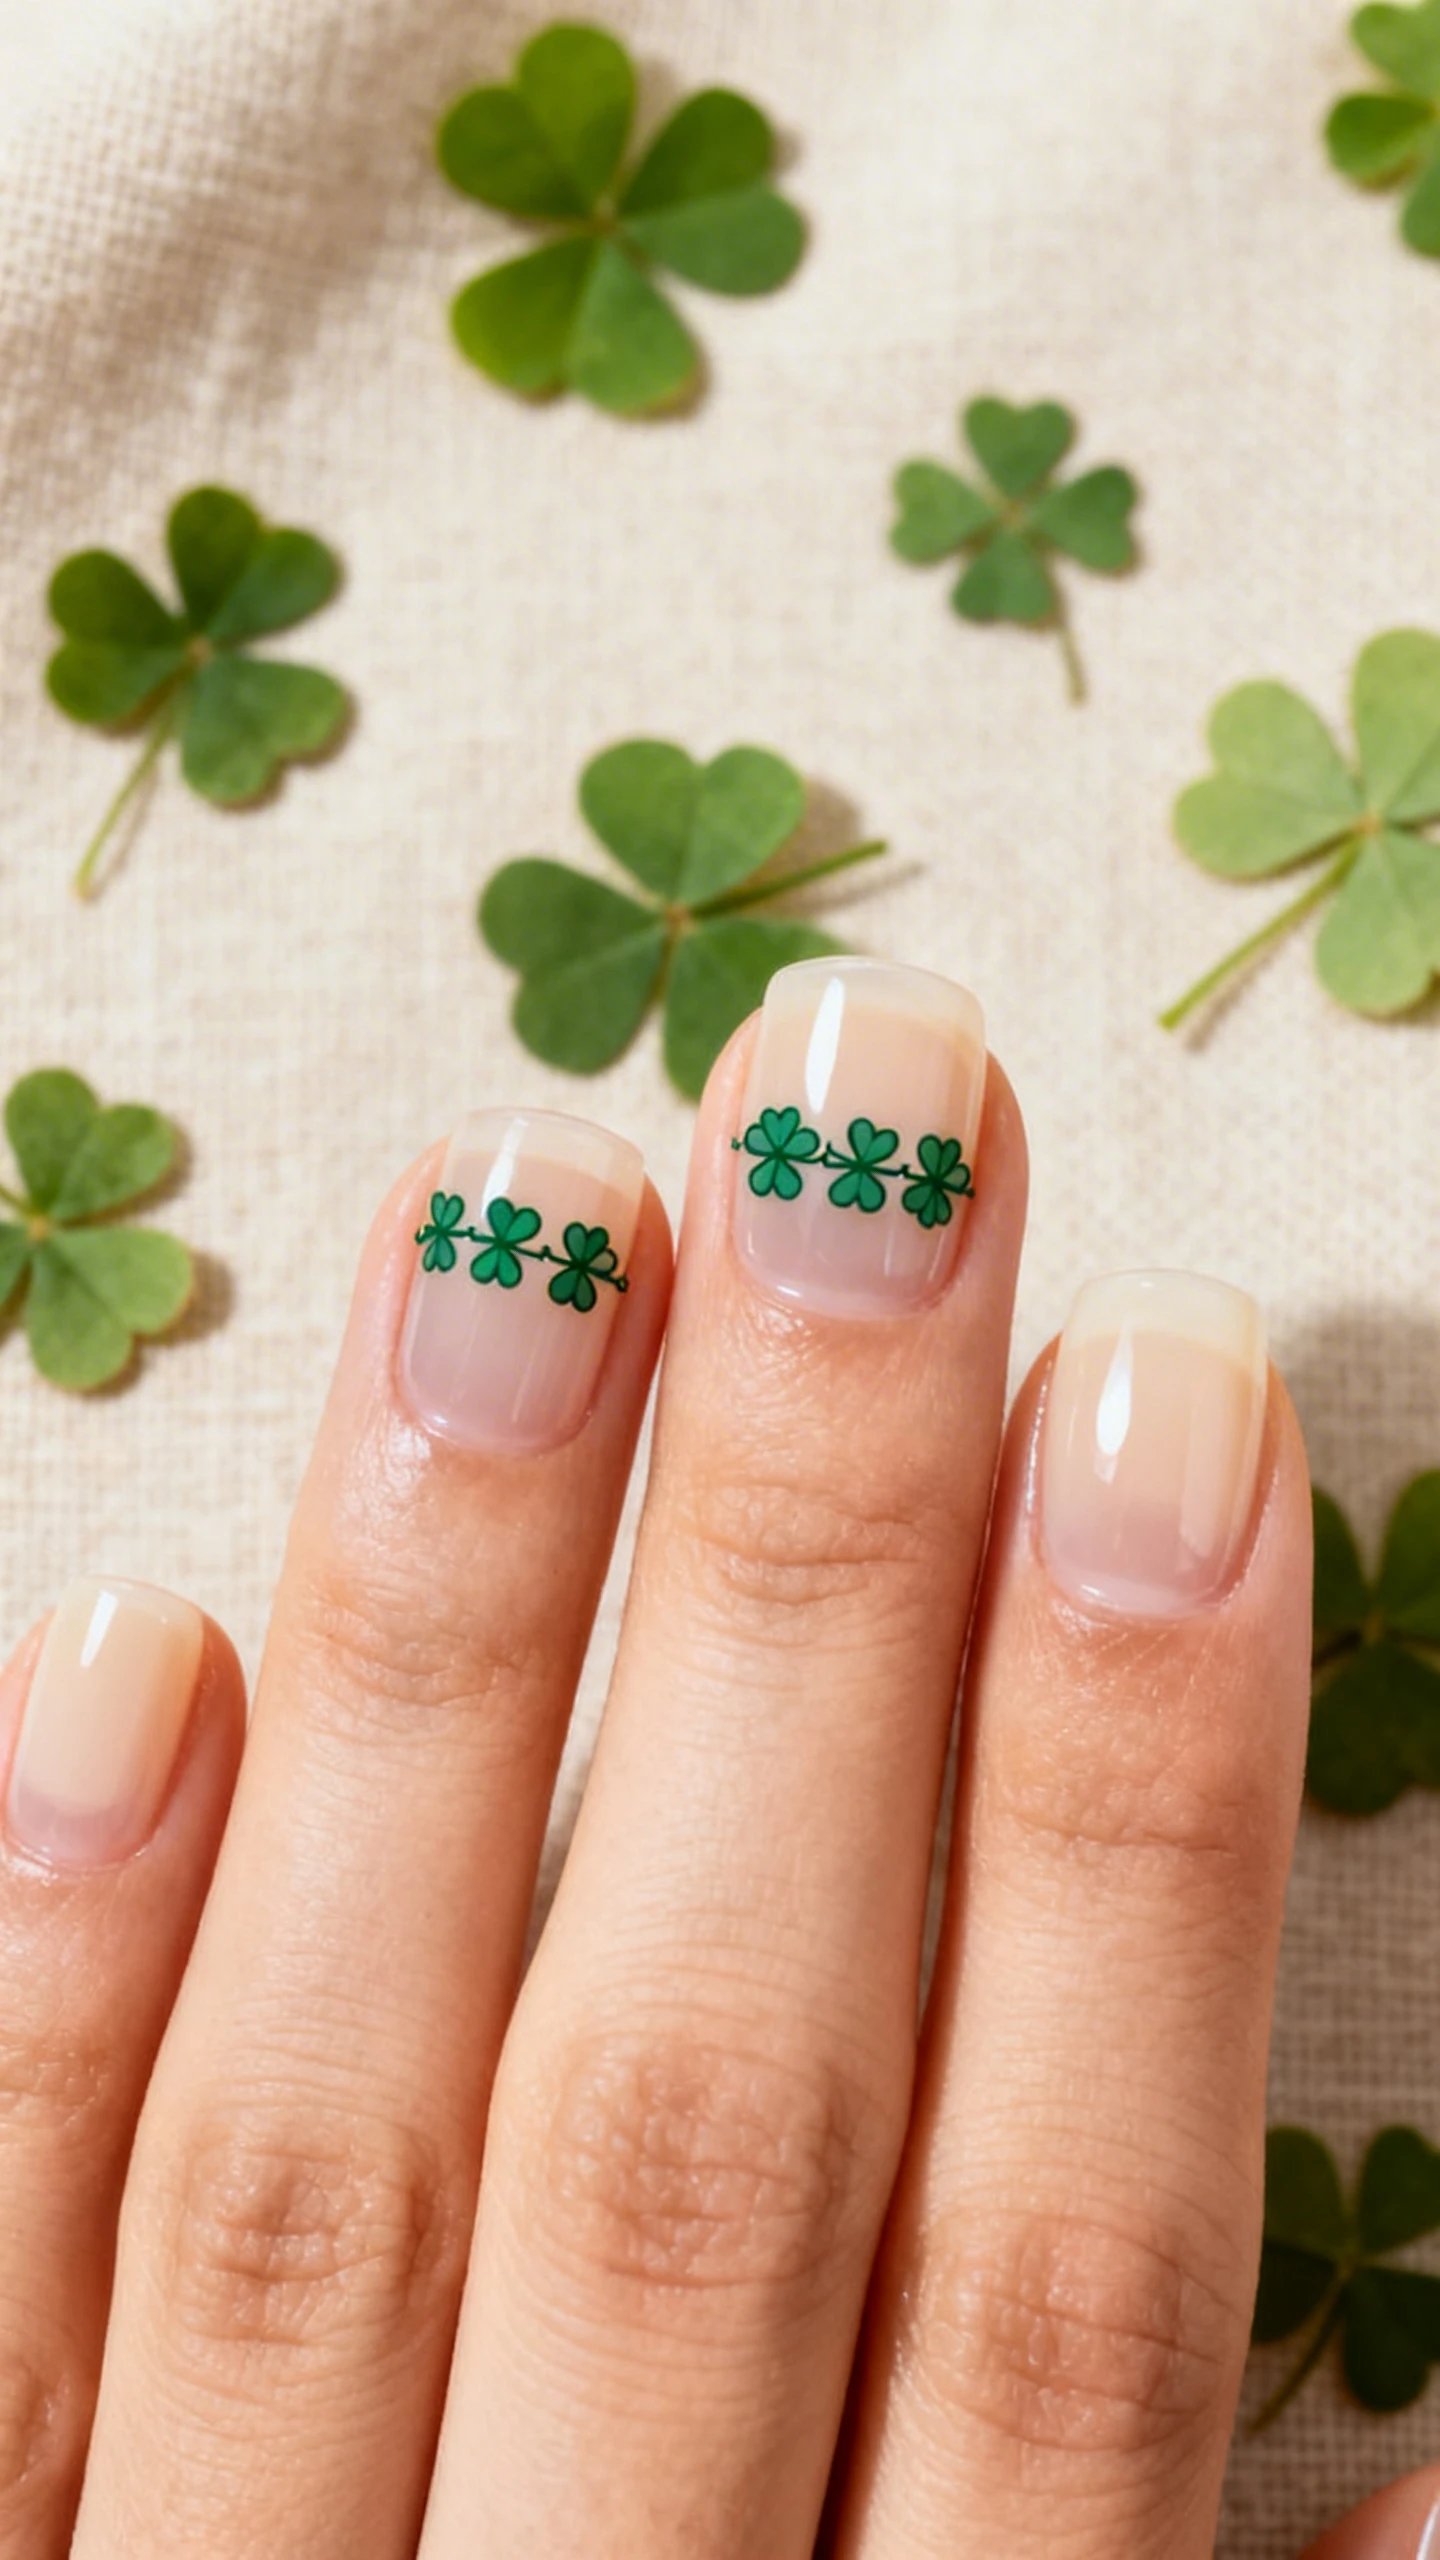
This minimal-yet-meticulous look channels delicate jewelry with a row of clovers linked like a bracelet across a few accent nails. The hero tool is a long liner brush (also called a striping brush), which gives you consistent, whisper-thin outlines and elegant stems without wobble. If you love clean, graphic art that still reads festive, this design hits that sweet spot—refined enough for the office, fun enough for the pub crawl.
Pro tip: Load the brush sparingly so your lines stay razor-fine, and steady your painting hand by resting your pinky on the table. A glossy top coat seals the chain effect and keeps those tiny leaves pristine through clinking glasses and snack breaks.
Nail Details: Short to medium oval nails with a transparent jelly base in soft cream or sheer beige. Use a deep emerald green gel for line work. On two accent nails (usually ring and middle), paint a horizontal chain of tiny, open-outline clovers: each clover has four mini heart-shaped leaves outlined in emerald, connected by a fine stem and small dotted “links.” Keep the rest of the nails simple with ultra-thin emerald French tips. Add a micro dot of gold metallic gel at the center of each clover and on the chain links for subtle sparkle. Finish with a glossy top coat.


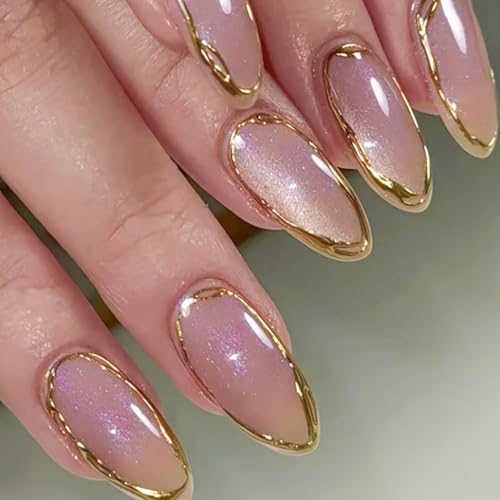
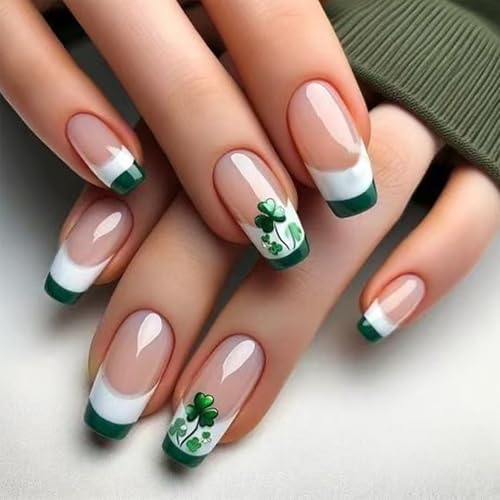
- 【3D Cat Eye Glam with Gold Line】Turn heads with our stunning 3D cat eye design, featuring an elegant gold line detail th…
- 【Medium Almond Shape for Everyday Chic】Designed in a timeless medium almond shape, these press-on nails are perfect for …
- 【Reusable & Easy to Apply】Crafted from soft, flexible gel, these nails offer a comfortable fit and can be reused multipl…
2. Micro Rainbow Arcs With Gold Cuticle Cuffs
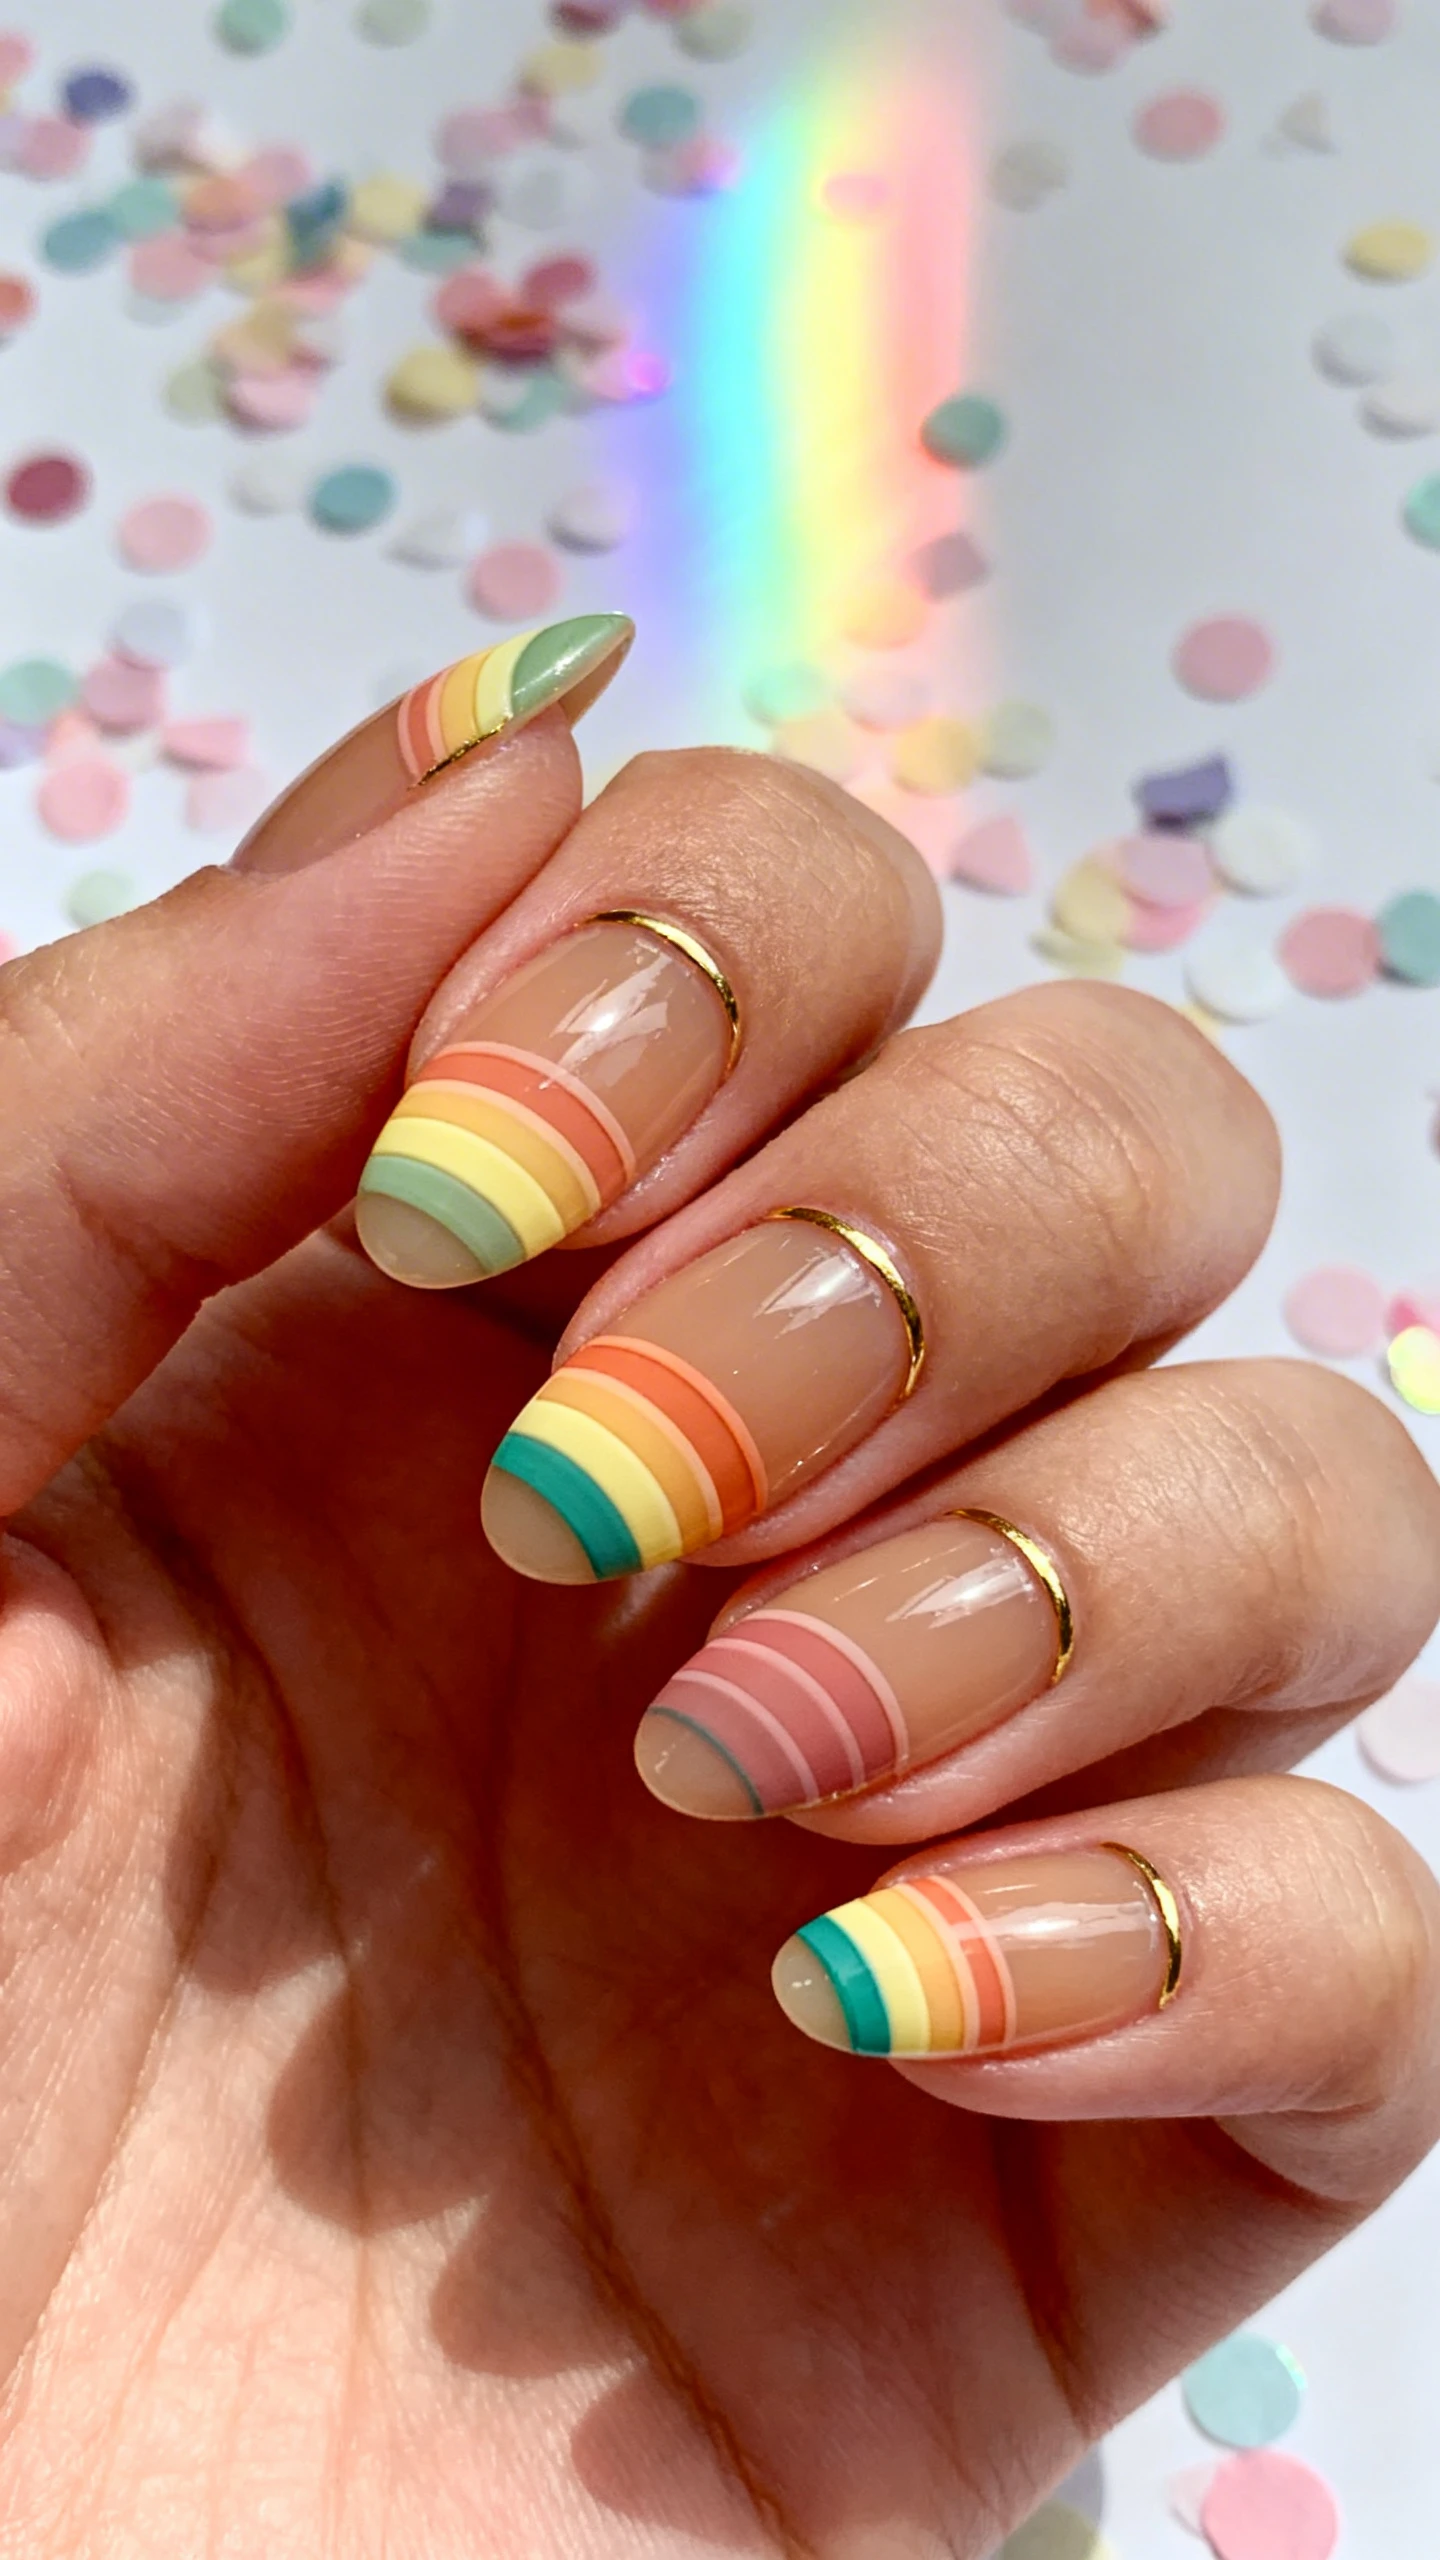
For a playful twist on classic St. Paddy’s rainbows, scale everything down with a short liner brush to create petite arcs that hug the nail’s sidewalls. The compact brush head gives you control over curve and spacing, which is key when layering slim stripes without muddling colors. Paired with chic gold cuticle cuffs, this design feels editorial—cute up close, clean from a distance.
If you aim for modern rather than literal, choose a muted rainbow palette and keep the arcs asymmetrical. The negative space ensures the look stays airy instead of crowded, and the gold touches nod to that pot at the end of the rainbow—minus the cartoon vibes.
Nail Details: Medium almond nails with a sheer tan or sand jelly base. On each nail, paint a narrow rainbow stack along one side edge using thin arcs in this order: sage green, butter yellow, soft orange, dusty rose, and teal. Keep each arc about 1–2 mm thick with even spacing. At the cuticle line, add a slim gold chrome “cuff” (a half-moon outline) using the same short liner brush. Optional: on a single accent nail, add a tiny emerald four-leaf clover silhouette at the tip’s corner for a wink of luck. Seal with a glassy top coat to make the chrome pop.
3. Celtic Knot Tips With Velvet Shamrocks
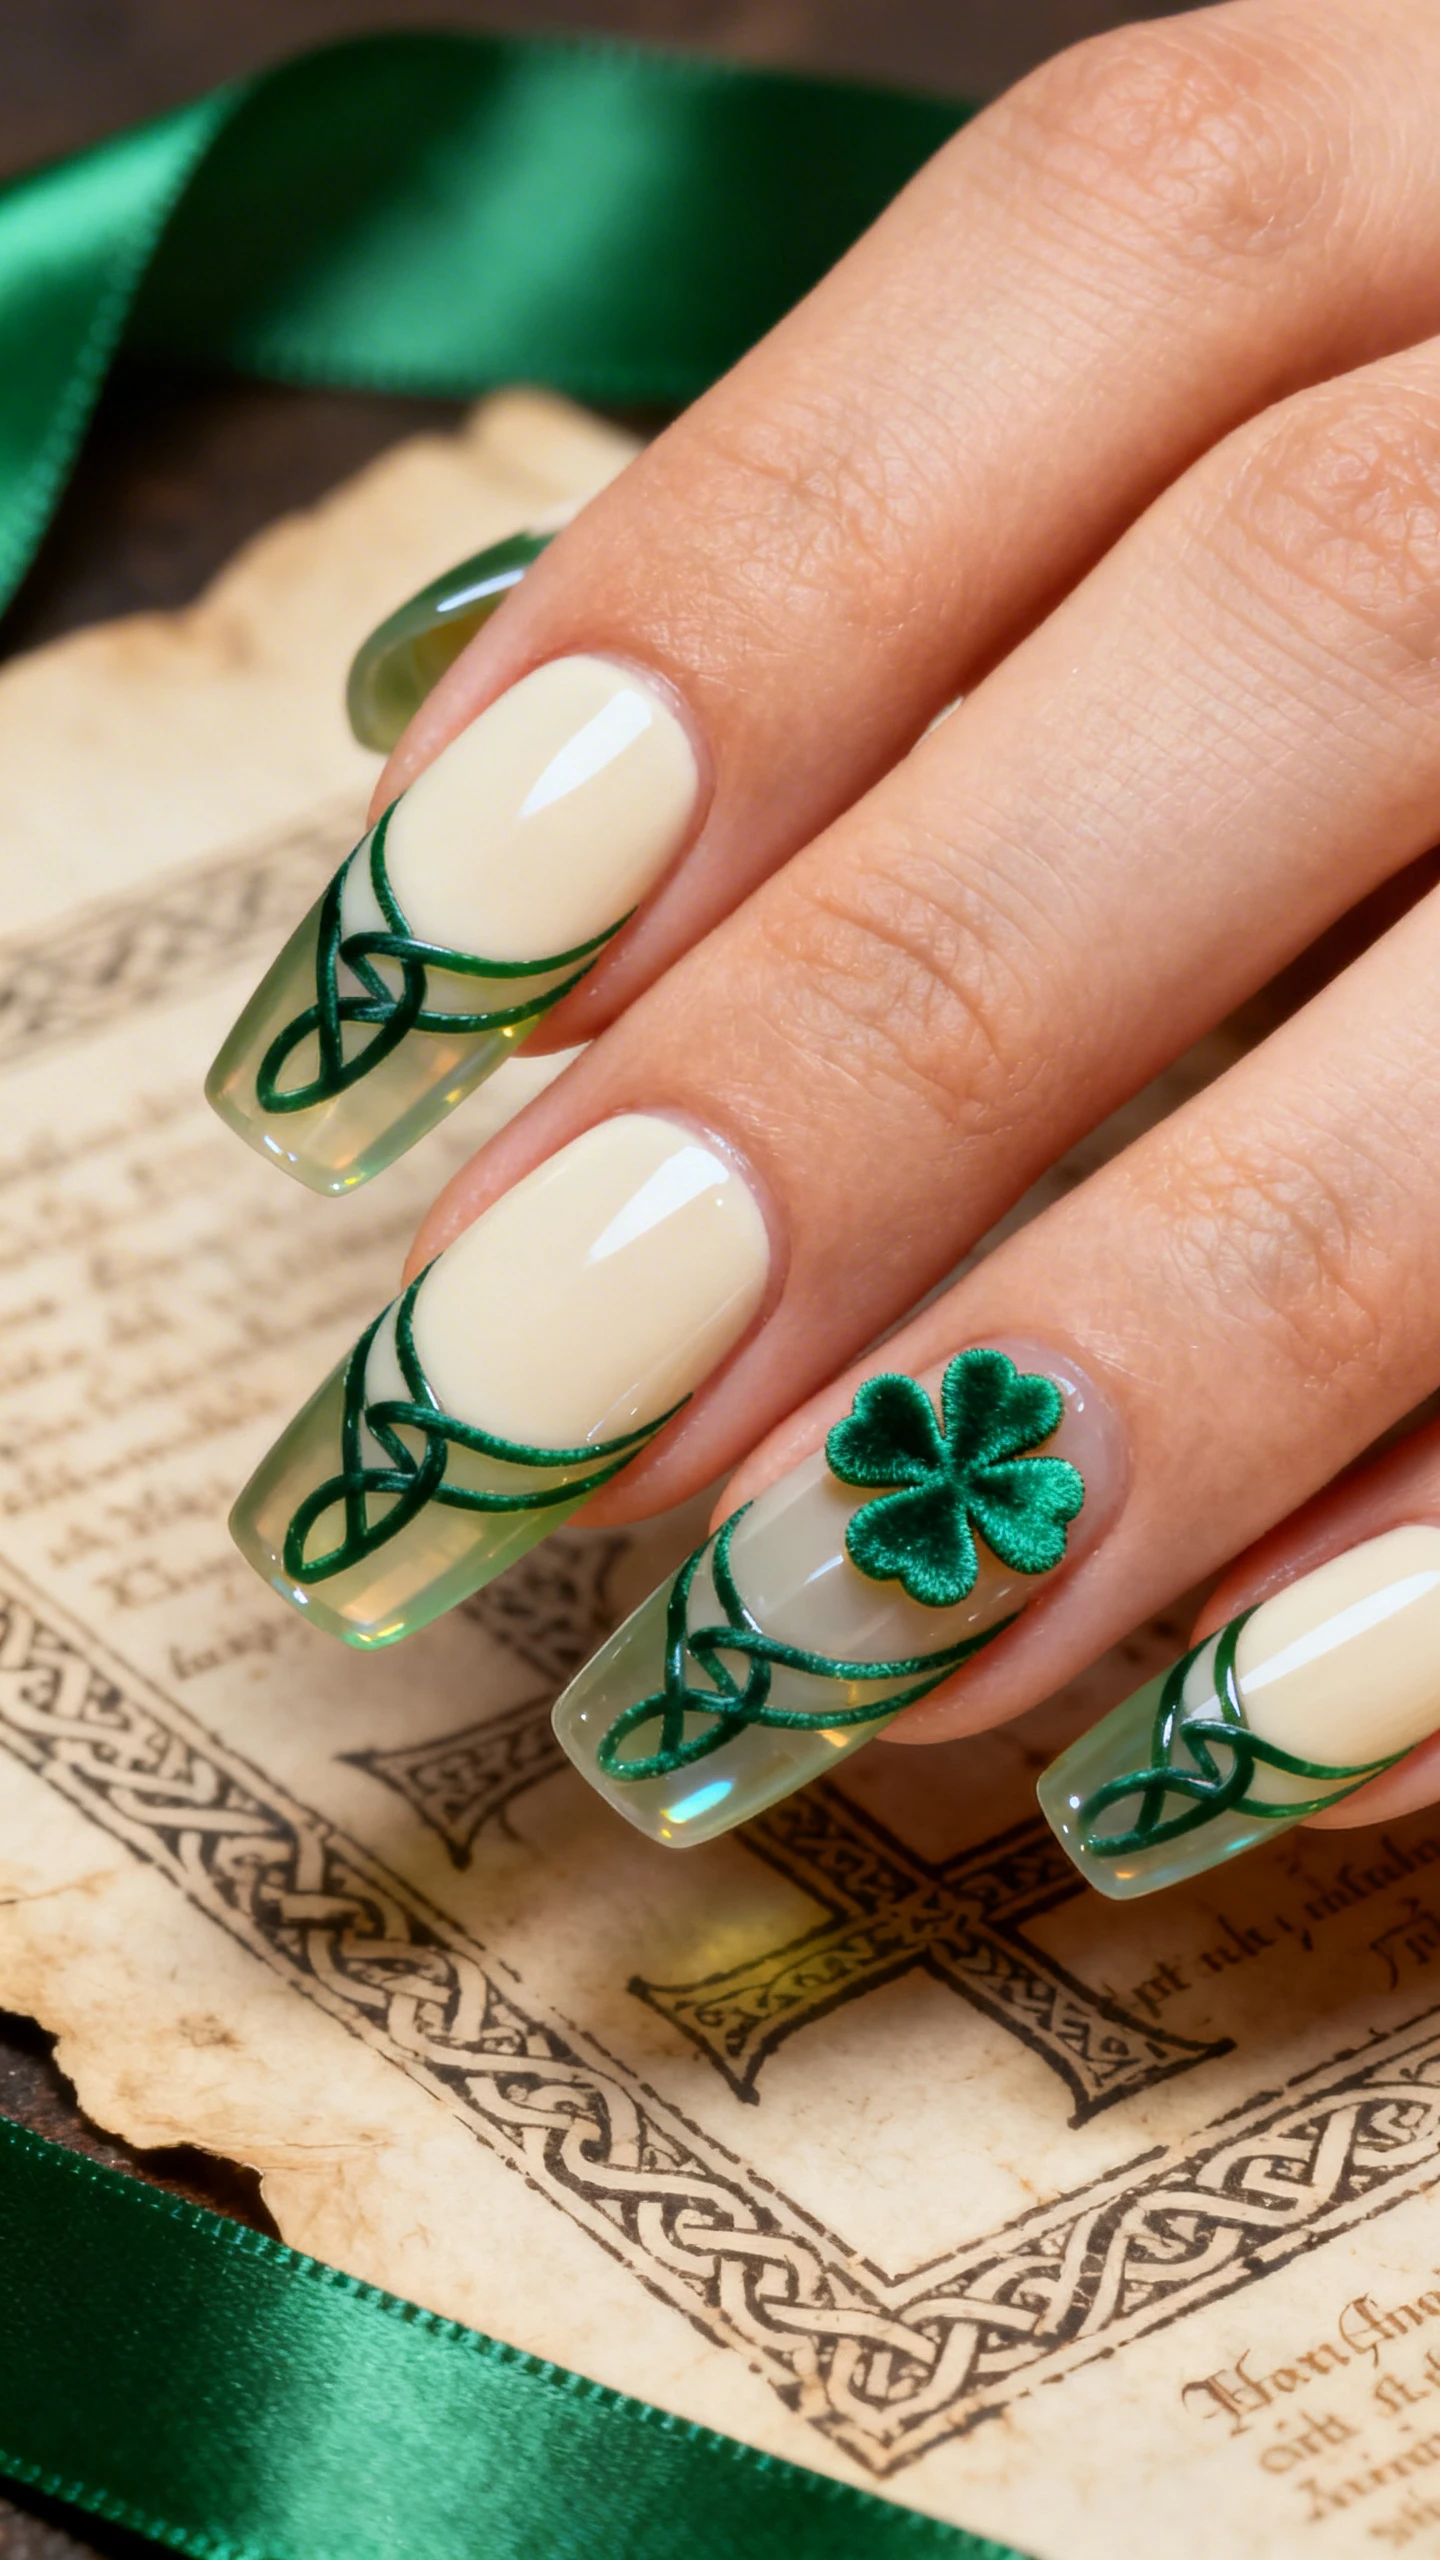
Elegant and a little mysterious, this design marries intricate Celtic knotwork at the tips with soft, tactile shamrocks using fluffy detail brushes and a round detail brush. The fluffy tip helps “bounce” texture powder into place without disturbing your base, while the round brush lets you build smooth, interlacing curves. It’s a good way to go high-drama while keeping the palette tasteful.
Think of it like lacquer lace: the knots add architectural interest, and the velvet shamrocks bring a plush, high-fashion finish. Pair with minimalist jewelry and a creamy knit for that cozy-meets-couture vibe.
Pro Technique
- Use a round detail brush for curved knot loops, then a short liner to sharpen intersections.
- For the velvet effect, sprinkle flocking powder over uncured gel shamrocks, cure, and dust off excess.
Nail Details: Medium coffin nails with a milky cream base. Create French-style tips filled with a transparent jade jelly polish. Over the jade tips, paint fine Celtic knot lines in deep forest green—interlaced loops that run along the smile line and taper toward the sidewalls. On two accent nails (index and ring), place one medium-sized shamrock slightly off-center using emerald gel, then apply green flocking powder for a velvet finish. Add two to three gold foil flecks near the knots for light-catching contrast. Top coat everything except the velvet areas (leave them matte and plush).
4. Speckled Lucky Charms With Negative Space
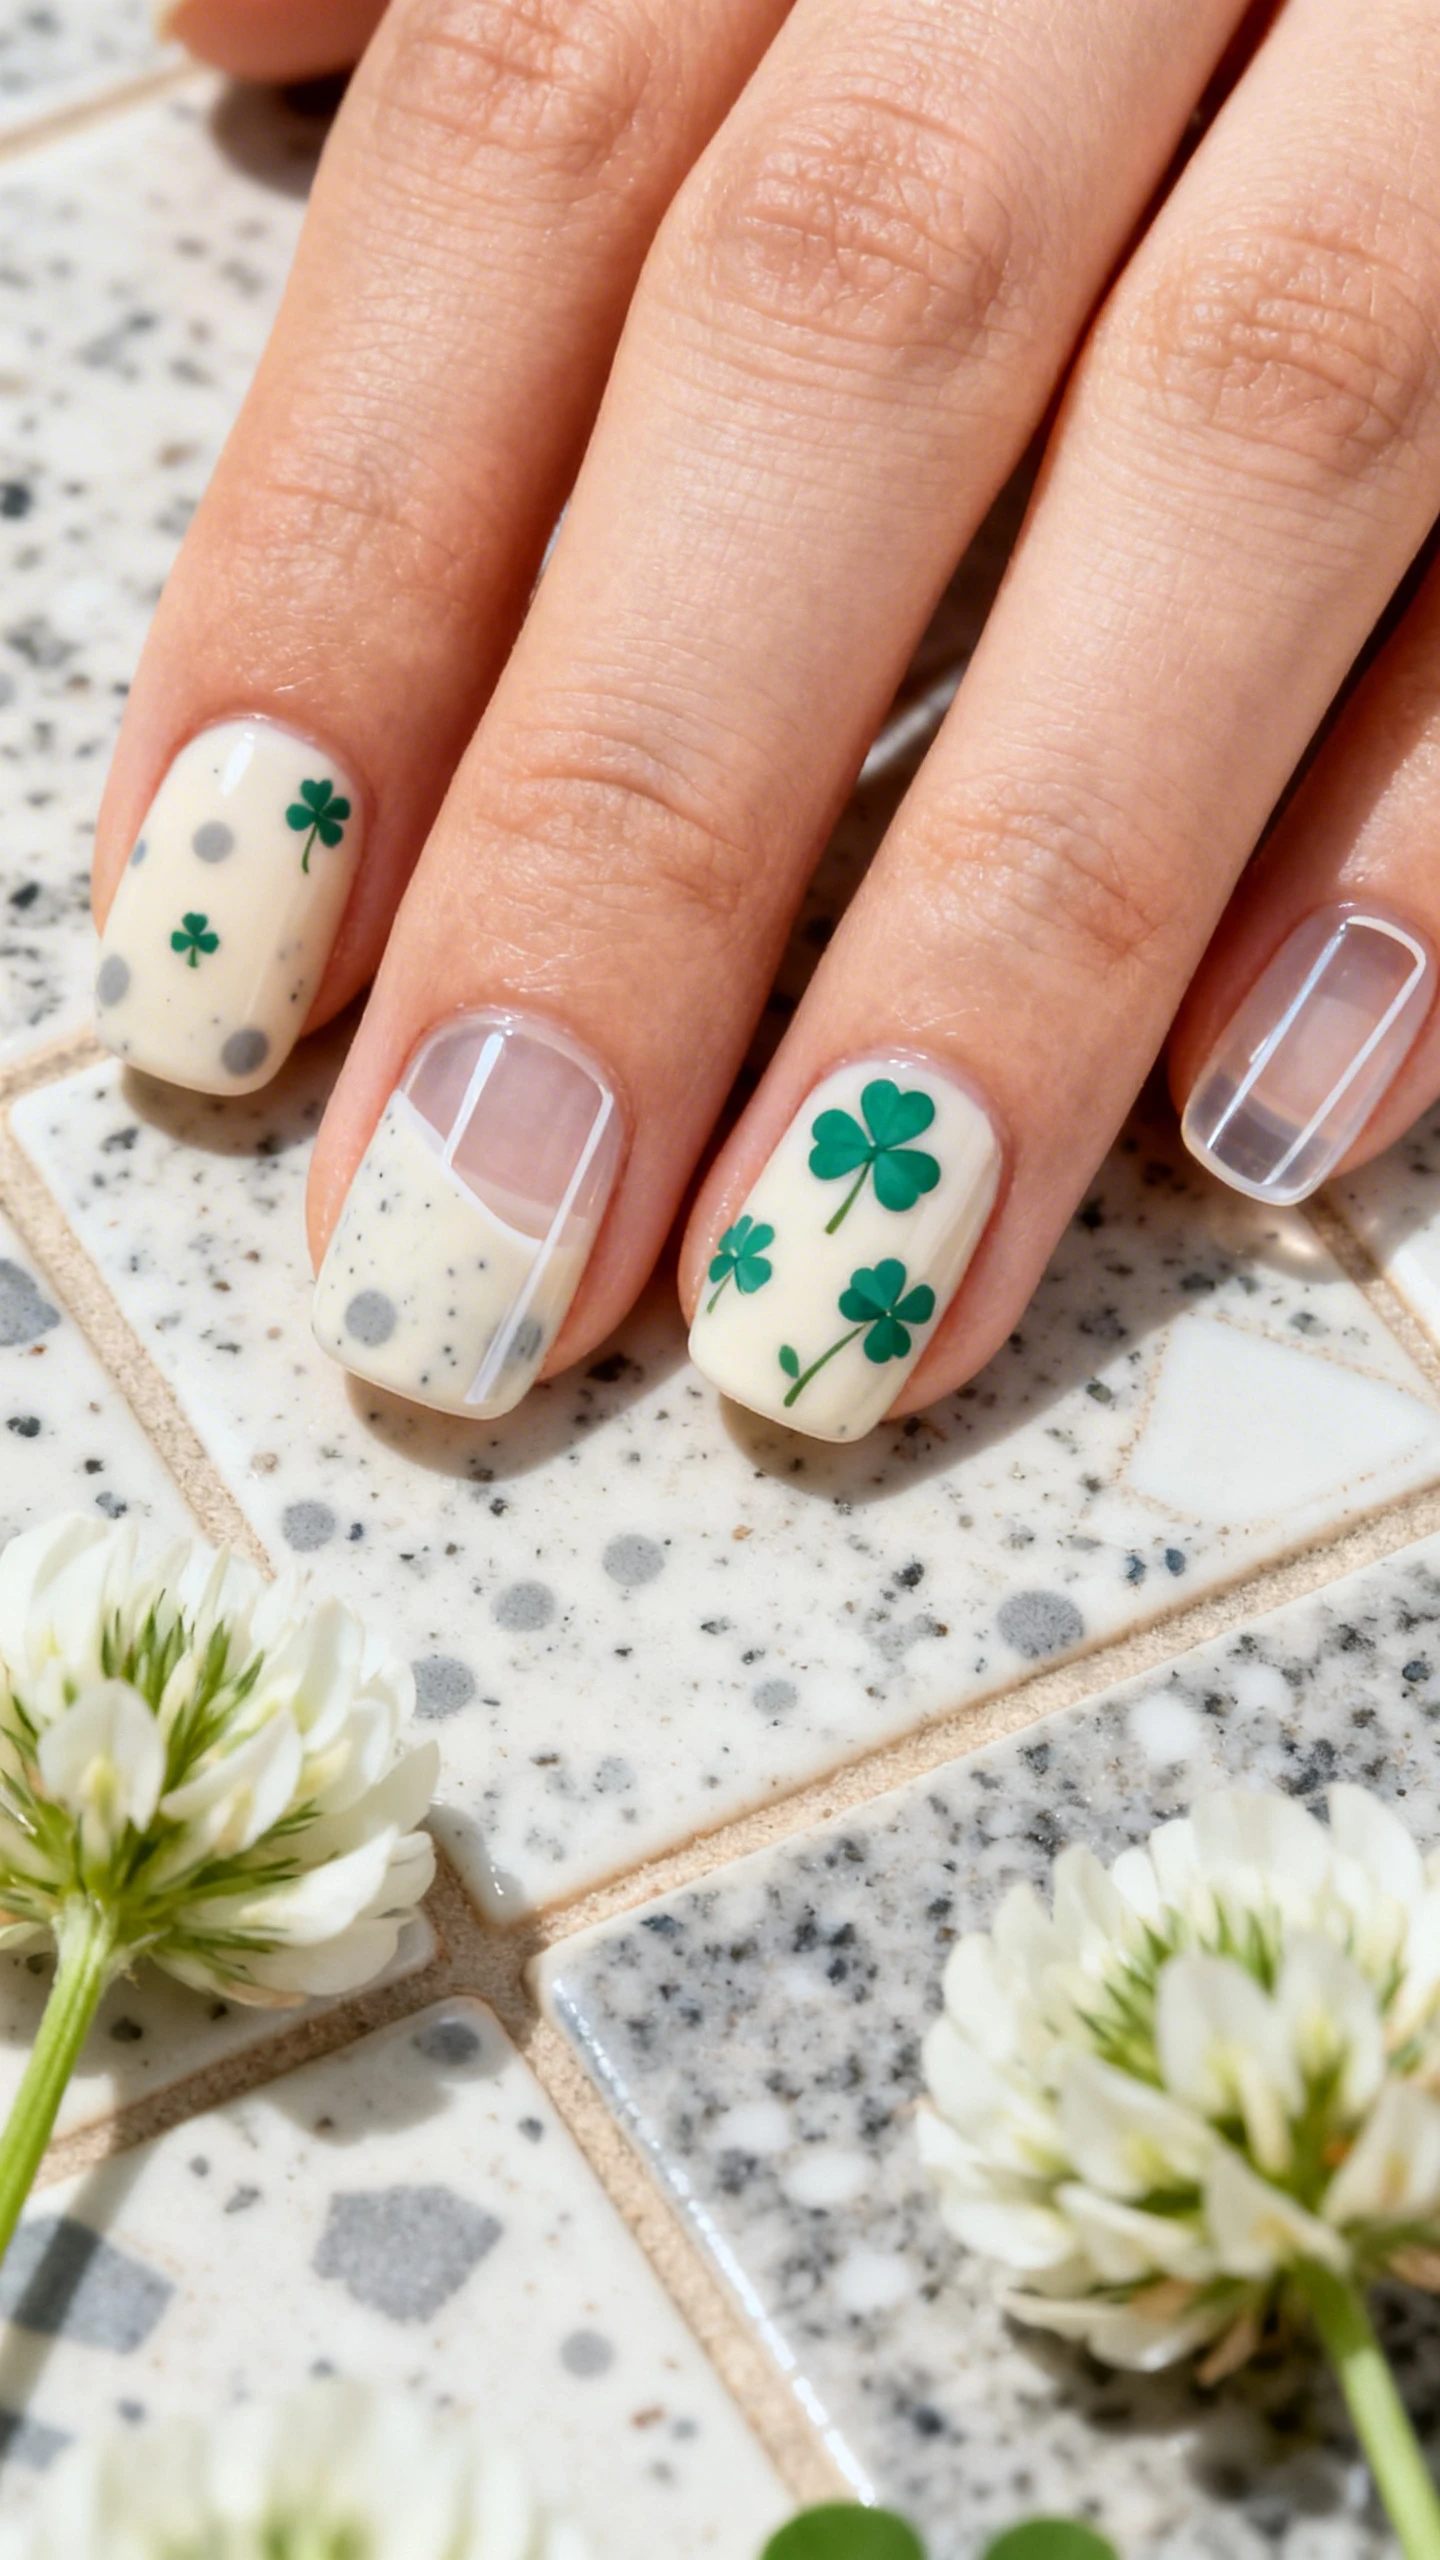
If you’re a minimalist who still craves whimsy, this speckled set pairs milky translucence with dainty icons—horseshoes, tiny clovers, and starry dots—painted using a dotting tool and a micro detail brush. The negative space keeps things airy and modern, and the speckles add that “ceramic” vibe that’s trending everywhere from homeware to nails.
Dotting tools are underrated heroes: they make uniform stars, confetti, and the mini ends of horseshoes ridiculously easy. Switch between small and extra-small tips to get curated variation that looks hand-sprinkled rather than random.
Keep It Balanced
- Limit yourself to two icon types per nail for cohesion.
- Use a milky base to soften high-contrast icons and keep the set cohesive across both hands.
Nail Details: Short squoval nails with a sheer, milky cream base and soft gray ceramic-style speckles (use thinned gray gel and a sponge for dispersed dots). Scatter mini emerald clovers on two nails per hand using the micro detail brush—each clover has four rounded leaves and a tiny stem. On two other nails, paint slim gold metallic horseshoes facing upward near the tip; add two micro white dots at each horseshoe end with the dotting tool. The remaining nails get delicate white star-dots and a few sage green micro dots to tie in the palette. Seal with a soft-gel top coat for a porcelain shine.
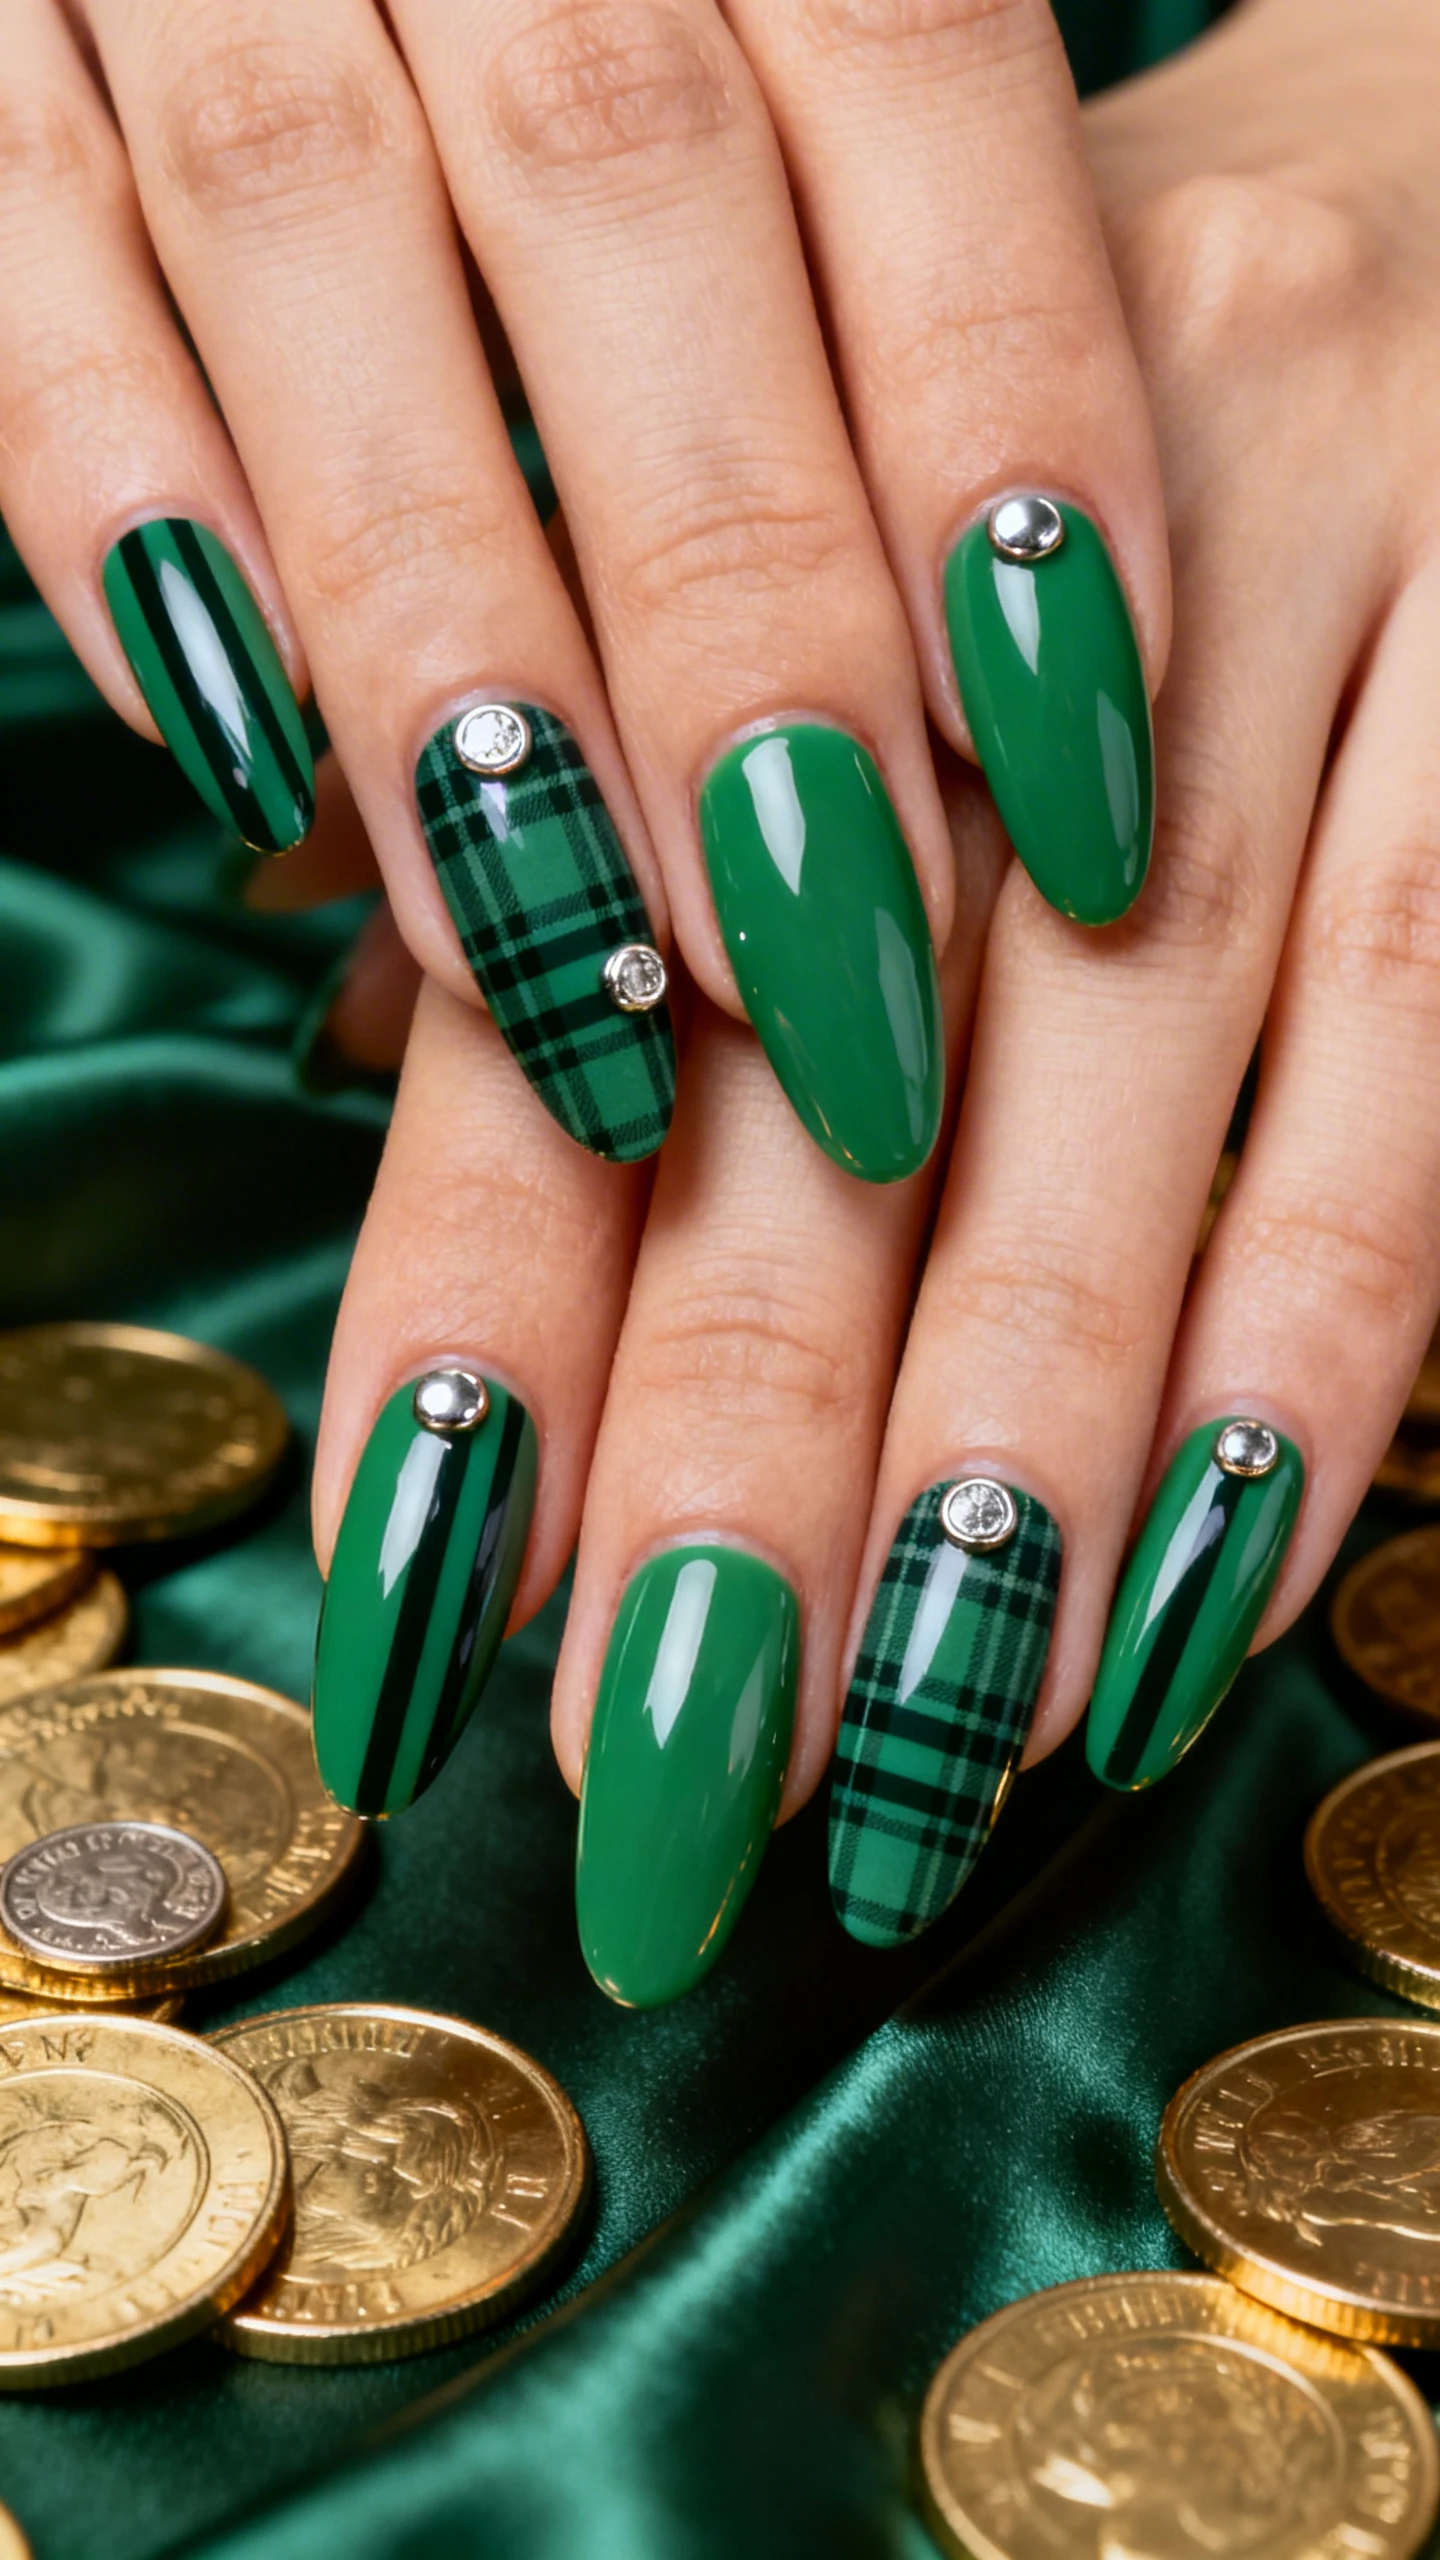
5. Emerald Plaid With Chrome Coins
For maximalists, this editorial plaid brings runway energy to St. Patrick’s Day. You’ll rely on a striping brush for the clean, linear grid and a flat shader brush to diffuse shimmer and lay down a smooth chrome “coin” accent. The contrast between structured lines and reflective circles is eye-catching in photos and IRL—totally “did you get these done at a studio?” vibes.
Choose a saturated emerald as your hero color, then layer in tonal stripes for dimension. A single chrome coin per hand keeps the look luxe rather than loaded. Finish glossy for mirror-level shine.

Pro Prep For Lines
- Wipe the striping brush on a palette to keep bristles aligned and saturated evenly.
- Work one horizontal and one vertical stripe at a time; flash-cure to lock crispness.
Nail Details: Long almond nails fully painted in opaque emerald green. Using a dark forest gel and the striping brush, paint two vertical stripes per nail—one along the left third, one along the right third—then add two horizontal stripes to form a subtle plaid grid. Layer thinner accent stripes in blackened green to deepen the pattern at intersections. On the ring finger of each hand, place a 6–7 mm circular “coin” near the cuticle: burnish gold chrome over a cured no-wipe base, then outline the circle with a micro black line for definition. Add three minuscule white highlights on the coin to mimic shine. Top with a high-gloss gel top coat for a lacquered finish.
Brush Breakdown: The 5 Essentials You’ll Use
- Long Liner (Striping) Brush: Ultra-fine, long bristles for consistent straight lines and delicate chains.
- Short Liner Brush: Shorter, tighter control for micro curves and stacked rainbow arcs.
- Round Detail Brush: Tapered tip for smooth curves, knot loops, and small silhouettes.
- Fluffy Detail Brush: Soft tip to apply textures like flocking powder without dragging.
- Dotting Tool: Perfect circles, stars, confetti, and tidy icon endpoints.
Pro Tips For Flawless Wear
- Base Is Everything: Start with a dehydrator and acid-free primer, then a thin rubber base for flex and chip resistance.
- Thin Layers Win: Multiple sheer coats dry harder than one gloopy one—less shrinkage, cleaner lines.
- Flash-Cure Smartly: Lock details as you go, especially fine lines and chrome accents.
- Top Coat Strategy: Gloss for chrome and glassy jelly effects; matte for velvet and ceramic vibes.
- Clean As You Paint: Keep a small brush dipped in cleanser to sharpen edges before curing.
Suggested Color Palette To Keep On Hand
- Greens: emerald, forest, sage, jade jelly, teal
- Neutrals: cream, beige, tan, sand
- Accents: gold metallic/chrome, butter yellow, dusty rose, soft orange, white, blackened green, gray
Whether you’re team minimalist charms or bold plaid drama, the right tools unlock pro-level detail fast. These five brush-driven designs give you a spectrum of looks—from airy and delicate to statement-making—that still feel unmistakably St. Patrick’s Day. Grab your liners, dial in your greens, and let the luck (and the gloss) be with you.